Showing posts with label Joanne Wardle. Show all posts

Wednesday, 16 July 2014

Kraft and Black Cards {with Hot Picks and Eclectica³ Lin Brown Stamps by Joanne Wardle }

Hi, it's Joanne here again, with more quick and simple one layer creations, and today's really couldn't be any quicker or simpler!


I love the look of black on Kraft. so simple but with big impact. I have gone for solid images that I feel suit this style well. Of course I had to add a little bit of script and splatter, they just find their way into everything I do! The "liitle black dress" fresco paint is absolutely perfect for this style as it is opaque, but you can still introduce subtle shading in the way that you apply the paint to the stamp.

I haven't included any step-by-steps as it's not rocket science working out how to do these.

I apply my paint with cheap make up sponges, dabbing it on.


I also protect the back of the card with post-it notes when stamping and the congratulations card was achieved by using some torn post-it note to mask the stamped words


I hope you have enjoyed this quickie project.

Joanne. 

A huge thanks to Joanne from PaperArtsy. In the busy lives we all lead, quick and simple cards are quite often a life saver. These would be so easy to achieve in emergency situations, while still having great impact due to the bold colour contrast. 

If you would like to join in our weekly challenge with any of this week's guests who have blogged since Sunday night, then join in to link up your creativity HERE you will go in the draw to win PA stamps of your choice! You need to link your entry by17:00 (London time) Sunday 20th July 2014

Saturday, 10 May 2014

Paper Flowers {with Eclectica³ Lin Brown Stamps by Joanne Wardle}

Hi, It's Joanne Wardle here again with another quick and easy project. I'm really enjoying playing with the new releases from february and this month I've made a quick card using Lin Brown's stencils and paints, and an easy technique for paper flowers.


I have used all of the colours from the fabulous set of Lin Brown limited edition paints

I started by taking a sheet of cheap copy paper and painting one side with Tikka and the other side with Chutney, and put aside to dry.


I then used ELB stencil 006 with seaweed paint, directly onto an A6 white card blank.


I then used a stamp from ELB05, for this card's one and only stamp.


And ELB stencil 001 with chartreuse in random places around the leaf


Then it came to making the flowers. To do this just tear thin strips of paper from the painted sheet. Fold down one end and then wrap the long end around this folding it with each twist, so that both sides of the paper are shown. This will create a spiral as shown, which will need the layers gluing together before gluing to card. I hope this picture helps this to make sense. If not, then look on youtube at how to make ribbon roses, it's the same technique.


 Glue these to the card.


 At this point I realised that I had made a couple of small marks on my card, so I went and added a few more dots with the stencil and paint to disguise them create a background!!

 I hope you enjoyed this project and I'll be back soon.
Joanne. 


A huge thank to Joanne from PaperArtsy. The composition here is wonderful with the text overlaying the leaves in the centre, a really nice little cluster of elements. We also like the subtle changes in paint coverage, with the top leaves being more dominant over the less solid bottom leaves, small differences that can add a whole lot of dimension. 

If you would like to join in our weekly challenge with any of this week's guests who have blogged since Sunday night, then join in to link up your creativity HERE you will go in the draw to win PA stamps of your choice! You need to link your entry by17:00 (London time) Sunday 11th May 2014

Thursday, 3 April 2014

Smile Card { Hot Picks Stamps & JoFY Paints by Joanne Wardle}

Hi, it's Joanne here again with another Quick and Simple Project. In fact it's another One Layer card. I'm using the gorgeous limited edition Jofy colours again, but this time just Amethyst and Dolly Mix.


This card is made with just 3 stamps: a splatter, a swirl and a sentiment. It could easily be recreated with other stamps and colours.


To create the line I used a post it note and then  repeatedly stamped the swirl from Noel Plate 4 This is one of the most useful Christmas plates I own, but that swirl is useful all year round.

I turned the stamp for different positions so it gets longer at one side, always overlapping the post-it note.
Noel Plate 4

I then did the same with the splatter from Hot picks extra 01


HPXT 01

I then removed the post-it note and stamped the sentiment from hot picks Xtra 03


HPXT 03

I then used an embossing tool to apply dots of Amethyst and Dolly Mixin a random way
The final step was to add lots of dots of glitter glue.
And that's it: A very quick, and quite pretty card, that could be used for any occasion with the use of the right sentiment.

I hope you enjoyed this quick make, and I'll see you back here soon. Joanne. 


Huge thanks to Joanne from PaperArtsy HQ. I think this is my favourite of your cards. I adore the dots of colour, and the straight edge gives it that professional printed look. 


If you would like to join in our weekly challenge with any of this week's guests who have blogged since Sunday night, then join in to link up your creativity HERE you will go in the draw to win PA stamps of your choice! You need to link your entry by17:00 (London time) Sunday April 6th 2014

Thursday, 6 March 2014

One Layer Card {with Eclectica³ Lin Brown Stamp & JoFY Paints by Joanne Wardle}

Hi Everyone, Joanne here. I'm back again with another quick project. I have been totally inspired by the new range of Jofy Paints. Quick, simple and one layer doesn't have to be clean and I've gone for a shabby chic style collage. 


I started with stamping some of my favourite PaperArsty stamps with the dolly mix, amethyst and dust teal paints.


These are the  stamps I used in this project, I layered them up to create my background. 


  I then used the flower from ELB02 over my background stamps. 

ELB 02


I opted to use a text stamp from HPXT03, placing it just under my focal image to ground the whole piece. 


HPXT 03

 I  then added  a few coordinating buttons to create texture and dimension. 


Finally I created the shabby chic corners by cutting a corner into the card as shown with a craft knife and then distressing it with the blade of the knife. Curl these corners forward slightly to add movement to the card. 


I hope that you've enjoyed this quick project, and I'll see you back here soon.
 Joanne.


A huge thank you to Joanne from PaperArtsy HQ. An SAS card, shabby and simple! You used Jo's new paints perfectly, layering them up and showing how well they work together even though they don't form a regular paint family. 

If you would like to join in our weekly challenge with any of this week's guests who have blogged since Sunday night, then join in to link up your creativity HERE. You will go in the draw to win PA stamps of your choice! You need to link your entry by17:00 (London time) Sunday xxx 2014

Thursday, 6 February 2014

Card {with I&D minis and Eclectica³ Lin Brown stamps by Joanne Wardle}

Hi Everyone, Joanne here,I'm back with another Clean and Simple card. This month I have made a one layer card, definitely a favourite style of mine. I'm using 3 mini stamps and one of the quotes from the brand new set of stamps by Lin Brown.

The concept for this card was to create the look of a flower growing up against a wall.


The neat trick to this card is the simple masking technique that is used. I stamped the quote from Lin Brown's new collection onto both plain white card and onto a  post-it note. 


I then stamped the flower from  Mini 69, again onto plain white card and onto a post-it note. 
I  roughly tore around the post-it images and secured them on top of the stamped images on the plain card as a 'mask'. 


I  then stamped  the brick image  from Mini 95 onto the card with brushed corduroy ink, but I didn't use the stamp with a block so that I could just apply part of the image for a softened effect. As you can see the images already stamped in black on the card are protected by the post-it note masks.

To add a softer, lighter accent, I removed the masks and then stamped the splatter image from Mini 72  over the card with pink ink. 

I finished the card by colouring the flowers with pencils. 


I hope that you enjoyed seeing this card, I had great fun making it, masks are great to experiment with.

Until the next time, Joanne. 

A huge thank you to Joanne from PaperArtsy HQ, another very effective, clean and simple design. Evocative of wild flowers finding a sheltered spot against a wall, exactly what you might find on a summer's day out in the countryside. 


If you would like to join in our weekly challenge with any of this week's guests who have blogged since Sunday night, then join in to link up your creativity HERE you will go in the draw to win PA stamps of your choice! You need to link your entry by17:00 (London time) Sunday Feb 9th 2014

Thursday, 9 January 2014

Valentine Card {with Eclectica & Hot Picks stamps by Joanne Wardle}

Hi everyone, Joanne here. I really enjoyed my Guest designer spot, so I was thrilled to be asked to do a regular monthly spot - what I like to think of as my clean and simple corner.

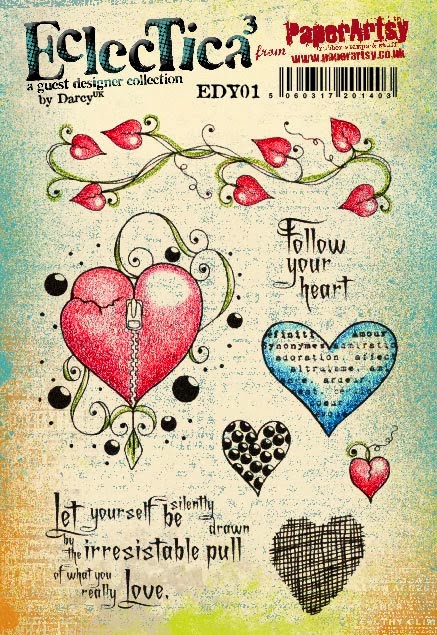
Valentine's day is approaching so I decided to concentrate on a romantic card, using Darcy's lovely stamps. 

I started by stamping the small heart from the Darcy set, EDY01 twice onto white card using Little Black Dress. 


http://shop.paperartsy.co.uk/eclectica-darcy-01-4326-p.asp

I apply the ink by putting a small amount onto my glass mat and then applying it with cut'n'dry foam. You may notice one thing appears to be missing.. no ink. I have found that stamping with fresco paints creates such a lovely effect that I don't use inks anywhere near as much as I used to. Cleaning up is a breeze too: just a wipe with a microfibre cloth does the trick.
Once the black was dry, I applied London bus paint.


I inked up the mini 96 flourish (this is definitely going to be a new favourite) with Hey Pesto paint


 and the sentiment from HPXT03  with Little Black Dress fresco acrylic paint.


I stamped them as shown, then added the splatter from HPXT01 (an old favourite)


I then cut out the hearts and moulded them with an embossing tool and embossing mat (actually mine is an old stamping mat). Any soft mat will do, if you don't have one, just do it in the palm of your hand. If you don't have an embossing tool, you can use something like the end of a paintbrush.


Attach to the card with a small triangle of 3D foam.


That's it all done, here is a close up of the 3D hearts.


Thank you for looking and I hope you enjoyed this project. I will no doubt be back again in the future, Joanne. 

A huge thank you to Joanne from PaperArtsy HQ. We love your clean and simple style and it is a pleasure to have you back with us. The layering of the stamped images with paint instead of ink works perfectly and adds subtle dimension. We love the embossed hearts, they really pop. 

If you would like to join in our weekly challenge with any of this week's guests who have blogged since Sunday night, then join in to link up your creativity HERE. You will go in the draw to win PA stamps of your choice! You need to link your entry by 17:00 (London time) Sunday January 12th 2014.