Showing posts with label HP2402. Show all posts

Wednesday, 19 March 2025

Art on a roll with TS Products {by Mags Woodcock}


Hi everyone

Mags here with you today.

This year on the blog, we are being given free reign to do a deep dive into one of the PaperArtsy product ranges, and for this post I have been exploring Tracy Scott products. 
 I decided to create art on a roll, or as some may call it, a scroll. I had great fun using different papers and paints as well as some Mattints.


I loved having a huge surface to create on,( the roll is about four foot long) it made it easy to add multiple layers. It was the first time I had used the blank PaperArtsy tissue for gel printing and it turned out fantastically.


As spring is on its way here in the UK I wanted a bright and airy feel to my project. Fresco Finish chalk acrylic Cerulean (FF200) is one of my favourite colours, so combined with Sunshine (FF223) it gave the feel I wanted. I love floral and botanical stamps, so Tracy Scott sets 024 (TS024) and  058 (TS058) combined with one of her stencils, (PS234) were ideal.


 To begin the project I needed to create lots of patterned and coloured papers, not only for the scroll, but to add as layers. I decided to use my gel plate for this. As you can see, the first layer was the Fresco Finish Cerulean which I brayered onto the plate and then added the stencil. A sheet of heavy copy paper pulled the print with the stencil still in place.


The next step was to brayer on a layer of Fresco Finish Chalk Acrylic, Sunshine, still with the stencil in place.


I used a panel of blank PaperArtsy Tissue (PT10,available from a PaperArtsy Stockist) to pull the print whilst the paint was still wet.
I continued to play with the stencil and paint on the gel plate, using both tissue and copy paper. I soon had a nice collection of papers including some 'roll off' papers - these are created organically when surplus paint is brayered onto copy paper. Between prints I also picked up leftover paint from the plate onto these papers. These would all create the basis for my scroll.


I wanted a rough, uneven edge to the scroll, so I tore the papers to the right size, using a ruler as a guide made it easy.


I laid the papers out and arranged them so the colours flowed along the scroll. When I was happy with the placement I glued them together with a slight overlap.

I was happy with my scroll and couldn't wait to start adding the layers of printed tissue and stamping out the floral elements to add to the project.


The first layers I planned to add to the scroll were the printed tissue. It was easy to tear the tissue, using a wet brush to mark out the tear line and then gently pulling the sheet apart. Fresco Finish Matte Glaze (FF52) worked great as an adhesive for the tissue.


You can see here some of the tissue with white gel pen highlights added; I used the stencil along with the gel pen to add white pen details along the scroll.


I wanted to add more layers and  details to the project before moving on to the floral elements. The grouped circles stamp  was idea for this, stamping in black made a nice contrast to the lighter colours on the project. 
Here's a handy tip when adding details like this, if you are unsure about placement of stamped details, stamp onto a piece of blank tissue and position over the project, this gives you a preview before committing to stamping.


I wanted to use more of the gel prints I had created, and also echo the stamped circles. I used a roll of packing tape as a template for my circles, running a pencil around the inside of the roll and then cutting out the circles. When positioned on the scroll, these seemed to be too large . I found a jar lid which was smaller and drew around that, the perfect size ! The added bonus was the open circle that resulted, serendipity indeed. 


It was time to move on to the floral elements to the project. I liked the idea of creating another texture contrast to the stamped images, so used vintage book pages. Stamping in black, but also blue to tie in with the colours of the project.


To continue with the theme of text combined with floral images I stamped onto more book pages which had Cerulean paint brayered onto them. Combining two stamps from the Tracy Scott 024 (TS024) stamp set. Adding white gel pen to outline some of the black elements also added nice contrast.


I was happy with all the layers on the scroll but the pale book pages were just not looking right to me. They weren't cohesive with the rest of the project. So Glow (MT01) and Dragonfly (MT07) Mattint to the rescue. 

I coloured the flowers with Glow and mixed Dragonfly and Glow to make a green for the leaves, which coordinated with the rest of the project. Using the Mattints, which are transparent, also allowed the text to show through.


I had arranged all the florals, circles etc on the scroll and glued them down with a UHU glue stick, but there was something missing still. I do tend to add words, quotes or numbers to most of my projects, and that was what was missing here. I love the Hot Picks word stamps (HP2402) from last years release, they were perfect for this project.


Now that my scroll was complete I needed a way to keep it contained and under control. Remember that large roll of packing tape, well the centre came in very useful for creating a collar for my scroll, or as I now call it "art on a roll " I covered the cardboard roll with roll off papers and then gel printed tissue.

My project was almost complete, just a few finishing touches and it was done.


You will see here that adding the white gel pen really brought everything together.


I will be honest here, I had stamped the word ART directly onto the project, but it wasn't straight . The easy solution was to stamp onto white card and then glue on, problem solved !


Mixing elements from both stamp sets gave a nice contrast


You can see here that I added some Sunshine Fresco Finish chalk acrylic to the centre of the smaller flowers and white gel pen to the wording.


The white gel pen at work again, bringing out the details.


The Glow Mattint coordinated so well with the Sunshine and Cerulean Fresco finish chalk acrylics. You can see it here on the flowers.


Stamping the words in black added some much needed contrast.


The end of the scroll, showing some interesting textures in the background.

I hope you have enjoyed learning how I created my art on a roll. Of course you can adapt this to be a small concertina book , canvas or journal page, the variations are endless.


Thank you for stopping by, take care and happy crafting
Mags

Facebook: Mags Woodcock
Instagram: Mags Woodcock
YouTube: Mags Woodcock


Tuesday, 23 January 2024

NEW PaperArtsy Products: PaperArtsy Hot Picks {January 2024}


 A note from Leandra:

Hi everyone,

Well this month has been somewhat busy behind the scenes at PaperArtsy HQ, 
We are super excited to be heading to Frankfurt for the Creativeworld Tradeshow. It will be our first time face to face with independent retailers since pre-covid, so we are so looking forward to catching up with some of our stockists, and I know they are coming from as far away as Australia! 

In the meantime, since Christmas we've been shipping out the stock for this week's releases to stockists, getting samples made, and prepping the tradeshow booth ... boy will we be ready for a break in February, it's been all hands on deck for weeks!!

This Hot Picks release was born from a request for some word stamps from one of our bloggers, Mags, and so she sent through some suggestions. We have sixed these to be useful for tags or pages, and on one of the sets there is some ephemera elements that we love for those background layers. The stencils I have loved exploring. You can't have too many numbers. I love the triple word layers, and the abstract design is a go anywhere/ everywhere!  

I will be sharing LIVE these products and over in our Facebook Group, 'PaperArtsy People' shortly after this post publishes, and ... don't forget...
 
These stamps are available EXCLUSIVELY from our approved stockists. Please check the list at the foot of this post to find a retailer online or geographically near you, it makes sense to order within your country where possible. Our retailers also endeavour to join the designer's live to share their direct shopping links - this makes it super easy for you to find a store with product in stock immediately.


Red Rubber Stamps (A5 set)
Price: RRP €23.00 +VAT
Size:5" x 6" (13 x16.5cm)
All stamps are individually trimmed onto cling foam, with a laminated storage/index sheet.

Stamp Code HP2401 (HP2401)

'Rust is a Must' and 'Tortured Texture' are fabulous words for the rusty makes that emerge from Vintage style creativity, especially if you are using PaperArtsy 'Rusting Powder'!. This set has gorgeous words but ohhh those little lines and the no 48 tiniest of stamps are adorable! And who doesn't love a row of birds! These are going to end up in my favourites always-close-to-hand pile for sure!

Light Your Fire
(16" x 8" journal spread)

Not so long ago I did a spread with my page divided into 9's in a limited pallet of blue and orange and absolutely loved it, so I decided to have another go, different colourway with a bit more colour variation. Sometimes it is good to do things more than once, a great learning exercise. This time I used Niagara Falls, Bermuda, Turquoise, Heavy Cream, Buff with Rust and Kiwi Gold, 2 of Seth's newest yummy frescos).


First up the fun is squirting out very small puddles and adding different mixtures of each colours randomly to the squares, it is a fast way to understand the colour blends at hand and play with the layers and composition. I love how the stabilo all black pencil gets activated as you work to make a blurry border.
 

Before you know it you have added stencils, stamps and smattering of gold-stamped textures - I really love that mini of Seth's in the foreground, it is like old damask wallpaper.
 
  
I layered up the stamping to get a bit of structure to the page, allowing some of the images to pop against the background as 'focals'. A smattering of Gold paint was perfect inside the 'light' word.


Each square has it's own personality, and the Rusty paint really added some warmth to the layers, even though I used it very sparingly.

Using the stamps was so easy as there are heaps to choose from, whether you want large or small, all the details add up to lots of fun.
 

I kept this 'flat' so you can appreciate the stamps, but it would be easy to add more layers on top of this, for a more typical scrapbook style layout.

Stamp Code HP2402 (HP2402)

This stamp set is packed with fun elements that are perfect for all kinds of projects. I just love adding script to my project layers, and I love the old dates and references within these snippets of ephemera. Typography was a recent topic on the PaperArtsy blog, but it is a long standing focus for us here at PaperArtsy and we adore words in a range of different font types, and vintage pictures like these acrobatic men.

Stand Tall

This Fresco painted background went through quite a number of layers, but I kept adding more layers, and it ended up in quite a soft retro palette, despite starting out as quite bold shades of rust and blue.  


I love that Seth mini stamped in Heavy Cream, it always reminds me of vintage damask wallpapers. In this up close picture you can see how gorgeous the script is and those bold words are so gorgeous. 

 
Specks of walnut splotches (from the new Just Walnut) was added and swiped across. You can dab at it to remove if you wish, but it reinforces that vintage vibe.


I really love how the walnut liquid wicked in from the edges too defining the frame with ease in random places.
 

You can see that early on in my background there was some pink! It's just peeking through, that is one of the beauties of creating with opaque paints, you can layer and layer until you love your layers, and its a great way to test out a range of colours. or practise making new ones!

Stamp Code HP2403 (HP2403)

Dream Journey
(16" x 8" journal spread)

This is how the background started (left side) of the 8x8" journal with the big number stencil adding some weight. My instinct was to knock it back a bit lighter because my plan was to add some tissue paper stamped with the adverts and coloured with Mattints .... yes you might spot 2 new Mattint colours in here .. they are coming your way next month!
 

You might also spot some of Seth's new minis in here too - find new products - must play, right? We should play spot ALL the new products!


You can see how much paler the background became, and I did play around with a Matte glaze and Cloud 9 mixture on the reverse of the tissue papers to allow the script to be more visible. Otherwise, as Mattints are 100% translucent you would see all the background layers and I wasn't sure that was going to be a good idea.


The tiny little script stamps from HP2401 was added - Mattints are a Matte Glaze (tinted) they can be over-stamped so easily, as the toothy matte surface accepts ink beautifully. My technique was to apply a coat to both the front and back of the tissue on a craft sheet, letting each dry. Then I added a very soft wash of Cloud 9/Matte Glaze to the reverse, let that dry. Then finally I used Matte Glaze to adhere each piece into position.
 
 
You might spot a snippet of the map from HP2403 in the background here stamped in Cloud 9 (white). As well as a wash of watery white paint in the background, I also stamped in white to soften out the base layers of the spread. 

Versafine Claire was used to stamp in black, it is the easiest ink to use covering your red rubber with a few gentle taps, beautifully black, and has a long open time if you wish to use embossing powders.  If you don't, a gentle zap with a heat tool helps the oil in the ink dry off.
 

The Eiffel tower image is from the first edition of our Hot Picks Printed Tissue (PT01), and is the same image from MN45 . This focal was also glued in with clear Matte Glaze. 


Birds on the Wire
(9.5" x 11")

This was one of those super quick makes that just fell into place in a blink. I have since added a border with machine stitching. Paint loosened with lots of water was sploshed onto watercolor card. I used the paint to stamp in the background too with some of Seth's newest minis. For the focal, the birds are from the new HP2403 stamp set, and they sit inside a France Papillon frame/stamp.


The quote is France's too. I decided gold was the splatter colour of choice, and used the leftover to add some sparkle to the frame and stamped the vintage script in it too ...ohhh it just is lovely doing that! Nothing like a bit of gold script, and how amazing does the fresco paint perform, even when watered down!


PaperArtsy Stencils {Regular}
Price: RRP €5.64 + VAT
Regular Size: 6.5" x 7" (16 x 18cm) 
Robust 250 micron mylar designed to offer longevity, deep texture and easy clean up

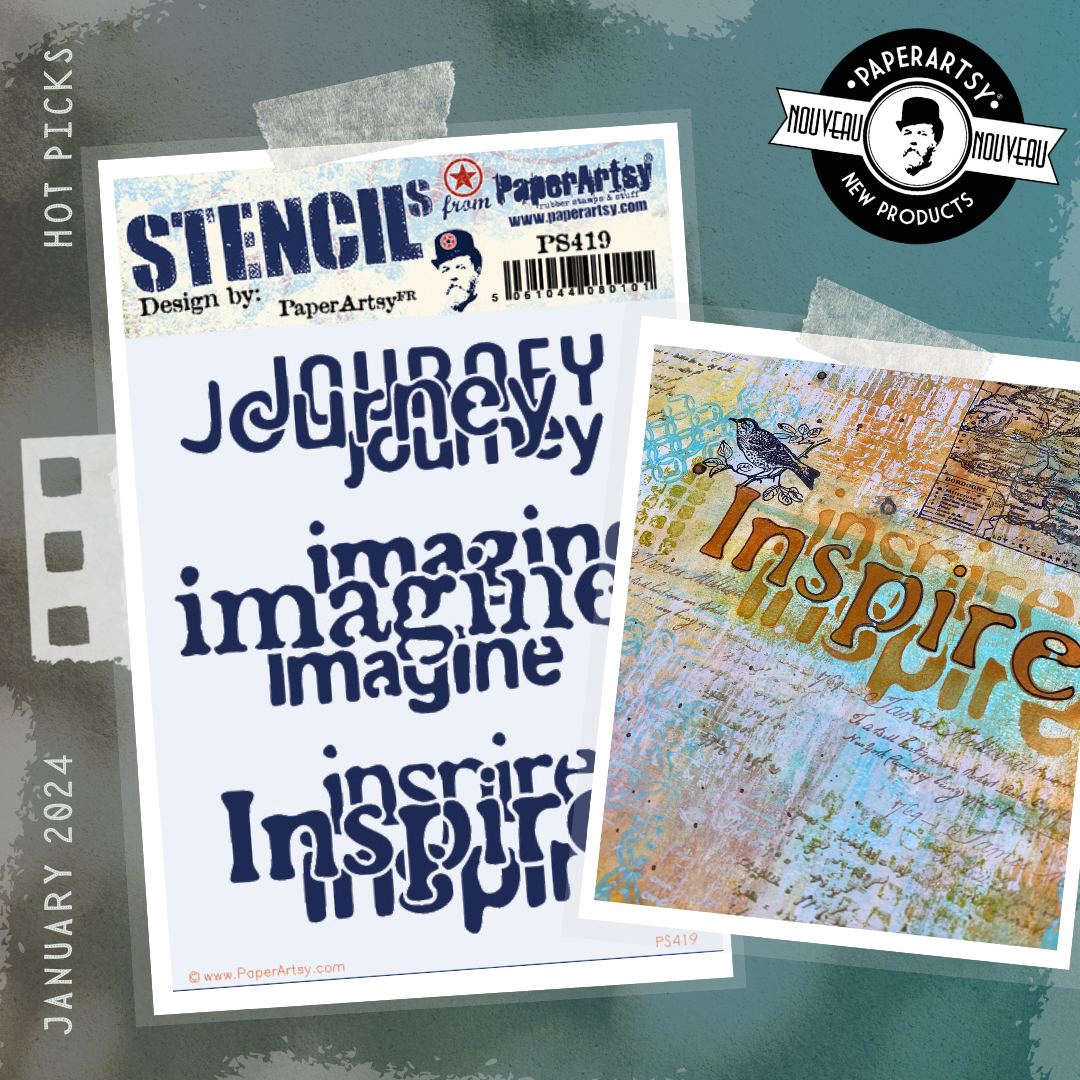
Stencil PS419 (PS419)

IMAGINE THAT
(12" x 12" on Smoothy Card) 

These layers started with colours brayered, Olive, Rusty, Bermuda and Heavy Cream followed by a range of Seth Apter mini stamps, I love those abstracted textures.
 

Next, with Seth's new Rusty paint, I sponged paint through the stencil onto the card, applying extra coat through the centre word to make it stand out a bit more. Once dry the stencil became a template to trace the letters of each word.
 
 
Stamps were added from HP2402 (bird, 'James' stamp), and the directional stamps are from HP2403. The numbers down the front left from HP2401 are stamped in Gold paint, hence why they are catching the light. Just Walnut is splattered across the page and added to the map stamp and directional arrows.
 

HAMMERED METAL

This was the first idea I was keen to try with this stencil. Grunge Paste was tinted with 'Little Black Dress' fresco paint, applied through the stencil, and then while wet (and before removing the stencil) gently tap the word in the centre with your finger to create texture. Then, once the past was dry, 'Classic' Treasure Gold was rubbed over the surface to catch the texture.

Stencil PS420 (PS420)

ABSTRACTED NUMBERS

You already had a peek at this background earlier in the post, and if I wasn't going to layer over the top with other stamped imagery, I probably would have stencil-bumped this in a colour lighter than the 'Blue Lagoon' fresco.
 

The numbers stencil was also used on the facing page.

 GOT YOUR NUMBER
  
Sometimes it is helpful to see the phases, above I really love how the numbers in Heavy Cream paint looks over these other patches of paint.
 

You can see with the addition of more stamped textures they start to look more distressed and worn. And once the black lines of each square are returned, then the numbers look like they have melted into the background as a whole.


Stencil PS421 (PS421)

DOT DASH DOT

You can have enough abstract stencils! And this one is super easy to add within layers. Make a background like this and chop it up, you have instant book pages, tags or card fronts. Abstract stencils allow those pieces to be suitable for anything!
 

What a great start to the year, these stamps not only represent 20 years of PaperArtsy designs, but how timeless our inherent Vintage style continues to be.

I hope you will take 5 minutes to find these at a retailer in your corner of the world, they have been ordering the past couple of weeks and we have been, and still are shipping out daily to all corners of the world.

I will be over in PaperArtsy People shortly to share these and a few more samples with you

Leandra

 PaperArtsy Stockist List

Our stockists are your go-to  source for all PaperArtsy products, and we suggest that you also use the PaperArtsy People Facebook group to source a retailer in your country. Many are members of our FB group and will happily share links to their online stores.

Australia
Bev's Cross Crafts, Spreyton, Tasmania https://www.bevscrosscrafts.com.au/
Crafters Cupboard, Berwick, Victoria www.crafterscupboard.com.au
Memories on the Murray, Murray Bridge, SA  https://www.memoriesonthemurray.net/
Natalie May Scrapbooking, Dover Gardens, SA https://nataliemay.com.au/
Scrapbook Superstore & More, South Penrith, NSW https://www.scrapbooksuperstore.com.au/
The Scrapbooker's Confetti Box, Swansea, NSW https://thescrapbookersconfettibox.com/
The Scrapbook Store, North Perth,WA http://thescrapbookstore.com.au/ 

Canada
Paper Art Creations Inc, Leduc, Alberta, www.paperartcreations.com/
Scrapbook Centrale, Dollard Des Ormeaux, Quebec www.scrapbookcentrale.ca
Scrap Addicts, Edmonton, Alberta www.scrapaddicts.ca/
Scrap and Bean, Edmonton, Alberta scrapandbean.com/ 
Scrapbooking Fairies, Drayton Valley, Alberta www.scrapbookingfairies.com/
The Paper & ink Boutique, Calgary, Alberta www.paperandinkboutique.com/
The Scrap Yard, Calgary, Alberta, www.thescrapyardcalgary.com/ 

Denmark
Hobbyboden Scrapworld Samso www.hobbyboden.dk

France
Eirl Bancon Cartoscrap, Midi Pyrenees, www.cartoscrap.com
Fée Du Scrap, Saint Sébastien-Sur-Loire, www.feeduscrap.fr/
Horizon Créatif, Ste Jalle www.horizon-creatif.fr
Instant Créatif, La Possession, La Réunion, www.icreatif.re
Katzelkraft, Ingwiller www.katzelkraft.fr/en/
Kerudoc Creation, St Yvi www.kerudoccreation.com
Le Grenier des filles, Pierre Benite
Page de scrap, Saint Pavace, www.pagedescrap.fr/
Scrap Déco Home, Goutrens, www.scrapdecohome.fr/
Toutencolle, Dun sur Auron www.toutencolle.fr

Germany
Stempelbar, Berlin, www.stempelbar.de
Stempeloase Munich, Munich www.stempeloase.de
Stempelfee Shop, Hilden www.stempelfee-shop.de
Stempellaedle, Stuttgart, www.stempellaedle.de/shop

Netherlands
De Hobbystudio, Genemuiden, www.dehobbystudio.nl/
Doe@ding,Spijkenisse doeading.nl/
Hobbycompleet de Duif, Leeuwarden www.hobbycompleet.nl
Stampingcorner, Capelle Aan Den Ijssel www.stampingcorner.nl

Norway
Hobbygarasjen, Kopervik, www.Hobbygarasjen.no

Spain
Cien por Cien Manualidades, Barcelona,  www.100x100manualidades.es
Ideas 10 Manualidades Y Scrapbook, Bilbao ideas10manualidades.com/
Marakiscrap, Tarragona, www.marakiscrap.com
Scrap & Papers Experiences, Barcelona, www.scrappapersexperiences.com
The Paradise Corner, Barcelona, www.theparadisecorner.com

Taiwan
Mandy's Cards, Taipei www.facebook.com/mandy.card.77

United Kingdom
Amelia's Creative Crafts, Studley, Warwickshire  www.ameliascreativecrafts.co.uk
Art from the Heart, Harrogate, Yorkshire www.afth.co.uk
Crafts at The Malthouse, Herstmonceux,  East Sussex, www.themalthouse.co.uk/
Loobi Crafts, Leighton Buzzard, Bedfordshire, www.loobicrafts.co.uk
Stampers Grove, Springbank, Lilliesleaf, Melrose,Scotland www.stampersgrove.co.uk
The Artistic Stamper Craft Store, Faversham, Kent www.theartisticstamper.com
The Forget me not Kraft KabinRochford, Essex, www.TheForgetMeNotKraftKabin.co.uk

USA
Artistic Artifacts, Alexandria, VA www.artisticartifacts.com/
Artistic Studio Creations, Fayetteville, Georgia www.facebook.com/ASCbyCrystal
Craftiness, Chatsworth, CA, www.craftinessonline.com/
Everything Scrapbook & Stamps, Lake Worth, Florida https://everythingmixedmedia.com/
Frantic Stamper, Oregon www.franticstamper.com
Free Heart LLC, Denver, Colarado, www.freeheartllc.com/
Joggles, Coventry, Rhode Island, www.joggles.com
PaperCraft Clubhouse, Westbrook, Connecticut, papercraftclubhouse.com/
Qingquing's Stamp Shop, Portland, Oregon
Roadtique Boutique, Rochester, New York Facebook Page
Runaway, Art & Craft Studio, NE Salem, Oregon www.runawayart.com/
Simon Says Stamp, Columbus, Ohio www. simonsaysstamp.com
Topflight Stamps, Irmo, South Carolina topflightstamps.com/

If you are interested in becoming a PaperArtsy stockist contact Dounia@paperartsy.com for more information

PaperArtsy Links
Facebook Group PaperArtsy People
Facebook Page PaperArtsy