Showing posts with label EDY21. Show all posts

Friday, 13 November 2026

Greeting Cards & boxes with EDY {by Martine Dubé}


Salut, c'est Martine! Aujourd'hui pour ma page de blog j'ai utilisé les étampes de EDY (Darcy) pour créer des coffrets de cartes de voeux. Avec le temps des Fêtes qui approche, ils seront de parfaits petits cadeaux à offrir à vos amis créatifs.

Hi, it's Martine! For today's blog post, I've used stamps by EDY (Darcy) to create sets of greeting cards. With the Holiday season approaching, these will make perfect little gifts for your creative friends.


Voici les planches d’étampes EDY20 et EDY21 que j’ai choisies pour les cartes, les parfaits petits personnages pour créer des cartes pour toutes les occasions. J'ai aussi utilisé les stencils PS309, PS329, PS394, PS421, PS428 et PS455 mais, vous pouvez utiliser un seul stencil pour faire toutes vos cartes. Pour créer les fonds et colorer les images, j’ai décidé d’utiliser les poudres Infusions  Black Night, Sleight Blue, Frankly Scarlet, Golden Sand et Magenta.

Here are the stamp sets EDY20 and EDY21 I chose for the cards , the perfect little characters for creating cards for any occasion. I also used stencils PS309, PS329, PS394, PS421, PS428 and PS455, though you could certainly use just a single stencil to make all your cards. To create the backgrounds and colour the images, I decided to use the Infusions powders in the shades Black Night, Sleight Blue, Frankly Scarlet, Golden Sand, And Magenta.


Pour commencer, j’ai préparé mes poudres Infusions avec un peu d’eau dans des petits contenants que je garde prêt à être utilisés comme une aquarelle liquide parfaite pour colorer des images. Pour la couleur chair, j’ai mélangé la poudre Golden Sand avec une toute petite goutte de Magenta. 


To begin, I prepared my Infusions powders by mixing them with a little water in small containers, keeping them ready for use, much like liquid watercolours, to colour images. For  skin tones, I mixed the Golden Sands powder with a tiny drop of Magenta.


Une fois que vous avez préparé vos couleurs, avec l’aide d'une pièce d’acétate ou d’un morceau d’emballage, appliquer la couleur choisie par taches de façon à créer une superposition de la même couleur en laissant des espaces blancs.


Once you have prepared your colours, use a piece of acetate or a scrap of packaging material to apply the chosen colour in patches, creating layers of the same colour while leaving some white spaces. 


Après avoir créé la première couche, appliquer de la couleur cette fois-ci sur le stencil en ajoutant de l’eau afin de faire une impression sur toute la surface et non d’autre taches de couleur. Bien éponger avec un papier à main.


After creating the first layer, apply colour, this time over the stencil, adding water to ensure an impression is made across the entire surface, rather than just creating isolated spots of colour. Pat dry thoroughly with a paper towel.


Bien presser le stencil avec un rouleau.


Press the stencil down firmly using a brayer.


La dernière étape pour finir les fonds, faire des éclaboussures.


The final step to complete the backgrounds is to add splatters.


Je me suis dit que savoir comment faire la boite pourrait être intéressant, même si ce n'est pas une technique. La dimension des mes cartes est 6po x 6po (15cm x 15cm ).


Not exactly a technique, but i thought it might be interesting to share how I made the box. My card measures 6" x 6" (15cm x 15cm)


Pour la base de la boite, prendre un carton de 12po x 12po ( 30x30cm ); le fond doit être légèrement plus grand que les cartes, mais aussi assez grand pour mettre les enveloppes. 


For the base of the box, use a 12" x 12" (30 x 30 cm) piece of cardstock; the bottom must be slightly larger than the cards, but also large enough to accommodate the envelopes.


Le couvercle doit être légèrement plus grand que la base d'environ 1/8po ( 3mm ). Pour la hauteur, c’est votre choix moi j’ai fait mon couvercle à 3/4po ( 2cm ) 


The lid should be slightly larger than the base, about 1/8 inch (3 mm). As for the height, that’s up to you; I made my lid 3/4 inch (2 cm) high.


Couper les coins en angles afin de faciliter le pliage.


Cut the corners at an angle to make folding easier.


Coller les coins et replier, puis coller les rabats.


Glue the corners, then fold over and glue the flaps.


Étampez les images choisies. J’ai étampé les personnages plusieurs fois pour faire mes séries de cartes. J’ai aussi étampé la maison et l’arbre pour pouvoir décorer le dessus de la boite.


Stamp the chosen images. I stamped the characters several times to create my sets of cards. I also stamped the house and the tree so I could decorate the top of the box.


Utiliser les poudres Infusions préparées plus tôt pour colorer les images. J’ai coloré les images avec les mêmes couleurs que mes fonds mais avec une touche de couleur plus intense ( Frankly Scarlet ) puis j’ai découpé les images en laissant  une fine ligne blanche sur le contour.


I used the Infusions powders that I had prepared earlier to color the images. I colored the images using the same colors as my backgrounds, along with an additional, more intense color (Frankly Scarlet), and then cut out the images, leaving a thin white border around the edges.


Préparer les messages à inscrire sur vos cartes. J’en ai préparé une série de différentes grandeurs et j’ai ensuite choisi celui qui allait le mieux sur chaque carte.


Prepare the messages to be written on your cards. I prepared a series in various sizes, then chose one that best suited each card.


À l’aide de ruban adhésif en mousse, collez les images et le message sur le devant de vos cartes.


Using foam adhesive tape, glue the images and the message to the front of your cards.


N'oubliez pas de préparer des enveloppes, J'aime bien faire un rappel avec les étampes pour les décorer.

Don't forget to prepare some envelopes; I like to use stamps to decorate them.


Voilà 12 cartes et 2 boites prêtes à offrir. J’ai toujours du plaisir à offrir des cadeaux faits main en espérant que cela vous inspire à en faire autant.


Here are 12 cards and 2 boxes, ready to be given as gifts. I always enjoy giving handmade presents, and I hope this inspires you to do the same.


Voici quelques photos en gros plan sur lesquelles on peut distinguer les différentes couches ainsi que d’autres détails. 


Here are a few close up photos where you can see the different layers and some other details.



J'espère que ça vous plaira!

Hope you enjoy!

Martine


Facebook: Martine Dubé
Instagram: martined.crafts
Pinterest: Martine Dubé


Thursday, 19 May 2022

2022 Topic 07: Specimen Jar {by Riikka Kovasin} with Darcy stamps


Heippa everyone, it's Riikka Kovasin from Paperiliitin blog with you today, and I'm here to share with you my take on the "Specimen Jar" using Darcy's stamps. It ended up being quite a circus and not a single actual jar!


When I first read the brief about the topic, my thoughts went to cabinets of curiosity, but then my train of thought took a strange turn to Dali. An image of "The Burning Giraffe" popped in my head with the bizarre human-styled creatures with boxes. I thought that maybe stacking matchboxes on top of each other and adding some details might be interesting and a different kind of approach to the subject, and then got excited about the idea. Like persons are vessels of their experiences and memories or their secrets and desires. 

I hope that my take on the "box people" ended up being less frightening than Dali's version, but you could tweak this structure to fit your style easily by changing colors and stamps. What I also found interesting was the idea of putting something inside the drawers. What makes the character tick, what are his or hers inner workings or secrets? Or what about doing this kind of character as a gift and adding little present to each box? The possibilities are endless! 


I wanted to pair the joyous and quirky Darcy stamps with vibrant colors, almost going with primaries! Somehow I immediately saw the characters wearing blue and red, not so much yellow. Now come to think of it, I assumed it was the happy colors than then guided my ideas more to the circus feelings of a big tent and colorful clowns.

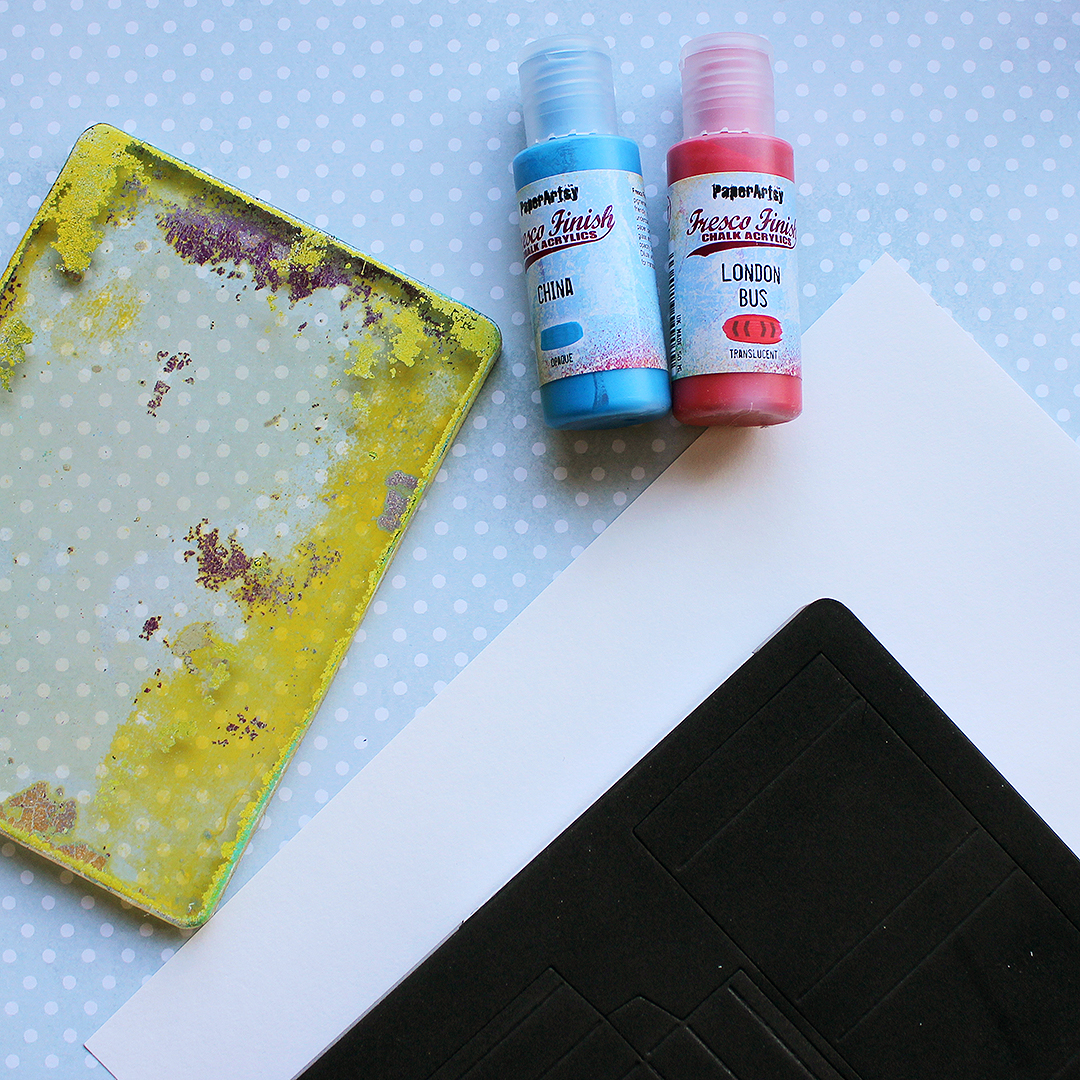
So, first I grabbed two Fresco Finish acrylic paints, China (FF101) and London Bus (FF37). I also picked my gel printing plate and some white cardstock. These would become the makings of the bodies of the characters. I opted to make the matchboxes white and decorate them with colors rather than make the boxes out of colored cardstock. In the end it worked beautifully with the white ruffles! Making the boxes out of one color also allowed me to play with the height as I could mix the boxes between different characters.


I patterned three pieces of white cardstock using different patterning tools. I made one blue, one red and one sheet with two of them mixed. The blue one I patterned with stripes by using a comb-like tool to go through the paint surface before pulling the print. For the red one, on the other hand, I made polka dots using bubble wrap. I pressed the bubble wrap to the wet paint surface on the plate before pulling the print. The purple version I patterned using a packaging of glue sticks. This caused a bigger dot pattern. 
 
 
I then cut the matchbox pieces out of white cardstock using a die and measured them to find out the measurement for the colorful bits. I cut the gel prints to cover the sides of the character but also smaller pieces to be added to the front of each little box. The side pieces are also holding the characters together.

First I cut just thin strips out of the prints but before I could add them, I needed to think about the height of each character. I chose to go with three different heights to have a more varying look rather than use the same height to all. I also didn't want the characters to have equal difference, like 6, 8, and 10 boxes, so I ended up doing one with 8 and the others with 5 and 4. 

I measured the height of each stack and added score lines accordingly so I could fold the piece nicely. I used double sided tape to adhere each box on top of each other and then the decorative strip around the stack. 


I also added the little pieces of the prints to the front of each little box matching the colors to the strips surrounding the stacks. 

As you can see, I chose the blue striped piece for the tallest character as I really liked the look of it. Then the red dots and purple-ish dots are almost the same height. The reason I chose the purple to the smallest character was that the print was the poorest and had a smaller section with a good pattern. This way I could use it to the maximum. 
 

Now that I had the bodies of my characters almost done, it was time to concentrate on their heads and inner workings. 

I chose a fun set by Darcy with two characters as the heads (EDY21) and then stamped elements from another Darcy set (EDY08) to be used as the items inside the drawers. I filled one sheet of white cardstock with the elements and after coloring them, I actually made another sheet with the elements I felt were needed to fill the designs. 


As you can see, I didn't stamp the characters completely, but only concentrated on their heads. This is because for these box people I didn't need more. I used the same thing for parts of the buildings as well, only inking a part of the stamp I thought I would use. Like for the hats I only stamped the roof of the house, not the whole building. 


I then colored the characters and parts coming to the drawers using brush tip markers and paint pens. I followed the same bright color scheme I'd decided with the paints, but added a touch of yellow in there as well. To highlight some details I used a white paint marker and drew each character rosy cheeks using a pink one. As with the stamping, I only colored the bits I thought I would end up using - like the cogs or the door.
 
 
To add a bit of marvel and wonder, I then made a sheet to be added inside each box. I wanted the drawers to reveal something magical, or maybe elements of magic, so I made a sheet of golden stars on a yellow background. 

I first colored a piece of white cardstock using a yellow tone of Infusions Dye Stain, Golden Sands (CS05). I sprinkled the crystals on to the sheet, added water and then used a big brush to cover the whole area with the dye. After drying the sheet I then added some golden stars on top using a Darcy stamp set (EDY08) with embossing ink, sprinkled golden embossing powder on top and melted the powder. At this stage I also thought to add some golden sequins to each drawer, but on a later stage decided against it.
 

Then it was time to fill each drawer with the just created dazzle and the vibrant elements! Some of the drawers ended up having just a little detail inside while others had a bigger element. This stage was so much fun! Thinking which detail to put inside which drawer. 

Instead of stamped details the drawers could hold some personal nicknacks as well or even found ephemera! Or what about a mixture of stamped items, personal pieces and vintage ephemera? Or even little rhymes or verses! There's so many possibilities! 


I used foam tape to add the little pieces inside the drawers to make them pop up more from the starry background. 


As a final stage I then needed to add the heads to the characters. I was first thinking of cutting a tiny slit to the top most box and sliding the head through it but the strong circus and clown feel I had been gathering the whole time resulted another way. Instead I steadied the heads with a big ruff. I cut a thin strip of white cardstock and accordion folded it. Then I adhered the ends together and turned the strip into a rosette of sorts leaving a small gap in the center for the head. I used hot glue to make the rosette and support the head in place. For one of the ruffs I used a strip of the gel print instead of just white cardstock. This was to have some variety in the bunch. 

I was happy that even though I added quite a big hat to each character and their neck was super thick, their heads were supported enough by the ruffle to stay upright! If you are using a thinner cardstock and it seems that the head keeps nodding, you could add either a wooden stick or a piece of wire to the back to support the head. This of course then means that the finished piece has even more one side where it's supposed to be viewed from. I did think if I should add another head facing the other side, when doing these, but then I thought that would be too strange. A bit too Janus like. On the other hand, I could have added a crazy ball of hair to each one thus making the characters more viewable from either side. 


After adding the heads and ruffles in place, the characters seemed to miss a little something. I was thinking about adding hands, but as the characters in the stamp set (EDY21) had really thin hands, I got no help there. I found it funny to draw the hands now that the heads were stamped. But instead the other character had a balloon in the set! So, now that I was already thinking these characters as a part of the circus, what could fit better! 

I made the balloons out of colored, stamped balloons and a length of wire. I used hot glue to add the wire to the balloon, poked a hole to the box using a needle and then pushed the wire through some hot glue to that hole. That way the glue secured the wire and made it sturdier. 
 
 
So, as the last detail I added some balloons to each character and then gave them a row of buttons running down the stack of boxes making up their bodies. I chose pink buttons for one, purple to another and yellow buttons for the tallest one. The reason I used pinks instead of red is actually due to the fact that all my red buttons were too big or too dimensional for these! 


This project pushed me a bit out of my comfort zone and I love it! I'm not usually accustomed to such a vibrant color palette, but I really like the end result. What I also like is how easily you can change the appearance of these characters by using different colors or stamps. 

I hope you'll give these characters a go! Think about the way you want them to look but also what treasures they hold inside, what you want to communicate with them. Or then just have fun, add elements together and see where you end up! It's not always about the finished piece, but about the journey.

Xoxo Riikka