Showing posts with label 2015 Topic 6. Show all posts

Saturday, 4 April 2015

2015 #6 Abstract Texture {by Darcy Wilkinson, PA Signature Designer}

2015 Theme 6: Grunge Paste


Hi everyone, Darcy here. I love this current theme, I adore layers and texture. I had this idea to create a piece that was all about texture and pattern, using  a limited palette and found objects as mark making tools. 


I began by collecting up some random objects, lids - square and round, a store card, a tooth pick etc. 


I then cut out a semi circle from heavy card and using this as a template I began to apply Grunge Paste to an 8x8 white/greyboard. This is the ideal substrate for this as it is solid and firm and with a smooth surface it takes the grunge paste and paint really well. 


I continued adding shapes of Grunge Paste, using the cut out card and a ruler as my guides. I left a small gap between each shape. 
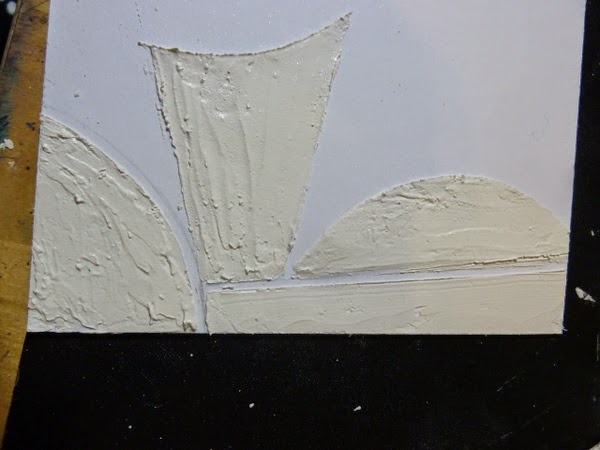

As the paste started to dry I began adding patterns using my found objects. 


I continued until the board was full, using lids to creates shapes and the cocktail stick to make small marks and scratches. 


This was left to dry overnight, then I added a second layer of Grunge Paste in the form of just 7 circles, over the top of the other patterns. 


Once this second layer was dry I painted the whole thing with a watery layer of Chocolate Pudding, making sure to push the paint down into all the lines and crevices. 


Next I added so areas of colour, but keeping it fairly neutral I only used Caramel, Toffee, Chocolate Pudding,French Roast  and Nougat. 
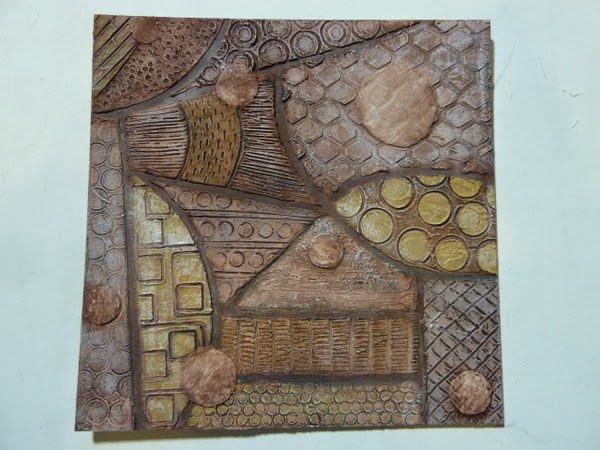

I added Nougat to the edges aswell. 


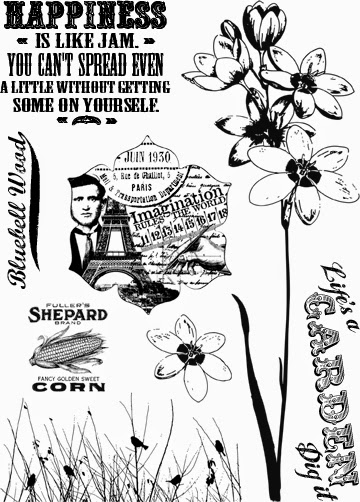
Around the sides of my pot of Grunge Paste were some bits that were quite dry, I scraped those out and kneaded them together, at this point the ball of Grunge Paste was more like dough. I pressed it flat and used ESN15 to impress some text into the Grunge Paste. 

ESN15
As the piece dried I decided to break it apart.. smaller pieces would dry quicker and be more useful. I left these to dry ovenight. 


Once dry I painted them with French Roast and then a little drybrushing with Buff, before adding Treasure Gold to the edges. 


I added Treasure Gold to the 7 circles on the board, using Onyxite, Spanish Topaz and White Fire. Then I attached the text pieces using gel medium. 


I gently rubbed White Fire over more of the raised parts, and this is it all done. 


This was a particularly satisfying and relaxing project to make. I would really like to make a much,much bigger piece of wall art in this style. I hope you enjoyed it and that it has given you some ideas on how to use your Grunge Paste. 

Darcy. 
Blog - Art and sole
Twitter - Darcy_uk_
I will be on the PaperArtsy stand at Ally Pally 11th and 12th April. come and say hello. 

We would love you to join in with challenge #6: Grunge Paste If you are inspired by any of our guests who blog with us over the fortnight, then please join in and link up your creativity HERE. 

NB.  you will get 3 weeks to participate in this challenge, as we will interrupt the usual schedule for our 3UP week which starts April 5th.

All links go in the draw to win a voucher to spend on products of your choice from the PaperArtsy online store. The Grunge Paste link will close 17:00 (London Time) Sunday, April 12th, winner will be announced 2 hours later at 19:00

Wednesday, 1 April 2015

2015 #6 Grunge Paste Icing {by Lucy Edmondson}

2015 Theme 6: Grunge Paste

Hi everyone Lucy here, joining you this evening with a post showing two ways with Grunge Paste, firstly a traditional technique using the gorgeous new Lin Brown stencils and matching stamps which I think is really effective, and secondly, a bit of fun using cake icing tools to create texture in the Grunge Paste for some veined PaperArtsy chipboard leaves. Not being a cake maker myself (Darcy, please help!) I didn't know what these tools were when I spotted them in a general store. I thought they were for DIY dentistry! But I knew they would be great for spreading and making indentations on Grunge Paste (or maybe clay).

For my substrate I have used one of my favourite items, the wooden shrine, which I thought was perfect for showcasing the shape of the new Lin Brown flowers:-


Step One: To start with I gave the shrine a thorough sanding and a light coat of gesso to prevent the gel medium soaking into the wood too much later. I'm using the dark bubble paper from the Chatsworth 12 x 12 Collection so I've mixed Slate Fresco with a small amount of Chocolate Pudding on an ice cream lid to exactly match it to blend in my edges. I painted the back as well.

Step Two: I drew around the shrine on the reverse of the Chatsworth paper and cut out my pieces for the middle and sides and also cut some edging strips. I used Snowflake to stamp a little of the large script stamp from Hot Picks HP1304

Step 3: I taped down the new Lin Brown stencil PS 013 on the arch shaped paper piece with low tack tape to prevent seepage, and spread a mixture of Grunge Paste and Banana Fresco from Lin Brown's Limited Edition Set 3.  NB. this bit of the stencil has a right and a wrong side (as I discovered the hard way) so compare it to the matching stamp and mark the stencil on the correct side! If you get it wrong, though, you'll just get a pleasantly off-set look!

Step 4:  Pop some Tangerine Twist, and Bougainvillea, from  Lin Brown's Limited Edition Set 3, and Prawn Fresco Finish onto your palette and apply to the large Lin Brown flower stamp ELB 16 that matches the stencil with a piece of Cut N Dry foam. Press firmly into the Grunge Paste with your fingers, i.e. without an acrylic block, and peel away. Wash and scrub your stamp immediately.

Step 5: Dry the Grunge Paste with your heat tool and use a fine paint brush to add some shading and highlight the texture with the Tangerine Twist and Bougainvillea, and Prawn from JoFY Set 3. I then mixed Bougainvillea with some Grunge Paste and pasted it through the Secret Garden stencil beneath the bloom to the right. I then decided I was going to want some more colour across the whole shrine so I used the quote from Lin Brown's new ELB 20  in Bougainvillea without a block across the pieces of Chatsworth.

I used the same process with the co-ordinating flower from Lin Brown's ELB 20 with the matching stencil PS 014 on the side panel paper pieces. More photos on my blog.

Step 6: Now for the icing! I mixed the Grunge Paste with Banana and Jade as I wanted to stick with the vivid colour palette of the newly released colours, to create an emerald green. I used the PaperArtsy chipboard pieces Eclectica Shapes 05 and cut away some of the leaves and stem to fit neatly on the shrine. I slathered the Grunge Paste thickly on the three pieces and blasted them with the heat tool briefly until they had just lost their wet look and then pressed in the icing tool to create a veined appearance before drying fully.

To finish the project I ran Treasure Gold in Pewter around all the edges and hinges and glued strips of Chatsworth to the sides using Golden Matte Gel. I then glued the front and side panels of paper in position with the leaf stems. I applied the Treasure Gold in Pewter to some Scalloped Chipboard strips from the poundshop, adhered on foam pads to cover the bottom of the stems. You could use the Prima strips here.

Here's a close-up of the gorgeous Lin Brown flower:-

I hope you will have a go with cake decorating tools on Grunge Paste, or have a look around the kitchen and the rest of the house for other items that will make interesting patterns. I look forward to seeing what you come up with!

Lucy 

Who knew icing tools could generate such experimentation! I'm sure the pictures don;t do the texture justice, but its great to know how you can manipulate the GP so easily even while partially set !! Thanks Lucy

We would love you to join in with challenge #6: Grunge Paste If you are inspired by any of our guests who blog with us over the fortnight, then please join in and link up your creativity HERE. 

NB.  you will get 3 weeks to participate in this challenge, as we will interrupt the usual schedule for our 3UP week which starts April 5th.


All links go in the draw to win a voucher to spend on products of your choice from the PaperArtsy online store. The Grunge Paste link will close 17:00 (London Time) Sunday, April 12th, winner will be announced 2 hours later at 19:00

Sunday, 29 March 2015

2015 #6 Embossed Grunge Paste {by Seth Apter}

2015 Theme 6: Grunge Paste

Hi all. It’s Seth and I am back as a guest designer on PaperArtsy. I am a mixed media artist from NYC and all about layers and texture. Grunge Paste has become one of my go-to supplies to achieve a dimensional effect in my work.


Although I love to work with Grunge Paste right out of the jar, it is especially fun to alter and experiment with it to find additional creative uses of the product. Today I am happy to have the opportunity to share one of these techniques with you.


I started with a sheet of watercolor paper that I painted with Fresco Finish Acrylic Paints, loosely layering Little Black Dress, Space Cadet, Caramel, Pumpkin Soup and Chocolate Pudding. I added some accents using a gold metallic inkpad.


I mixed Grunge Paste with a combination of Caramel and Pumpkin Soup. One of my favorite properties of Grunge Paste is the ability to mix it with paint before applying. I added it to the background in a rough layer using a palette knife, being sure to let the background show through in spots.


While still wet, I randomly sprinkled the surface with embossing powder.


Using a heat gun, I immediately heated the surface until the embossing powder melted and took on its metallic sheen. Because the embossing powder settles into the wet grunge paste, it takes a little longer than usual for it to react.


Happily, the extra heating time also reacts with the grunge paste and adds extra texture and dimension as a result.


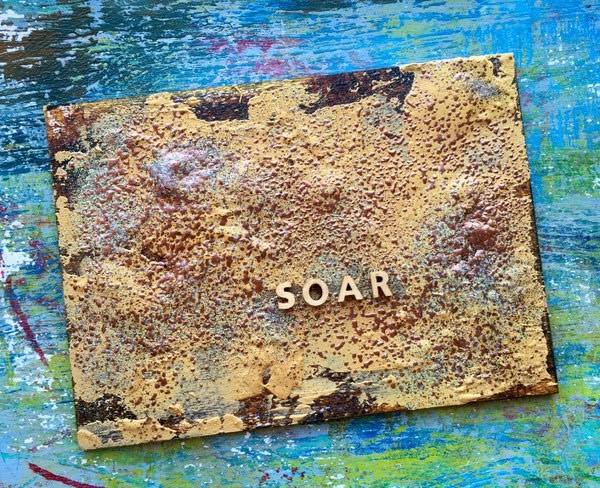
Although I thought the surface that was created stood on its own as abstract art, I couldn’t resist adding text as I often do in my work. To echo the dimensional effect of the grunge paste, I used 3-dimensional wooden letters.


I enjoyed this creative process so much that I immediately made a second piece in what will no doubt become a series!

Seth. 

You can take part in my workshops here:
Art & Soul retreat - Kansas City, Missouri - April 28-30
The Studio of Mary Beth Shaw - St. Louis, Missouri - May 2
Pacific Northwest Art School - Coupeville, Washington - May 16-22
ArtWorks - Edmonds, WA - May 26, 28

Wow! I am positively drooling at this texture. Brings to mind all kinds of wonderful things, old houses, barns and boats... abandoned vehicles reclaimed by nature. This technique could be used to great effect in so many projects. Thanks Seth. 

We would love you to join in with challenge #6: Grunge Paste If you are inspired by any of our guests who blog with us over the fortnight, then please join in and link up your creativity HERE. 

NB.  you will get 3 weeks to participate in this challenge, as we will interrupt the usual schedule for our 3UP week which starts April 5th.

All links go in the draw to win a voucher to spend on products of your choice from the PaperArtsy online store. The Grunge Paste link will close 17:00 (London Time) Sunday, April 12th, winner will be announced 2 hours later at 19:00.

Saturday, 28 March 2015

2015 #6 Decorated Hand {by Liz Borer, PA Signature Designer}

2015 Theme 6: Grunge Paste


Hi Liz here. I have had this papiermache hand for some time and I just couldn't work out what to do with it . Then I started to think about a project using Grunge Paste and all of a sudden I knew that the hand would be a perfect base for the work . I wanted to really go to town decorating the hand and I wanted to add some texture to the background which might have been difficult to do because of the shape but Grunge Paste to the rescue !
The other problem with the hand is that because it is made of papiermache it is not really stable , but by sticking it to a block of wood (left over from building work ) the problem was solved .


With most items made of papiermache the surface can be rather rough with odd dents etc. in it . I have found that Grunge Paste is perfect for filling these irregularities because it is easy to sand smooth without damaging the surface . Once I had done this I painted the whole thing with Nougat paint and stuck it to the wood block . I didn't paint the block , I just gave it a coat of Matte Glaze to seal it.    

 I then found some stencils that I liked in my box of stencils and using tissue paper I smoothed Grunge Paste through the stencils several times .Once I had done this I decided that I only wanted to use the pattern from the flourish stencil , so I have kept the other sheets for another project .


The advantage of using tissue paper is that it will stick to curved surfaces and that the dried Grunge Paste design can be cut into smaller pieces so that the can be stuck wherever needed .                                   

To stick the stenciled tissue to the hand and wood paint a coat of Matte Glaze over the area and carefully apply the tissue over it . Paint another coat  of glaze carefully over the tissue to seal it and press out and bubbles .The tissue will tear if you press too hard but if you are gentle it will adhere nicely to the background . I cut up the tissue so that I could arrange the stenciled swirls up and around the hand and block .                              

        
Once the glaze had dried I painted the whole thing with Nougat so that the Grunge Paste was the same colour as the background . When the paint had dried I rubbed Rose Quartz Treasure Gold over all the raised areas . At this point it almost looked like henna tattoos !                     


I wanted some more pattern on the background so I stamped the ivy from EEB01 onto some more tissue paper with a brown archival ink . I cut up the ivy design in the same way as I had cut up the stenciled tissue and stuck the tissue down using matte glaze as before                      
EEB01


On of the reasons that I needed the hand to be stable is that I wanted to hang a birdcage from one of the fingers . I had a rather large cage in my stash and I decided to cover the lower part it tissue . I painted a strip of tissue wider that the depth of the base of the cage with matte glaze and carefully wrapped it around the cage . The glaze stuck the tissue to the cage and once dry made it much less fragile . I found that I needed to attach a second strip of tissue in the same way to fill in any tiny splits in the tissue .                


I then stuck some one of the other designs that I had stenciled onto tissue onto the cage and when it was dry painted it with a coat of Nougat I found two metal birds that I felt would look nice and painted them with Squid Ink. I then made a paint with the Rose Quartz Treasure Gold by mixing it with a little alcohol ink blender which I  'dry brushed ' over the bird cage and the birds to pick up the raised details .   

                              
The hand needed some more decorations and more colour , so I stamped flowers from EEB06 and HP1009 onto smoothy card with black archival ink . The flowers were painted with various browns and purples from the fresco paints and cut out  ( a bit tedious but worth it ) .           
EEB06

HP1009
I then started to stick the flowers to the hand . I curved the petals a little to give some dimension and used Pinflair glue ( or any dimensional glue ) to attach the flowers . These pictures show the first few flowers attached but I went on to add more overlapping some to give more dimension .    


To hang the bird cage onto the hand I made a hole through the finger using a darning needle and then carefully pulled a chain through . I fixed the chain at the top by attaching it to a flower and added glue to make it more secure and then it was possible to cut the chain to the right length. 


To add a little more texture and some sparkle I found some seed beads in various colours that complemented the flowers and mixed them together to get a random effect . To stick the beads to the hand I spread a little pinflair glue in various places and pushed the beads into the glue       


Don't forget that this can be viewed from all sides so make sure all the decorations go all around the hand . Here are some pictures of the finished piece from different angles .                                           


I enjoyed decorating this hand ( which my daughter says is a Zombie hand -- but a pretty one ) and I hope that it has given you some inspiration for your work . I'll be back soon with something else , so Bye for now .

Liz. 
Blog - Decorative Delights

Thanks for joining us this evening Liz, this is a perfect example of how versatile the Grunge Paste can be. Using the paste on tissue means even really curvy substrates can be used. The texture on the birdcage is so lovely and a definite trick to remember.

We would love you to join in with challenge #6: Grunge Paste If you are inspired by any of our guests who blog with us over the fortnight, then please join in and link up your creativity HERE. 


NB.  you will get 3 weeks to participate in this challenge, as we will interrupt the usual schedule for our 3UP week which starts April 5th.

All links go in the draw to win a voucher to spend on products of your choice from the PaperArtsy online store. The Grunge Paste link will close 17:00 (London Time) Sunday, April 12th, winner will be announced 2 hours later at 19:00

Friday, 27 March 2015

2015 #6 Grunge Paste Mosaic {by Liesbeth Fidder}

2015 Theme 6: Grunge Paste

Hi, it's Liesbeth here again, today I'm showing you my altered Grunge Paste ! I made some mosaic tiles out of it. I think the mosaic and leaded glass of the stamp go very well together !


I smeared a thin layer (1 mm) of Grunge Paste onto a craft sheet and let it dry for at least 12 hours.


 I peeled the big piece of dried Grunge paste off of the craft sheet and broke off lots of small irregular ,tiles'.

I painted most of the tiles with the beautiful, translucent Fresco Finish paint Glass Blue...


... and some of them with Inky Pool and Smurf as shown. I let everything dry very well.


Onto a piece of Smoothy-white stamping card, I stamped the leaded glass woman (LPC032) using StazOn ink Jet Black , and cut out the image with a 3 cm wide border.
..
LPC032

 I watercoloured the stamped image with the Glass Blue paint and less or more water to create light and dark. I coloured the face and hand with some pink ink

I glued on the Grunge Paste tiles one by one like a mosaic..it took lots of time but it was fun ! Here and there I added an Inky Pool or Smurf tile..


I glued and glued (and glued...)  till all the white disappeared.


I cut off the excess of the tiles at the edges of the card.


To create a shiny accent I added a very little bit of Treasure Gold - Spanish Topaz, very lightly using my finger. I finished the piece by sticking it onto black cardstock and with some metal embellishments.


Some details:


I hope you like this Grunge Paste altering-mosaic ! Have fun with this technique !
Hope to see you next time :-)


Liesbeth this is such a really, really cool idea! I can't believe that we haven't seen this done before. The shape of the card and the colours are just perfect, and really add to the stained glass effect of the stamped image. 


We would love you to join in with challenge #6: Grunge Paste If you are inspired by any of our guests who blog with us over the fortnight, then please join in and link up your creativity HERE. 

NB.  you will get 3 weeks to participate in this challenge, as we will interrupt the usual schedule for our 3UP week which starts April 5th.

All links go in the draw to win a voucher to spend on products of your choice from the PaperArtsy online store. The Grunge Paste link will close 17:00 (London Time) Sunday, April 12th, winner will be announced 2 hours later at 19:00