Hi everyone, it's Floss Nicholls from flossworkshopart with you today, and I'm here to share how I integrated fabric and paper together using fabric slashing and reverse applique techniques using a selection of stamps designed by Gwen Lafleur.
I often use fabric within my art, but mostly as a substrate or as an addition to a piece. So when PaperArtsy set the challenge of how I may reinterpret paper, using a woven or knitted substance or the interchangeability between fabric and paper crafts, I thought I'd explore a couple of techniques I used to use a lot with just fabric to see if I could replace a part of it with paper. I have created a removeable notebook cover and page marker using both fabric and paper together.
Firstly I made a stack of gel prints in a whole range of the beautiful PaperArtsy fresco finish acrylic rich red coloured paints. I varied the prints using EGL04 and layered transparent paints under and over opaque finish fresco paints to gain depth and tones in the prints.
I used Ranger's Archival Black Ink to stamp some detail onto the gel plate on some and made sure it was dry before adding the paints.
I decided to use reds for my gel prints as I rather like the cheerful colours together. I also love how the translucent colours work over the opaque ones using stamps as they give subtle depth and tones.
You can see the different colours poking through on the gel plate before my final paint layer and pull.
I ripped the gel prints into strips using a metal ruler. I wanted to simulate fabric remnants being used for the slashing technique. If you are not familiar with slashing, you can read a bit more here.
I pressed the paper strips onto some interfacing, then covered and pressed them again. One half was covered with 140gsm recycled cartridge paper, the other half was covered with some cotton fabric. (An old shirt.) Interfacing is a stiff lining used in dressmaking/textiles to make thinner fabrics more sturdy. You could use denim or a reasonably heavy fabric for this too.
I then stamped Gwen's circles onto both the fabric and cotton shirt and stitched over the lines of test pieces securing the red printed layers inside to compare the outcomes before embarking on the finished product. I stitched an oblong shape too. The reason I did this is because the slashing technique works best when the stitched lines are quite close together so that it holds the fabric remnants in place. I was not sure how the paper would work with this technique.
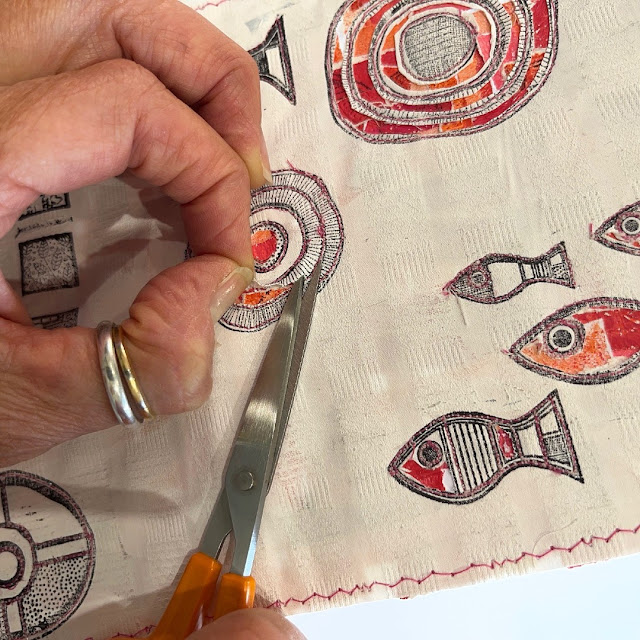
I then used my stitch unpicker to rip a hole in the fabric area and small sharp scissors to cut between the lines to expose the gorgeous red layers sandwiched behind.
This was the two outcomes...and what were my findings?
Oh my goodness it was so different from working purely in fabric! The top half of the photo was paper on paper layers with interfacing underneath. The bottom half of the photo was cotton fabric over printed paper layers on interfacing.
The paper on paper was just so flat and did not really show the technique at it's finest. I may as well have just cut and stuck things over each other like a collage without all the hard work! The paper layers were easy to get stuck together and the rich reds easily cut away making the whole exercise pointless. The thin oblong was also very difficult to cut the inside away regardless of what size scissors I tried. So slashing strips was not going to be an option.
The material over the paper layers was much more pliable. I loved the way the cotton fabric edges frayed to expose the painted layers underneath. I purposely wanted coloured strips rather than one flat pieced gel print as it brings more depth and texture and simulated the technique I was trying to achieve; the white ripped edges also brings light to the revealed sections.

So having tested the technique and finding that reverse applique would also work inside the fish images of EGL04 I set about layering up a big piece of interfacing ready for my A6 notebook cover with lots of strips of gel prints, I did glue a few down to avoid white spaces where some may slip whilst completing the stitching on the sewing machine.
I laid my A6 notebook out open and cut one piece of interfacing and one of cotton fabric. I allowed an excess of 10mm above and below the book height to allow for stitching the cover pockets to hold the notebook. I added 40mm to the width for the opening movement around the spiral spine and 45mm each side end for the flaps/pockets to hold the notebook in place... so an extra 130mm to the width in all. I have not added exact measurements as yours may differ depending on the type of spine your notebook/sketchbook may have. Naturally this should work if you size up too. I like the idea of a removeable cover as I get through a few notebooks.
I pulled the top thread through to the reverse and tied the ends together to secure them and then cut off the excess threads.
Pierce the areas of the images you'd like to expose and cut away taking care not to cut the middle printed layers...take care also to cut/pierce away from yourself and behind the other hand...I stupidly got over excited with how it was going and stabbed myself trying to get into a small area!
I stitched a straight line over my random zigzag line all the way round the edge.
My notebook already had an elastic 'strap' to hold it closed so I aligned the covers and used my awl to pierce the removeable cover. I used an eyelet to finish the hole.
Fold the cover around your closed notebook/sketchbook and check the the pocket folds will house it and also allow the notebook/sketchbook to be inserted, opened, closed and removed. Stitch the pocket folds into place after checking this.

I like pockets and areas to keep little paper treasures I find to journal with in and so I decided to use up some more of the gel prints I made to make a circle that would fold into a triangle pocket.
I layered the gel prints as I did before but on a circular piece of interfacing this time.
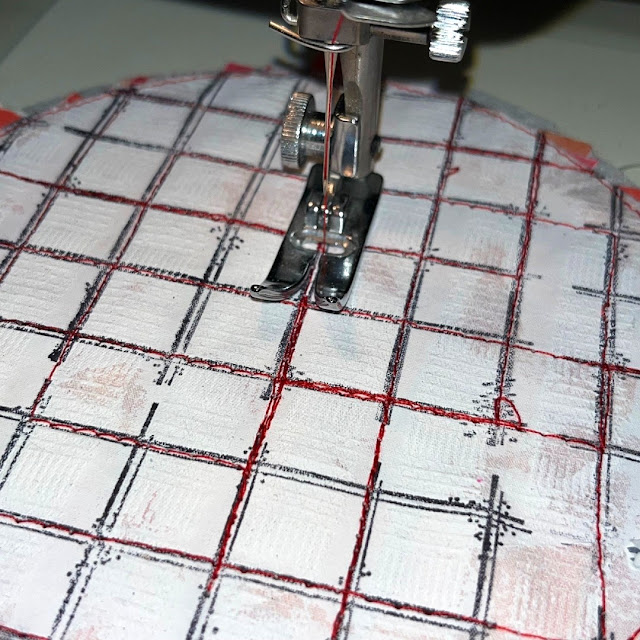
I stamped the squares from EGL24 onto a fabric circle with Ranger Archival black ink and used the same process and techniques as before.
I stitched over the lines again using red Gutermann thread. I left some unstitched and some I went over twice to give it more character.
I cut random squares out...I'm now thinking I could've used Gwen's detailed stamps from the same set to decorate some of the other blank squares...I may just go back and do that...
I divided the circumference into thirds. And folded the lines over to create a triangle.
The rounded edges will lock beautifully together to form a little feature and a pocket for paper bits...
It can also be used as a page mark. I added an eyelet to the top of the triangle and attached it to the top of the cover with another eyelet.
Slip the elastic strap through the eyelets and then through the holes in the notebook. If your notebook does not have these holes you can add them if you'd rather they were there, align the covers and pierce before you stitch the pocket folds together.
Slip your note book in the folded pocket and secure with the elastic strap.
I did use gesso over the fabric so that stamping would be more clear and have a better tooth to print onto. However, I think I should've used a little less as it made the fabric less pliable for when I was cutting the excess areas away within the stitched shapes and gesso may make the notebook less resistant to getting grubby. I think I need to explore a bit more and find another product to coat it with. Any suggestions would be gratefully received.
{One possible answer from Leandra: Fresco Finish Paint is also like gesso,as it is a chalk paint, but if you add textile medium to the paint, then you not only end up with a chalky, toothy surface perfect to stamp on, but also the textile medium permits a softer, more flexible fabric to work with. The answer was right under your nose all along *winks*}
Let me know if you give these techniques a go and if so what fabric/paper combinations you try, or what you choose to make with it.
Until next time take care,
Kindest Wishes,
Floss x
Instagram: https://www.instagram.com/floss_workshop.art/
I have various in person workshops coming up in East Sussex UK. Dates and details can be found here...https://www.flossworkshopart.com/book-online


.jpg)


.jpg)


3 comments:
Really interesting techniques - I learnt a lot. Also love the colour choice.
Absolutely Fabulousness!! You really rocked Gwen's stamps!! You should post these in her group on Facebook!
Bravo Floss!
You are a total GENIUS! Super project xxx
Post a Comment