2021 Topic 9: Baubles & Bling
With
a non-traditional colour scheme, using gorgeous pinks and purples that
Kay is well known for, she's created some wonderful hanging bauble cards
which, at first glance seem like CAS cards, but if you look carefully
she's created subtle layers with such a gentle sparkle.
~ Keren.
Hi everyone, it's Kay with you today, and I'm here to share with you some simple Christmas card makes.
For this project I wanted to show you why I designed my bauble stamp set (EKC22)
with plain baubles. This was to give you scope to have lots of
different decorated baubles. You can simply stamp them onto patterned
paper if you want really quick and easy decorated baubles or you can use
stamps/stencils to add decoration to them. Another option is to doodle
into them!
For this project I have used stamps that are contained on (EKC22) to decorate my baubles.
To begin I pulled out the stamp set and stencil that I wanted to use for this project - namely (EKC22) and (PS070) and
then made a decision as to what colours of Fresco Chalk Acrylic paints I
wanted to use for the baubles. I also had in mind for my 'bling'
element to use a twinkly embossing powder so I reached for my WOW!
Twinkling Lights EP.
My first step was to begin creating a background onto panels of 340gsm Smoothy card stock. For this, I used stencil (PS070) with Fresco Chalk Acrylic (Snowflake).
I had toyed with the idea of using (Metallic Glaze)
for my background but in the end as I knew there would be lots of
twinkle being added to the card later on I thought it best to go with
subtle interest at this stage! To be able to stamp different elements into the baubles I needed to create some masks.
The masks were achieved by stamping each of the baubles into the middle of an A4 piece of paper.
I
used a craft knife to cut out the middle of each bauble. (I keep these
masks [both the aperture and the solid bauble] so that they can be used
time and time again.)
Next I painted a panel of 240gsm Smoothy card stock with Fresco Chalk Acrylic (Snowflake) before stamping and painting the background of the baubles within a stamping platform.
As
I was going to be cutting out the baubles and adding them onto my cards
I wasn't careful with my painting. The photo below shows what they
looked like before I re-stamped them.
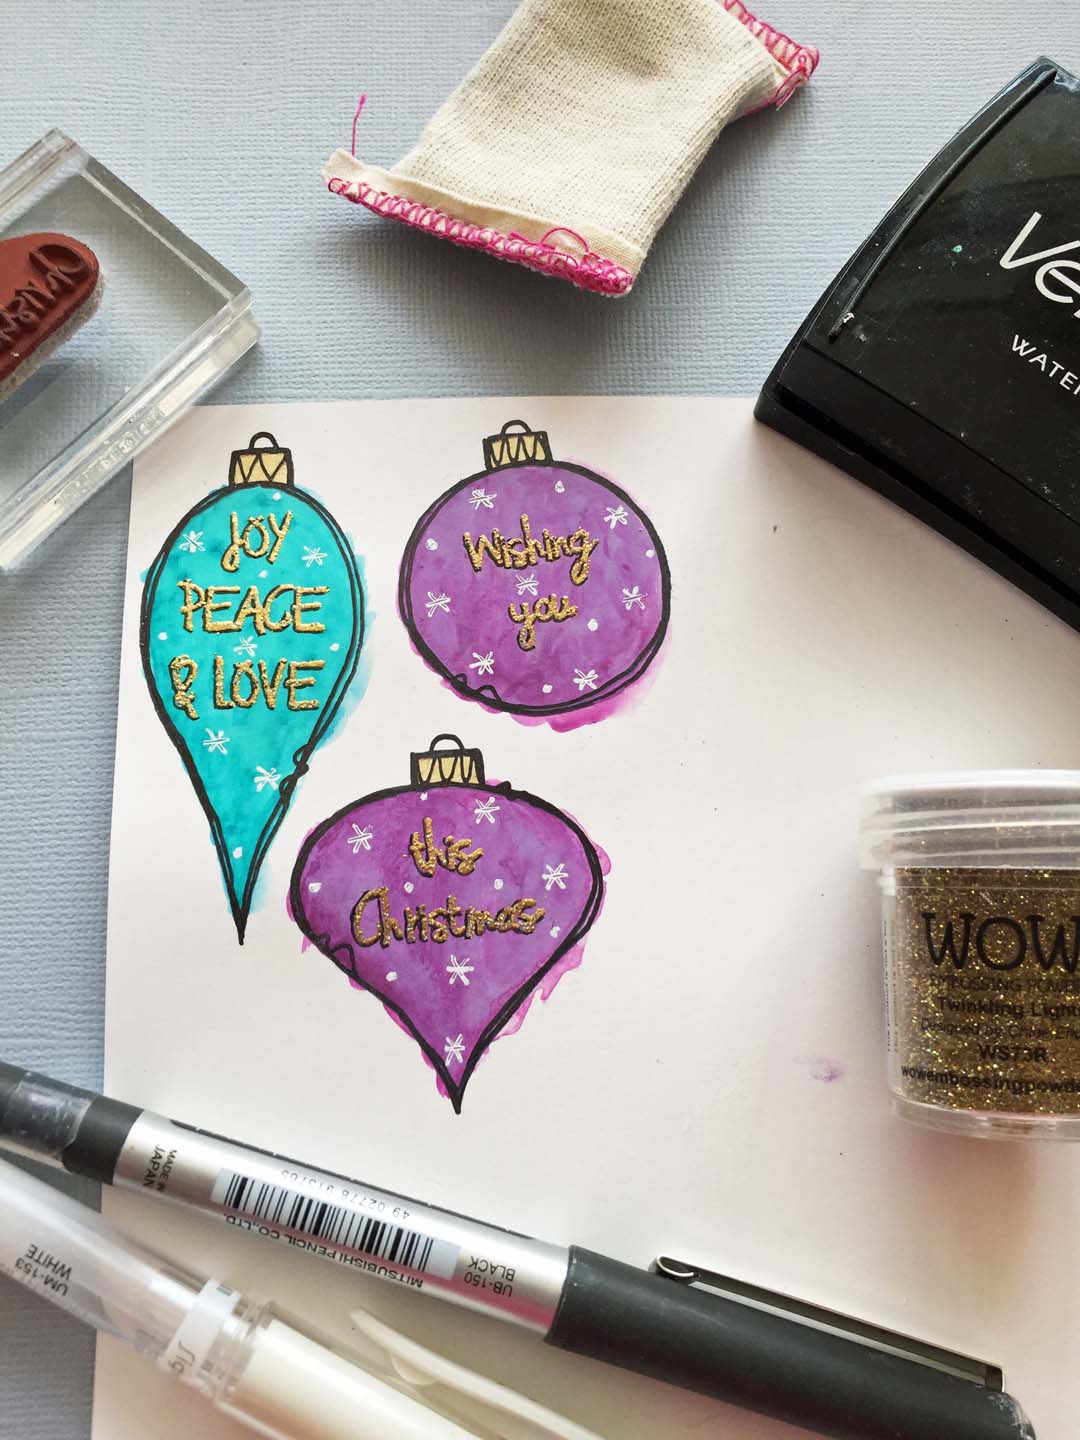
For these baubles I used (Caribbean Sea) and (Globe Thistle) for my base layers and then added a watered down mix of (South Pacific) for the turquoise bauble and (Purple Wine) for the purple bauble. The hanging element was painted with (Gold). Once
the baubles were re-stamped I then added my decoration using the WOW!
Twinkling Lights embossing powder along with some doodles using a white
gel pen. (These particular baubles didn't require those paper masks but
all my other baubles did!).
These baubles were decorated using the little background stamp contained on the stamp set instead of the holly.
Next I needed to stamp and emboss my different sized card panels.
As
I was working with a glittery embossing powder I made sure to dust my
panels first with an anti-static bag. Without dusting first I knew I
would struggle to get nice clear twinkly imagery as my large holly stamp
is quite intricate!
As
you can see I just adapted my stamping and embossing to suit each of
the different sizes of card panels. The panel sizes I used were DL, 6" x
6" and 7" x 5".
To
finish I adhered my card panels to card blanks and curled the baubles a
little by bending them over my fingers before adding them to the cards
with 3D pads.
I
used a gold glitter glue for the string to hang my baubles. To give me a
guide to follow I first drew the 'string' very lightly with pencil and
then traced over with the glitter glue.
Crystal glitter glue was used onto the holly leaves and dotted around randomly onto the card blanks to finish off.
As
you can see, having baubles that you can decorate yourself gives you a
lot of scope on creating a variety of Christmas cards. As I mentioned at
the very start, one of the quickest and easiest things you can do is to
stamp the baubles onto pre-printed patterned paper or onto any
background pieces that you have created yourself and may have left over
from other projects.
I
chose a modern colour scheme for my baubles but you can easily give
them a more traditional feel by choosing a red and green colour scheme.
Plus if you have a lot of cards to make you can omit the stamping and
embossing of the background panels and go for a very clean and simple
look. Or you may have a pine branch stamp in your collection that you
could 'hang' the baubles from instead and of course you can stamp the
baubles directly onto your card blank if you don't want them to look
'dimensional'. Lastly, being that the baubles are all separate stamps
easily enables you to adapt your layout depending on the size of
project/card you are creating. Lots of possibilities!
At
this current time, all of my teaching is being done online. You can
find details of all of my past and current online workshops over on my Crafting with Kay Carley Facebook Group.


2 comments:
These are just so pretty Kay! I got to play with these bauble stamps, though I don't own them, and fell in love. I really like the gold embossing with the vibrant colors and the white on white snowflakes is truly an inspired touch! xx, Autumn
They are beautiful Kay
Post a Comment