
"In this post I've been experimenting with making
backgrounds using inks and stamps and embellishing with a black pen. Grab yourself a cuppa and pull up a chair this is going to be a long read".
Splat
Card
First off I've got out the Distress Stains again and
splatted - seriously addictive this! I've gone for bright zingy colours but it
would work with anything.
I've cut a panel of white card (I've used white linen)
and splatted the Picked Raspberry, Peacock Feathers and Mustard Seed all over (the
Squeezed Lemonade yellow was a shade too light here). As they overlap they make
lots of other colours.

Then stamp your images over the top in StazOn Black Ink using
Pierrot Plate 1


Then paint over the focal areas in bleach - use basic
thick bleach and a cheap paintbrush (not your best sable brush - the bleach
will eat it up!) Go right over the Black StazOn, it won't be affected. Wait for
the bleach to work. I love the effect
as the Distress Stains leave hints of colour behind.
{Note:
I'm not sure how other permanent black inkpads react with bleach so you'll have
to try them out}.

Then get a fine black pen and doodle round the splats.

I've kept the embellishments to a minimum, just a couple
of brads.

Add some small circular stamping and mount onto black
card.

Here's another example using exactly the same techniques.

I've used the same colours but it's turned out a bit lighter - not sure why. The beads along the bottom are upholstery trim attached to ribbon that you buy by the metre - I'd like to say I spent ages threading them all but I didn't!
Stamped
all over Card
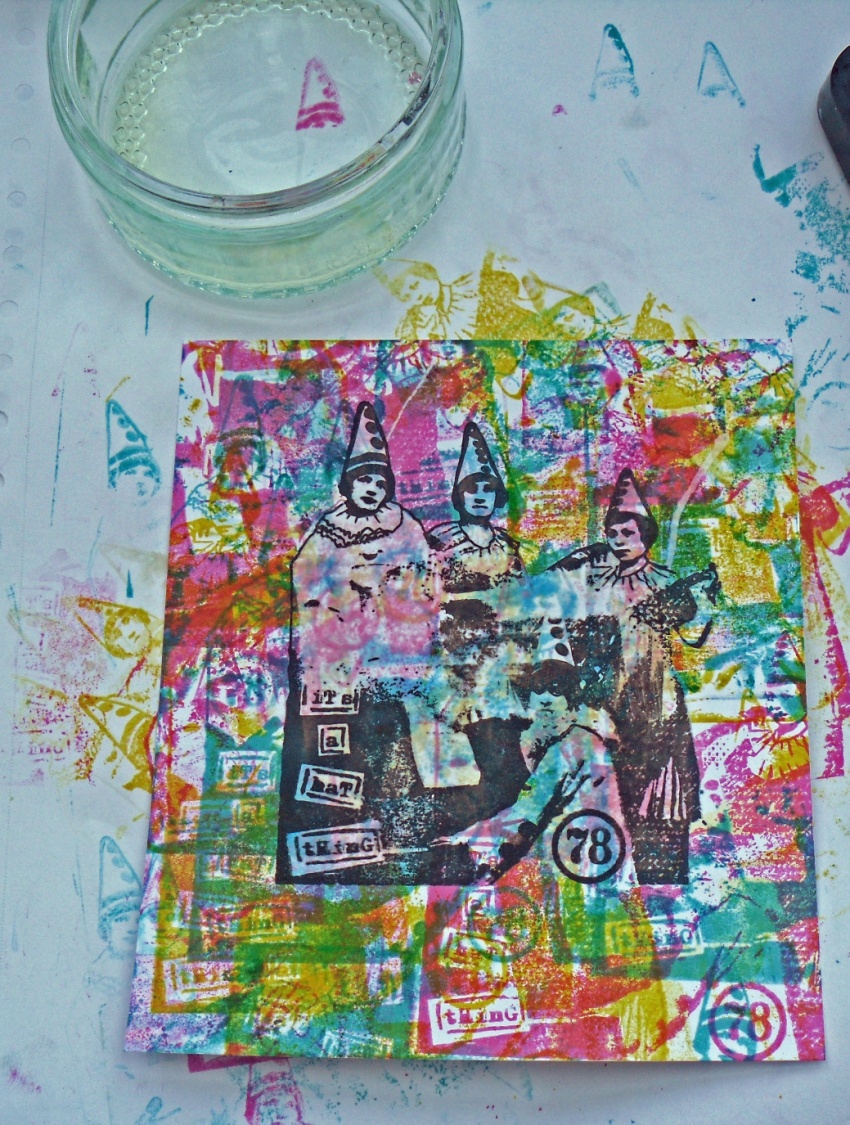
The next card uses the stamp as the main image and also
for building up a background and colouring in. I don't know about you but I
often spend ages trying to work out what background to use. With this technique
it all ties in as you use the same image and the same colours to build it up.
Problem solved!
So, cut a panel of card, get out your Distress Ink Pads
(Mustard Seed, Picked Raspberry and Peacock Feathers) and start stamping. Ink
it up in pink and stamp repeatedly without reinking. Repeat with the blue.

Add in the yellow, overlapping all the time.

Keep on building it up with the three different colours.

At this point it looks a real mess, but don't panic! Stamp in StazOn Black Ink over the top (you need
quite a juicy inkpad for it to show up):

I then tried bleaching out the colour from the main image
but wasn't really happy with the result.
I think there were just too many layers of stamping for
the bleach to work its magic. Never mind!
Instead I stamped it onto another piece of white card and
then coloured it by stamping the image repeatedly in the three colours as for
the background, but using the third or fourth impression so that it's lighter.

Then mount it onto the background.

After that I got out the black pen again and had a
doodle, added a little extra colour to the hats and text and then used the
stripey hat from Pierrot Plate 2 to create some corners.

To finish off add a little bit of lace (had to prize up
the image here as I'd already stuck it down!) and layer up on pink and
turquoise card.

Text,
Glorious Text Tag
It uses the tag and text from Pierrot Plate 4

Stamp your tag in black, create a mask with the centre
cut out and add the clowns from Plate 1 marking the back of the stamp to get
the right placement.

Then cut a full mask and start stamping the text over and
over in Mustard Seed, Picked Raspberry and Peacock Feathers Ink Pads.

Create highlights and shadows by repeat stamping with the
yellow and blue ink pads.

Add pink text round the edge for a border, stamp lightly
over the central tag to colour and soften with a paintbrush and water:

Finish off by stamping a border with the striped and text
hats (I've fallen in love with these!), a little bit of black pen and a tag
reinforcer from the large tag on Plate 1

Finish with looped ribbon (actually a shoe lace I had in
my stash that matched perfectly - knew I'd kept it for something!)

So there you have it, a few simple inky background projects , which are fun and easy to do. I hope you get the chance to play along.
Leandra Says: Always good to see how your projects come together, great depth achieved in building up those backgrounds!
Gillian Says: I admire your bravery with colour Helen, your projects always look fantastic.


13 comments:
What great backgrounds, and indeed focal images! Hope to get time to play tomorrow - have a serious shortage of distress stains though...!
Dear Helen, thank you for another amazing blog post! But please will you replace my friend's blouse. I was splatting today after yesterday's blog post. She wasn't splatting at all, in fact she didn't even have any Distress Stains in front of her, but she went home a different colour than when she arrived ........!
Lucy x
Helen amazing background tutorials, I really need to get these stamps they are so funky. Happy Crafting :-) Kezzy xxx
I love making backgrounds. Fab ideas using great colours & stamps!
Love the splats and bleach! I've never been brave enought to try bleach but I' definitely going to give this a go...
Love the effects you have here and the colours. I haven't done much bleaching. Question; neat bleach? Doesn't that leave a nasty residue that might poison/burn the cat/small children? Sorry health and safety brain kicking in!! Since you used distress wouldn't a cotton wool bud with water work to remove the colour? Or would the ink just react and sploosh? Love your splats and the way you have doodled around. Love the shoelace. I saw some in a shop the other day and thought those are bright, nah, I'd never put those in my shoes. Must pop back and buy. Great tag tie. Thanks for sharing.
Fabulous,inky projects Helen ! Looks like you had alot of fun ! Sue C x
Helen,
Your work is so fun and perfect in every way! I always love what black does to make colors jump out at you! Great job!!!
~Linda
You have such imagination Helen! I love your backgrounds, and especially the splat one. I'm off to try something very new to me. Thank you!
I need to put my thinking cap on and have a go at emulating Helen's work full on and full of colours.
Hi Helen love this splattering technique, have used it before but in a more random way, will now try overlapping and bleaching parts out. Great idea, thanks. Margaret
I tried this background that is so fantastic! Also I like this shoe lace. Thank you this tutorial.
Another fabulous tute Helen! So many techniques, I don't know where to start, but the inks are coming out!
Alison xxx
Post a Comment