Sunday, 17 April 2016

2016 Topic #8 White Space {Challenge}

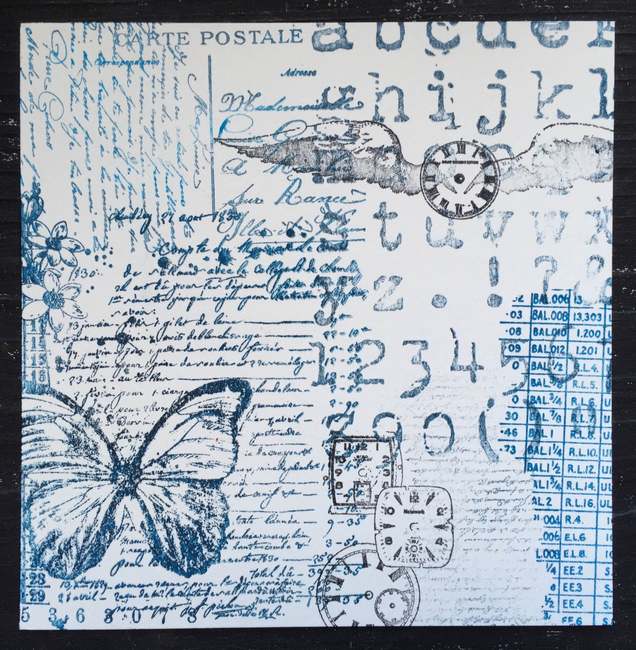
 2016 Topic 8: White Space

Kasia Krzyminska
Well hello everyone, Darcy here with a brand new topic for 2016. Easter is behind us and we are moving forward at a pace toward summer. Many people take this time to spring clean and declutter, and so this next topic is very fitting. 

White space is where a portion of the project is left plain, often totally unmarked. However this space does not need to be 'white' it can be any colour. The space though, should be clearly defined in its own right, it is, after all, part of the design. 

Often white space is called 'negative space' , and is the area left behind in relation to the focal image. But negative space done cleverly and with careful colour choices can become the more prominent of the two,  when it forms an interesting or artistic shape, it does not simply have to be 'background'. 

Bronwen Vaughan-Evans

Before we start, let's see who won the Topic 7: Resists Challenge...
Oh lots of  interesting resists from the past 2 weeks, pops of backgrounds showing through and a huge variety of techniques used. Relatively simple but so effective, I hope you will continue to use the techniques explored. 
The winner of Resists  is .... 
Challenge entry number 7: Lesley from Crafty love and hugs, you can see her entry here where she uses a rub-on, Hot Picks stamps and Golden's tar gel combined with inks to create a lovely tag! Thanks Lesley, and congratulations on your win!
Email Darcy to claim your prize. Darcydotneedles@hotmail.com
When you think about it, negative space supports everything else. Where would our typing be without gaps and spaces between paragraphs. Without white space the text would be crammed together and difficult to read. Take a look at advertising, the more expensive items will have lots of negative space, it is the illusion of class and opulence... less is more, and indeed costs more. The same applies to music, when there is a pause, this can be referred to as negative space. It helps make sense of the main elements.

The use of equal negative space, as a balance to positive space, in a composition is considered by many as good design. This basic, but often overlooked principle of design, gives the eye a "place to rest," increasing the appeal of a composition through subtle means.

Brendarose
I found this quote, which to me sums up the importance of white space perfectly. 
'Look beyond the obvious to see what is left behind, and find beauty in that' {The Drake" by Dick Sproul}

In ancient Japanese white space or negative space is know as 'Ma', this is the gap between two structural parts. It is best described as a consciousness of place, not in the sense of an enclosed three-dimensional entity, but rather the simultaneous awareness of form and non-form deriving from an intensification of vision. To put that in normal languague, 'ma' is how you interpret what is NOT there while also contemplating what IS there.
'Ma is not something that is created by compositional elements; it is the thing that takes place in the imagination of the human who experiences these element'.


Hasegawa Tōhaku
So that is the how and the why and a little history, so now let's look at some examples. You are all familiar with journal pages so we shall start there. I find it really difficult to leave white space, I always feel I have to fill the whole page with colour, but these are beautiful examples.

San-T

This page is striking in its simplicity.
IYA

This page by Mary Brack  at first glance seems to have a lot going on, but the spaces suspend the focal images so serenely, it truly is a calming layout.

Give your whole journal an air of tranquillity, begin with the front cover like this one from Kasia 


Minimal cards always look so elegant, these are often called CAS, clean and simple.

Bianca
This one from Heather shows perfectly that white space does not have to actually be white.


You might think that white space can only apply to flat projects, in books or on cards. However even 3d items in home decor can have white/negative space elements.

Kat Grieve
This piece has natural beauty in the wood, a simple addition of the gold bird is all that is needed. No need for layers or embellishments.
Ashley
These tree bowls from Barry Guppy make perfect use of the negative space, it has become such an important art of this design.


How about snuggling up under this beautiful quilt, the minimal use of colour really pops against the white background.

Rachel Griffith
Let's check out some larger pieces of art. Faces are particularly well suited to this technique, leaving areas that only suggest features.


Anajarockz
This one from Beverley Shiller could not be simpler, there is more white space than ink and yet you know exactly what this image is, it is truly amazing how the brain fills in the missing parts. 

I love this one, it really appealed to my penchant for recycling. The artwork is technically brilliant, but the background of ordinary cardboard adds so much, a lot more than you might think. Never overlook those PaperArtsy delivery boxes!

Jason Ratliff
In this piece from Megan Wells, the central are is unworked and is therefore the negative space, but in this case it is also the focal image by default as all the colour work is around it. 


This one by Kit Sunderland is similar, with the enhancement of the music paper as a background. Remember white space does not need to be white, or totally plain.


A lot of you will have had a go at scrapbooking, did you manage to conquer the 'white space' treatment like these pages.

Peppermint
Such simple elegance, hardly anything there but still so effective. The white space draws you in and leads your eye to the focal image.

Julie 
A final layout, again showing how well the negative space works to draw you to the main image, aside from that how gorgeous do those powders look against the black!


Let's finish with a few fun and funky ones.. Hands up who remembers string art?


JennMarie
Can you see the legs, my brain is telling me they are there even though they are not!


Susan Cutts
Perhaps you would like to have a negative space manicure. i am a little baffled by this one, I sort of like it but I am not sure why lol ( I thought I had stumbled upon a one off, but no, this is a real thing, there are lots of negative manis out there)


If all else fails you can always go for an 'inside out clock' 

Gilt
I hope that has given you some ideas of how to make the most of your white-but not neccessarily white space. Have fun over the next 2 weeks. 

Don't forget to follow Leandra's pinterest page if this topic pushes your buttons, you will see plenty more examples to whet your appetite there! 

I am really looking forward to seeing what you create over the next 2 weeks!


Darcy 

Topic 8: White Space PaperArtsy Blog Challenge


We'd love you to share your ideas and link up your creative response to our current blog topic. Take a minute to read the challenge guidelines below.

All links go in the draw to win a voucher to spend on products of your choice from the PaperArtsy online store. The White Space link will close 17:00 (London Time) Sunday, May 1st 2016, winner will be announced 2 hours later at 19:00.


1. The challenge is a for you to show how you are inspired by the current blog topic.

Your entry should contain:
- a mention of which post inspired you and why, and 
- a link in your blog post to that original post on the PA blog.

The whole concept of this challenge is 'play along with us'. You are encouraged to put your own twist on ideas you see on our blog, do your own thing - whatever grabs you!

2. The link you put on our linky page must lead directly to the specific post on your blog where you have explored the technique/ idea mentioned in point 1 above. Don't link to the home page of your blog.

3. We prefer your challenge blog post is created exclusive to our challenge, but if our topic fits perfectly with another challenge, then you may link to both if appropriate.

4. You are most welcome to use stamps/ products/ substrates you have to hand from a variety of companies, we do not expect you to exclusively use PA products - it's lovely when you do though!

6. You can enter as many times as you like. We don't want to restrict your creativity! 
NB. Link closes at 17:00 Sunday May 1st  (London Time)

7. The winner of the random draw will receive a £50 credit voucher to be redeemed on the PaperArtsy Website. The credit voucher includes VAT and postage. We request that one of your purchases is an A5 rubber stamp. You can add any other items to your basket, but the final total should not exceed £50.

8. Each fortnight on Sunday, the winner will be announced at 19:00 (London time). In the same post, the link for the next fortnight will be posted. 

9. It's your responsibility to claim your prize coupon from Darcy. 
email: darcydotneedles@hotmail.com

Good Luck! If you have any questions, don't hesitate to ask!

Saturday, 16 April 2016

2016 #7 Fossil Resist ATCs {by Alison Bomber}

 2016 Topic 7: Resists


Hello all, it's Alison here from Words and Pictures. I've not been around much lately but I couldn't resist joining in with the Resists theme, and it gave me the excuse to get two of the PaperArtsy Minis I've coveted for ages - finally giving in to temptation (like Oscar Wilde, I can resist everything but temptation!). Regular followers of mine will know that clear embossing is a favourite thing of mine - I love its glossy dimensionality - and it works brilliantly as a resist for the inkiness to follow.

I ended up creating a quartet of ATCs with these fabulously detailed stamps... one pair with the fossils lying in state in a fusty wooden drawer in some zoologist's collection...

... and one pair where they are in a kind of dream of the world they used to inhabit.
I started by cutting ATCs from some off-white card and stamping the fish fossils - Ink & The Dog Mini 100 and Ink & The Dog Mini 101 - in Versamark before embossing with clear embossing powder.

ID Mini 100
ID Mini 101
(You'll see I created a spare pair in case of problems or other ideas!)


For the zoologist's pair, I applied Distress Inks to the ATCs with a blending tool - Antique Linen followed by Vintage Photo and some Black Soot around the edges - keeping some damp paper towel nearby so that I could buff away any excess ink from the bones as I went. Then I did some spritzing and flicking, and also sprayed some Distress Marker splatter to add to the aged look.

I added some vintage script - the zoologist's notes, taken from the Ink & The Dog Words Plate 4 - stamped in Distress Ink so that it could also easily be wiped away from the bones. And finally I added the rub-ons to label the collected specimens, as well as the word stickers which I shaded around with more ink.

Ink & The Dog Words Plate 4

For the underwater pair, I applied my ink differently - pressing the chosen colours - my usual blue/green suspects, Broken China, Salty Ocean, Mowed Lawn, Peacock Feathers, I think - onto the craft mat, spritzing with some water, and then dipping and smooshing my ATCs until I liked the look of them.

I used the branches from Hot Picks HP1008 as seaweed, again stamped in Distress Ink so that the paper towel could spring into action to remove any excess from the embossed fossil.

HP1008

I painted some Snowflake Fresco paint on to my craft mat and then used the top of a paintbrush cover and the other end of the paintbrush..


...to "stamp" my columns of bubbles.


I always enjoy the gleam of the clear embossing in sunlight...
... and it gave me great pleasure to fit in just a little bit of Resistance in my brief few days at home recently. Heat embossing and inks are my favourite, but there are so many ways to create a resist, so I hope you'll be inspired to play with some Resists too. Thanks so much for stopping by today.
Alison x
Words and Pictures


Great smooshing Alison, a fabulous way to blend colours. The embossing resist is so magical, appearing all glossy and bright from under the ink. Great to see both colour options too, showing that these stamps work equally well in a vintage or a bright project. ~Darcy

We would love to see how you interpret this Resists topic by linking what you make to our 2016 Challenge #7: Resists, on this page HERE.
All of our bloggers love to see your twist on their ideas,  particularly if you were inspired directly by their post. 
All links go in the draw to win a £50 voucher to spend on products of your choice from the PaperArtsy online store. The Resists link will close 17:00 (London Time) Sunday, April 17th 2016. The winner will be announced 2 hours later at 19:00.

Friday, 15 April 2016

2016 #7 Blooming CD Art {by Alison Hall}

 2016 Topic 7: Resists 

Hi everyone Alison (Craftytrog) here. Tonight I'd like to share with you a post about using vaseline to create a resist with PaperArtsy Fresco Finish Paint.
I love using this technique for making backgrounds, as you can build up many layers, each time leaving some of the lower layers visible, and you get a lovely, random finished effect. I used an old CD as my base for a piece of hanging art, together with Emma Godfrey's beautiful floral stamp set EEG14 and some of my favourite bright Fresco paints.

Step One: I Began by priming my CD with some Chalk Fresco Finish paint, then I used Ranger Jet Black ink to stamp a background with the phrases from EEG14.

EEG14.
Step Two: I added a thin layer of Bora Bora Fresco paint, watering it down so that the stamping shows through. Then I used my finger to add some vaseline in a few places, where I wanted the next layer of paint to resist.


Step Three: I carefully painted the CD with some Zucchini Fresco, taking care not to spread the vaseline. After drying the paint with my heat gun, I used some kitchen towel to remove the paint where the vaseline had been. Oops...rubbed a bit too hard bottom right! But that's fine!


Step Four: I added some more vaseline, making sure that I wasn't covering too much of the lower layers, then painted a layer of Lavender Fresco, drying and wiping away the resisted paint as before.


Step Five: My final layer was some South Pacific Fresco. I wanted the top layer to be a bit darker.


Step Six: To make my embellishments, I painted some book paper with Bougainvillea and Tango Fresco, and stamped and cut out the two flowers from EEG14. I also stamped the phrase from EEG14 onto some unpainted book paper edge, and cut out each line and two of the words. I stamped the large flower onto the CD, just to check that it would cover the centre hole, then inked the edges of the CD, using Black Archival Ink and Ink Blending Foam.


Step Seven: I used Glossy Accents to layer the flowers and adhere them to the CD. I adhered the phrase, adding some Glossy Accents on top of the words. I then glued a small metal book plate and some buttons to the flower. At this point I decided to stamp another small Bougainvillea flower, and glued this just below the larger one. I decided to add some more tiny buttons next to the phrase, to add a bit more balance to my piece. I finished it off by punching two holes at the top with a Crop-A-Dile, and adding some eyelets and chain.


I hope I've inspired you to try out the vaseline/paint resist technique. It's messy and fun, and gives you a lovely random, layered background. It would be fantastic as a journal page, canvas, or card background. You could used unpainted stamped embellishments instead, as a great pop against a colourful background.

I look forward to seeing your resist projects for the challenge.
Alison x
Blog: Craftytrog's Inky Adventures
Facebook: Alison Hall
Twitter: @craftytrog

Thanks Alison, not only is this a great bit of upcycling but what a brilliantly effective technique. The effect is just like peeled paint, and can be easily controlled to be as subtle or as dramatic as you want. A really nice cheery piece of art. ~Darcy 


We would love to see how you interpret this Resists topic by linking what you make to our 2016 Challenge #7: Resists, on this page HERE.
All of our bloggers love to see your twist on their ideas,  particularly if you were inspired directly by their post. 
All links go in the draw to win a £50 voucher to spend on products of your choice from the PaperArtsy online store. The Resists link will close 17:00 (London Time) Sunday, April 17th 2016. The winner will be announced 2 hours later at 19:00.

Wednesday, 13 April 2016

2016 #7 Spring Wings{by Seth Apter}

 2016 Topic 7: Resists

Hello everybody. Seth here,  I am thrilled to be back for my first guest post on the PaperArtsy blog in 2016. The theme for today's project is resists. And who can resist a good resist? There are so many approaches to making resists and mine focuses on the wax crayon technique. I seem to be channelling spring with my colour choices, waiting for warmer days in NYC.


This piece started with a 6 x 6 inch square of 140lb cold press watercolour paper. The 140lb weight makes this sturdy and the cold press surface is slightly textured. I used watercolour paints for this project and I just love the way the colours settle into the nooks and crannies.

I started by gathering my (large) collection of PaperArtsy stamps. I pulled out stamps that were either text-based or image-based. I was not looking for any particular theme but rather a grouping of stamps that I could use to create a stamped collage over the entire surface of the paper.

Words 2
Mini 30
Using StazOn ink pads so that my ink would dry fast and remain permanent, I stamped on the surface creating a collage of images and text. I used Words 2 Mini 30 HPXT01 HP1301 and VID04 and VID09


HPXT01
HP1301
Next I took a white wax crayon and selectively coloured some of the surface of the paper. I chose to fill in the larger areas with spaces, such as the butterfly wings, bird wings, clock faces, flower petals and inner loops of the letters.


I then painted the entire surface of the paper with watercolour paints using a water brush. I used a spring palette, choosing yellows, reds, blues and greens and allowing all the paints to bleed and blend together. Once the surface was painted, I used a baby wipe to gently rub over the areas that had been previously covered with the crayon. Because of the wax, these coloured areas resisted the watercolour paint and stayed white. I was careful not to rub too hard so as not to dig into the paper below.


Here are a couple of close up shots showing how the white crayon has resisted the watercolour paints. 


Any paint on the crayon areas can be wiped away leaving the white areas bright and clean, this makes them really pop against the colourful paints. 


There are many approaches to resist in addition to the crayon technique but I find this simple and very effective. If you haven't tried it yourself, hope you are now inspired to do so.
Seth. 
Blog: The Altered Page

Who indeed could resist a page like this. thanks Seth for highlighting one of the simpler techniques. So often overlooked in the wake of all the fancier products. Getting back to basics has produced a fabulous page here, with a technique accessible to everyone ~Darcy 

We would love to see how you interpret this Resists topic by linking what you make to our 2016 Challenge #7: Resists, on this page HERE.
All of our bloggers love to see your twist on their ideas,  particularly if you were inspired directly by their post. 
All links go in the draw to win a £50 voucher to spend on products of your choice from the PaperArtsy online store. The Resists link will close 17:00 (London Time) Sunday, April 17th 2016. The winner will be announced 2 hours later at 19:00.