Friday, 26 August 2016

2016 #16 Shrink Jewellery {by Wanda Hentges}

2016 Topic 16: Beads,Charms and Dangles


Hi everyone!! It's Wanda Hentges (artbywanda.blogspot.com) here. Tonight I'd like to share with you a post about creating jewelry/charms/dangles with shrink plastic. 

I enjoy making jewelry and charms, even beads, with shrink plastic and this topic was a good motivator to get some done. Years ago I did some pieces with this same basic design!! It was great revisiting this and it will be fun to wear these or I might add the charm to a book or card. I have a scarf I want to wear the pin with. Since these are really light weight, the pin shouldn't "pull" the scarf when I have it on.


I'm using white shrink plastic and 2 oval punches. I prepped the shrink plastic by sanding it well with a sanding block. I sanded in four directions - horizontal, vertical, and both diagonal directions. Sanding in multiple directions gives tooth to the plastic and the surface doesn't show any of the sanding lines, it's smooth but not shiny smooth. 

Before shrinking, the larger oval I used is about 3" x 3 7/8". The smaller oval is about 2 7/16" x 3 5/16". After shrinking, the large oval is about 1 1/4" x 1 5/8". You could also use dies to cut the shrink plastic and they could be any shape - oval, circle, triangle, square, etc. - or go free form and cut whatever you want. 

 If you are using 2 shapes the same but different sizes and you want to place them together with even edges then it's important to cut both pieces of your plastic from the sheet in the same direction. The reason is the plastic doesn't shrink exactly the same amount in all directions. 


I used the larger oval to create the bottom piece of each project. I put texture in the piece by stamping the hot plastic with a rubber stamp inked with clear ink. I used the largest floral image on EEB08 and VersaMark ink. 

EEB08
I placed the piece of plastic on a thin cardboard covered with parchment paper, and put it in my oven at about 325 degrees. While it was shrinking I inked up the stamp. You have to work fast as the plastic cools very quickly. When it's done shrinking (you can tell this because as the piece shrinks it contorts and then will go back to laying flat when it is done), you take it from the oven, immediately place the stamp over the piece and press hard. You can even just set the cardboard directly on the floor, place the stamp on top, and step on it. You hold this for a few seconds and then take the stamp off. 

 You are left with a textured piece, that texture determined by your stamp. *I thought I'd taken a picture of the piece with just the texture in it (not finished) but I don't seem to have one* 


Below is the first project I did and I turned it into a pin. The bottom piece of plastic was done exactly as explained and then I used Treasure Gold in both White Fire and Brass to bring out the texture. I also put the Treasure Gold on the outside edge. After buffing, I sealed the piece with Treasure Sealer


For the top piece of plastic I stamped the flourish from EEB08 with Fresco Finish Paint Gold and let it dry, I then painted in the image with Hey Pesto and Glass Blue thinning the paint a bit with water to keep it very light. Any colouring done on shrink plastic before shrinking comes out darker after shrinking. To add colour around the edge of the piece I used Glass Blue and a fan brush to lightly make wispy lines. 


The picture below shows my cardboard covered with parchment paper, a pot holder, a large kitchen spoon, the plastic ready to shrink and an extra small piece of parchment to lay over the plastic when I press it. Again I used my oven to shrink the piece. You can use a heat tool but I like using the oven for these because the whole piece is evenly hot for either pressing into or shaping. 


Here is the piece after shrinking and using the spoon to make it domed. Once shrunk I took it out of the oven, quickly (but carefully) picked it up, put it on the spoon, placed a piece of parchment paper over it and pressed over it with the oven mitt.

 I actually found this to be a bit difficult as the plastic wanted to slide and you can't see through the mitt. I even had an edge that I did not like how it laid so I put the piece back in the oven to get hot again and then reshaped it without using the mitt. Yep, it was hot and I kept changing fingers but it was easier to control. After the fact I thought perhaps band-aids on my thumbs would have helped - protection against heat but I'd still be able to see what I was doing. 


A side view. This picture was taken after the first time I shrunk it and my long sides just didn't shape as well as I would have liked. See how it sticks up in the centre area... and the other side even did it a bit more.


I sealed the stamped piece with Krylon Crystal Clear. If this was going on a card or book, I might not have bothered to seal the pieces but if it's something I'm going to wear, I prefer it to be sealed. Once both pieces were dry, I glued them together and added the pin back. You can see in this picture how much nicer the front piece is shaped after being heated and shaped a second time. 


Here is my second piece. Before heating and pressing the bottom piece of plastic I punched a 1/8" hole in the plastic. When shrunk this leaves a place to add a jump ring or to just tie it onto something with string or ribbon. If you know you are going to use a thicker string or ribbon then start with a 1/4" hole before shrinking. 

 I painted the plastic with London Bus before shrinking. I just used my finger to paint it on very thin around the edges. No need to bother with the centre since it gets covered. The heating and stamping was done the same as with the first one but it wasn't stamped with the same area of that large flower image - notice how the pattern looks different then the first project. Once cooled I used Treasure Gold White Fire to enhance the texture including putting it on the edge. I then buffed it and again sealed with Treasure Sealer being sure my hole was open and not filled with sealer. 


For the front piece of plastic I stamped the small flower from EEB07 with Slate paint and let it dry. 

EEB07
Then I decided to paint it in with Neocolor II again keeping the colour light so that it wouldn't be too dark after shrinking. I also used the fan brush to add streaks of colour around the edge. 


When I made the first piece it was hard to keep the shrunk piece in place on the metal spoon. I wondered if using a wooden spoon would make it a bit easier so I used one instead of the metal and it did work better. 

 I also tried the whole band-aids on the thumbs idea :-) It worked really well. So I shrank the piece, pulled it from the oven, immediately put it on the spoon, covered it with the small piece of parchment and used my thumbs to do the pressing giving it a nice dome shape although not quite as high as with the other spoon. I sealed this piece with Krylon Crystal Clear and attached it to the back piece. 


I had a lot of fun making these and am itching to do more. I had actually not thought of doing a free form piece until I was writing up this post. I think that would be way cool maybe even adding a flip or curl here and there. I am looking forward to seeing what you come up with. Please be sure to link up your projects on the challenge post. 

Thanks for following along!!!!
Hugs, Wanda

Ohh the brooch is so pretty Wanda, and a bonus of being lightweight. Great colouring details and brilliant shaping tips. I love how you achieved the background texture, just genius. ~Darcy 

We would love to see how you interpret this Beads,Charms and Dangles topic by linking what you make to our 2016 Challenge #16: Beads,Charms and Dangles, on this page HERE. All of our bloggers love to see your twist on their ideas, particularly if you were inspired directly by their post. 
All links go in the draw to win a £50 voucher to spend on products of your choice from the PaperArtsy online store. The Beads,Charms and Dangles link will close 17:00 (London Time) Sunday, Sept 4th 2016. The winner will be announced 2 hours later at 19:00.

Wednesday, 24 August 2016

2016 #16 Textured Locket {by Dounia Large}

2016 Topic 16: Beads,Charms and Dangles

Hello, Dounia here from the South of France, suggesting how you could create a jewellery locket with chipboard and Grunge Paste. Intrigued yet ?


As soon as I saw the theme for this fortnight, I knew I wanted to make a locket. It is a double treat: a nice piece of jewellery and a secret inside it! For some reason I also decided to go with a subtle and classy color palette of ivory and gold. I probably felt I needed a(nother) challenge as I'm generally more an « explosion of colors » kind of gal!

At the end of this post, there is a video describing in details the process of building the locket, filling it and also making the necklace to go with it. Check it out for loads of technical information in my French accent (it's said to make everything sound sexier, you tell me?!). 

In this blog post, I'll be focusing on the actual locket and the Grunge Paste relief technique I used to decorate it as I think it's full of creative possibilities.

Step One: The base
For this project I also wanted to show you can make jewellery items using mainly things found in a « regular » crafter stash, no need for special tools or materials. For example, for the body of the locket, I needed a light but sturdy material with an already existing shape (everything I cut ends up wonky) so I turned to my chipboard stash and chose a classical oval shape. Those chipboards are quite thin so I ended up stacking 5 of them (two for the top and three for the bottom) but first I die cut arches in the inside ones to make the locket tiny secret niche. To keep the locket closed, I planned on using a small magnet and a piece of metal so I also made holes at the bottom of the chipboards to insert them. To glue my chipboard sandwiches, I used spray glue because it sets quickly and is mostly dry so I was sure the chipboards wouldn't bend.


I then gave my pieces two good coats of Fresco Finish paint in Vanilla, which is very close to the color of antique ivory. It is an opaque paint so it completely covered the patterns on the chipboard and provided a nice neutral base. 

For added interest on my background I covered all four sides with old book paper, gluing it with matte gel. For a more subtle look I used a mix of Matte Glaze and Vanilla to slightly tone down the text and finally declared myself satisfied with the background.

Step Two: The Niche
Now, onto decorating ! Even if it is hidden most of the time, the niche is an essential part of a locket and, in my opinion, should be a tiny teeny shrine to whatever you put inside. With that in mind,  it obviously needed gold. I therefore cut two arches, slightly bigger than the niche, from a gold metal sheet and shaped them with a paper stump to mould into the niche while also covering the niche and this also provides a nice frame around it. I spray glued them to the chipboard base then decorated the metal frame with patterned Ten Second Studio wheels and a fine teflon tip tool.


Step Three: Outside locket cover
For the outside of the locket, I fell in love with the pattern of the main stamp from...


...and wanted to recreate it in relief. After trying a few different compositions on scrap paper, I committed to a symmetrical one. For more control, I applied the chipboards to the inked stamp but I was probably too careful and the impressions were not the best... No matter, I completed them with a black permanent pen. Of course I then found them too stark and did another Vanilla glaze to tone them down a bit. That's the beautiful thing with paint, you can always change your mind !

Step Four: Grunge Paste Piping
Now those black lines are mainly guides for piping Grunge Paste. I got the idea from this post by Ruth (inspired by the PaperArtsy Grunge Paste fortnight a year back), and I've been experimenting with the technique ever since. 

I wanted to stay in the Ivory color scheme and Grunge Paste is naturally paler than that so I tinted a good dollop of it with a darker color, Haystack, to somewhat match the Vanilla I used for the background. I actually was too generous with the Grunge Paste but it's generally better to make too much and have some left to use on another project than to find yourself short and scramble to make another batch of the exact same color! 

Once satisfied with the tint, I made a piping cone out of Crunchy Paper. The wax surface is perfect for the Paste to slide on and as it is sturdier than parchment paper, I feel I have better control of the flow but that's just a personal preference ! I was ready to slowly add lines of Grunge Paste following the stamped pattern. I'm not a very good piper but thankfully, Grunge Paste is quite forgiving. As it dries rather quickly, it is better to work in small sections and correct any mistake immediately. When it is still wet, using a pointy tool like a toothpick or a needle, you can easily remove excess paste, correct curves or make lines flow into one another. When it is a bit drier, when a « skin » forms on the surface, you can better shape harsher relief like peaks and even add some impressions, like the hole in the bottom dot here. I left the pieces to dry overnight before giving them a good sanding. 

On another type of project, I probably wouldn't have bothered that much but I wanted to be sure it wouldn't scratch or catch on skin. Grunge Paste is quite porous so I sealed it with Satin glaze before adding a glaze of Slate to emphasize the relief. I covered to whole surface then wiped most of it, leaving it only in the dips of the pattern. A great way to create a permanent patina effect.

Step Five: Edges
I was happy with the surface, less so with the edges. I began by giving them a good coat of Gold Fresco paint but they were still too plain. To jazz them up a little, I decided to glue chains on them. You could easily substitute that for a nice textured ribbon or some embossed metal. I glued the chain with matte gel then added another coat of gel on top, filling the nooks and crannied while still keeping the chains relief. That way I was sure the gluing would stay strong and it also reduces scratching risk and dust gathering. However, the chains were a darker gold that the metal I had used for the inside niche so I used Brass Treasure Gold to bring some shine on the raised parts. I also lightly brushed some on the edges of the backgrounds to bring all the parts together. Finally, for strength, protection and smoothness, I sealed the locket with a generous layer of satin glaze finish.

I really love this technique with Grunge Paste. It is fantastic to add controlled relief on 3D projects. Jewellery is a good example, you can make simpler pieces like a brooch or a medallion and the raised pattern instantly gives it flair and interest. You can also choose a pattern with closed shapes that you then fill with different colors or beads or crackle paste ; the possibilities are endless !


Now, the body of the locket is finished and you could add a tiny picture inside it. I went with something a bit more abstract, and also made a necklace to hang it from (from a plastic bottle). 

Don't hesitate to check out the video for more information. 


Here's is a sneak peek :

I had fun thinking ways to use my stash differently and challenging myself to a more classical palette (you can see I broke down and cheated on the inside). Hope this project gave you a few ideas and made you curious enought to try new things !

Blog : http://doudoulina.over-blog.com/


Ohhh Dounia, this is fantastic. I love how you have explained this so perfectly! And I would never of thought to use chipboard layers to make a niche-locket! The metal chain looks perfect, such and elegant piece and the grunge past piping looks amazing!! Thanks for sharing with us! ~Leandra
We would love to see how you interpret this Beads,Charms and Dangles topic by linking what you make to our 2016 Challenge #16: Beads, Charms and Dangles, on this page HERE.

All of our bloggers love to see your twist on their ideas, so please link up what you make!

All links go in the draw to win a £50 voucher to spend on products of your choice from the PaperArtsy online store. The Beads, Charms and Dangles link will close 17:00 (London Time) Sunday, Sept 4th 2016. The winner will be announced 2  hours later at 19:00.

Monday, 22 August 2016

2016 #16 Dellow Dangles {by Lauren Hatwell}

2016 Topic 16: Beads,Charms and Dangles


Hi everyone Lauren here, and tonight I'd like to share with you this a very quick post about making beads and charms from stamped acetate. .

I chose this technique because it's quick, easy and effective. Kim's gorgeous elements are perfect for beads and charms. You can change your materials to suit your needs. I chose acetate because it is lightweight and easy to use but you could also stamp into Fimo, paper clay, silver clay. The possibilities are endless.


Step One: I used a few of my favourite colours of Fresco Finish Paint to colour a piece of fairly heavy weight Acetate. First I mixed some Mermaid with an equal amount of the Mod Podge Dishwasher Safe Medium (you could also use Gel Medium) and sponged it onto the acetate. Once that layer was dry I just spread on the other colours with a credit card in the usual way. I coated the whole lot with a layer of Pearl Glaze which gives a lovely sheen and really makes the colours pop.


Step Two: Next I stamped some of Kim Dellow's gorgeous shapes from EKD01 onto the painted acetate using Archival Ink which I then heat set to make it permanent.

EKD01

Step Three: Before cutting them out I added some dots of Glitter Glue just to lift them a little more and add a bit of light catching sparkle.


Step Four: For the next stage I pierced holes in the Acetate shapes and attached the them to each other with 5mm jump rings. Then it was just a case of threading them onto the earring wires (I got mine from Hobbycraft but they are easy to get hold of.


Just look at the gorgeous sheen you get. It really does look pearlescent. Gotta love those PaperArtsy glazes. They really do the job don't they. 


You could also make some beautiful charms stamping into something like Fimo or Silver Clay and maybe use some enamel dots for the detail. I think this would be a great project to make with older children in the holidays. I even made some charms using some old coins left over from trips abroad. Those few little bits that just aren't worth changing up again. They get shoved in a jar and saved. Why not coat them with Fresco paint, stamp them and add a bit of glaze and glitter glue to give them new life. The ones below are about the size of a Penny. I think they look really cool and they have a nice weight to them too. 


Thanks so much for joining me tonight. I hope it's been interesting.
See you again soon.
Lauren Hatwell


Thanks Lauren, fabulous sheen on your danglies! The Pearl glaze really transforms the surface. The sheer number of Fresco colours means you can have a pair for every outfit. ~Darcy 

We would love to see how you interpret this Beads,Charms and Dangles topic by linking what you make to our 2016 Challenge #16: Beads,Charms and Dangles, on this page HERE. All of our bloggers love to see your twist on their ideas, particularly if you were inspired directly by their post. 

All links go in the draw to win a £50 voucher to spend on products of your choice from the PaperArtsy online store. The Beads,Charms and Dangles link will close 17:00 (London Time) Sunday, Sept 4th 2016. The winner will be announced 2 hours later at 19:00.

Sunday, 21 August 2016

2016 # 16 Beads,Charms,Dangles {Challenge}

 2016 Topic 16: Beads,Charms and Dangles

Carolyn Saxby
Well hello everyone, Darcy here with a new topic. i am so looking forward to seeing your creations for this one, I love beads and dangly embellishments. We see them everywhere, in all forms of decorative and wearable art, made from every conceivable medium. 

Beads in particular started out not just as an embellishment but as currency, they were highly valuable, so much so that they were placed in burial tombs. This continued till the late 19th century. This beautiful blue glass bead was found in a 3,400 year old Danish grave, but after testing was found to have originated in Egypt, confirming well established trading routes. 


Where beads were a symbol of wealth, charms had other symbolic meanings, mainly concerning religions or superstitions. In ancient Rome, Christians would carry a fish charm in secret, so as to not advertise their religion. In other cultures various charms were worn to ward off evil spirits and to deter bad luck. This may seem very outdated but think about wearing a cross on a pendant or wearing a 4 leaf clover charm and you soon see that even today these traditions live on. 


Before we get arty, let's see who won the Topic 15: Patterns Challenge...
Wow, you all went pattern crazy! I saw so many fabulous uses in projects over the past 2 weeks. Everything from hand drawn to stamped, organic watercolour patterns and scrapbook papers. It is nice to appreciate patterns as they play such a great part in making life interesting. 


The winner of Patterns  is: Wendy from Wendy's House with her fab Escher pattern.


Email Darcy to claim your prize. Darcydotneedles@gmail.com

So let's dive into our new topic. Beads and charms have for all time been made from natural materials, such as stone, clay, glass, shells, wood and bones. 


Natural embellishments are always stunning, however not everyone has the skills or equipment to blow glass beads, or a tumbler to polish shells, and how do you drill holes in shells easily? Thankfully all these jobs are done for us and stunning beads are readily available to buy. 

What if you do want to recreate the look at home? Well how about these felted beads, they have the amazing patterning of glass beads but they have been needle felted. 

Jane Crowe
If bright colours don't inspire you how about going neutral, this felted necjpiece is breathtaking. 
Sarah Ball
Another fun way to make beads uses drinking straws covered with fabric, like these by Sherrill Kahn. A very talented mixed media artist Sherrill has some great books, one is all about Creative Embellishments. 


If fabric really is your thing then I am sure you will be inspired by these intricately stitched beads by Victoria Gertenbach


 Or these gorgeous beads made from vintage ribbons. 

Carmi  Cimicata
Another way to get the look of pretty variegated glass beads is by using UTEE, this is a brilliant video tutorial from Leandra showing just how it is done. The end result is stunning and can look just like dichroic glass. 


A more unusual medium for bead making is Tyvek. This is a synthetic product, the spun polyethylene fibers create a dense material. It is quite strong and not easy to rip or tear, and as such it has many uses from envelopes to protective clothing. Because of the density it protects from dust particles, however it is not heat proof, and this is where the artist takes over. Tyvek can be painted and stitched and then heated, it bubbles and melts, creating amazing, if unpredictable results. 

Carolyn Saxby
Another fantastic modern material is polymer clay, created in the 1940s it is used widely in arts and crafts. I don't think I have seen a more stunning piece than this necklace made with folded clay beads from Tanya Mayorova.  her Flickr is full of amazing jewellery. 


We can see that in the modern era we are having a lot of fun making beads and charms from plastics, fabrics, metals and wires and also papers. In fact paper beads are probably the easiest to make. They can be made from gift wrap, painted papers, old maps, book paper, magazines. Experimenting with different cuts of paper can result in some funky shaped beads. 

These are made from old maps. 
Gillian McMurray

..and these are from book pages. 

Renee
There is a handy, and simple guide to making paper beads HERE. 

This video from Lindsay Weirich is a fun way to make your paper beads look like they have a silver core. 

So now we can see how to make our basic beads and charms, but how do we use them in art? and how can we combine them with other items to make dangly embellishments. 

How about a glass bead garden sprinkler, so pretty, can you imagine the sun bouncing off these beads. 


Roberta Dunn
A fantastic combination here of chain, beads, and charms. 

Julie Thompson
When making hand made books I find they always look so inviting with beads on the spine, there are so many different ways to add beads to books. You could even just add in a bookmark with beads dangling out of the book. Note how on this book the idea of beads and charms is also carried around to the front with the use of the letter tiles and the key. 


Sarah Fawcett

Even a simple card can have the dangly treatment, whether you use beads, or buttons or like this card a punch out. 


Maile Belles
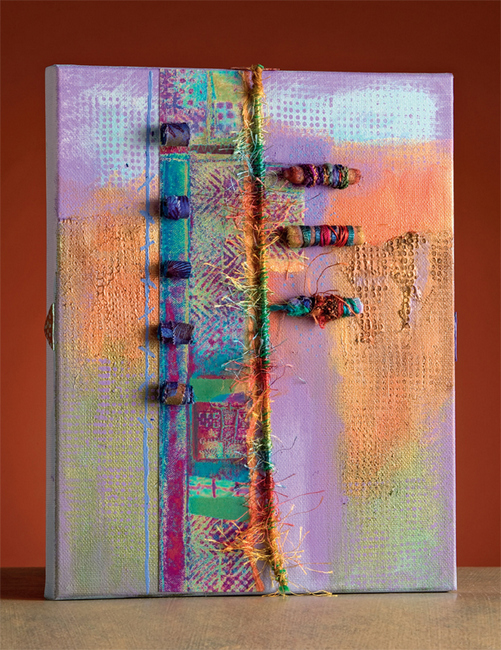
Wall hangings look great with danglies, even teeny tiny canvasses like this one. 

Becky Shander
The little hearts on this plaque are a great addition. 

Lilybeanpaperie
These tick a lot of boxes for me, some painting, some fabric and some beads. 


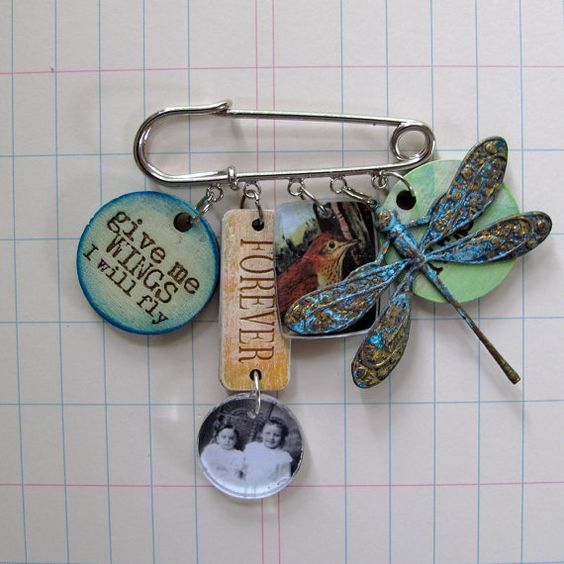
Not all dangly embellishments need to be beads, what about creating your own miniature pieces of art that you can hang from... well anything. Shrink plastic is a great modern substrate. You can use your favourite stamps and shrink them down into perfect little charms. 

They could hang from a kilt pin, how about attaching this to a coat lapel, or to a bag. 


Red Lea
Or you could make a key fob, do you remember this fantastic blog post by France Papillion. 


Another really useful item to have in your stash is wire, this can be added to all sorts of mixed media projects. I love these wired wrapped corks. What a great way to use corks from a celebration bottle. 


I have found some amazing photos of dangly art, these heads made me smile. 


Sophie Cave
For something a bit more achievable, how about dangling photos. I really want to do this, it is a very cool idea, and not just for photos.. how about hanging small pieces of art this way. 


Bree Thurston
I think this has to be my favourite dangling project, a beautiful, vintage upcycled lampshade. not only is it pretty it is so simple, just scraps of fabric . 
Dottie Angel

So have those inspired you? I hope so. I am looking forward to seeing all your beads, charms and dangling creations over the next 2 weeks. 

There were so many more examples that I wanted to show you, please check out  Darcy and Leandra's Pinterest boards if this topic pushes your buttons, you will see plenty more examples to whet your appetite there! 

Darcy


Topic 16: Beads,Charms,Dangles PaperArtsy Blog Challenge


We'd love you to share your ideas and link up your creative response to our current blog topic. Take a minute to read the challenge guidelines below.

All links go in the draw to win a voucher to spend on products of your choice from the PaperArtsy online store. The Beads,Charms,Dangles link will close 17:00 (London Time) Sunday, Sept 4th, winner will be announced 2 hours later at 19:00.


1. The challenge is a for you to show how you are inspired by the current blog topic.

Your entry should contain:
- a mention of which post inspired you and why, and 
- a link in your blog post to that original post on the PA blog.

The whole concept of this challenge is 'play along with us'. You are encouraged to put your own twist on ideas you see on our blog, do your own thing - whatever grabs you!

2. The link you put on our linky page must lead directly to the specific post on your blog where you have explored the technique/ idea mentioned in point 1 above. Don't link to the home page of your blog.

3. We prefer your challenge blog post is created exclusive to our challenge, but if our topic fits perfectly with another challenge, then you may link to both if appropriate.

4. You are most welcome to use stamps/ products/ substrates you have to hand from a variety of companies, we do not expect you to exclusively use PA products - it's lovely when you do though!

6. You can enter as many times as you like. We don't want to restrict your creativity! 
NB. Link closes at 17:00 Sunday Sept 4th   (London Time)

7. The winner of the random draw will receive a £50 credit voucher to be redeemed on the PaperArtsy Website. The credit voucher includes VAT and postage. We request that one of your purchases is an A5 rubber stamp. You can add any other items to your basket, but the final total should not exceed £50.

8. Each fortnight on Sunday, the winner will be announced at 19:00 (London time). In the same post, the link for the next fortnight will be posted. 
9. It's your responsibility to claim your prize coupon from Darcy. 
email: darcydotneedles@gmail.com

Good Luck! If you have any questions, don't hesitate to ask!