


Hi everyone, it's Renata Peley with you today, and I'm here to share with you a couple of winter and Christmas projects made using a selection of stamps designed by France Papillon. Originally, I wanted to create a few Christmas cards, then I went on making some canvases and in the end, I actually made both. So, I hope all these projects will manage to inspire you and get you in an early festive mood.

In my opinion, Autumn is one of the most beautiful seasons. Unless it’s raining all the time of course. :) If you look at nature, you can see an abundance of beautiful colors. And not just colors, but shapes as well. While some leaves are dry, crunchy and curled up (and I just love the sound when I walk on those), I can still find some green, fresh ones. And those green ones that I found while walking with my kids from the school were perfect for the project I have planned out.


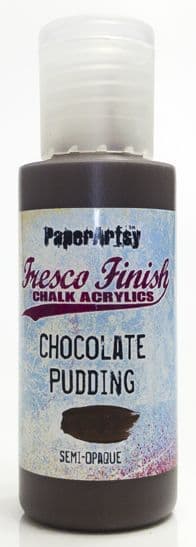
At the beginning of my crafting session, I decided to start with a couple of round canvases. For what I had in my mind, a regular rectangular canvas would have worked just fine, but I was in the mood to switch it up a bit. Anyway, the first thing I did was to completely cover one canvas with black paint (PaperArtsy Fresco Finish Acrylic Paint Little Black Dress) and the other one with a mix of paints (PaperArtsy Fresco Finish Acrylic Paints Caramel and Chocolate Pudding). For the second one, my goal was to achieve somewhat of a bright kraft paper color.



And now on to the fun part. When both of my backgrounds were dry, I decided to start working on the black canvas first. So, what I did was to take a random leaf, cover the back of it with PaperArtsy Fresco Finish Acrylic Paint Snowflake and stamp it over my canvas. I chose to use the back of the leaf because it is usually more textured than the front. What you have to be aware of is not to put too much of the acrylic paint on the leaf and to distribute the paint evenly. Then press your leaf carefully on your background and rub it in to transfer all those gorgeous textures.


Now just keep repeating the process. You can choose to use the same leaf over and over again or even better, choose leaves of different sizes. In this particular project I decided to go with same type of leaves, but if you wish you can experiment a bit and see how it would look using leaves of different shapes as well.

For the next step, I would highly recommend using a translucent paint, but if you don’t have one, you could try diluting your paint with some water. I chose to work with the PaperArtsy Fresco Finish Acrylic Paint Southern Skies. It is a beautiful translucent shade of blue and I covered my entire canvas with it.


At this point, I also reapplied a bit of the black paint on the empty areas in the background and went on to stamp the second layer of leaves. I repeated this whole process four times. But this isn’t a precise recipe, so you can try with less or more layers as well. The point of all this is to create layers of darker and brighter leaves and give the whole canvas a feeling of depth and dimension.


I was really happy with how this turned out, but I wanted a somewhat different effect on the other canvas. Personally, I enjoy how the white color looks on the kraft color background. It’s very simple but still elegant and stylish. So, for the second canvas I simplified things. I only had one layer of leaf stamping. Of course, you could try layering like I did for the first canvas, but I just wanted to show you that it can look really good with one layer as well. It all depends on the effect you are going for.
Also, let’s not forget that at the start I promised you that I will be making some Christmas cards as well. For them, I employed the same technique that I used for my second canvas. This whole process of leaf stamping can be somewhat messy as you can see on my craft mat, but the technique is quite easy and can be good for making a bunch of card backgrounds in one go.

Of course, I haven’t forgotten to put some white splatters as well on all four projects as a final move to complete my backgrounds. Below you can see how they look like at this stage.


Now the time came for me to work on my focal elements. For this I chose two stamp sets from the latest release from France Papillon. These stamps are really lovely and bring some cozy winter feel. From the FP030 stamp set I have stamped both birds and those cute winter hats and from the FP029 I have chosen a bunch of leaves. I have stamped, heat embossed, fussy cut my chosen images and then colored them using some watercolors. In this case, there is no particular reason for heat embossing the images, but I like that watercolor won’t dull the stamped image outlines as they would if the image wasn’t embossed.



With all of my backgrounds and the focal images ready, it was time to assemble my projects. As my backgrounds were rather flat, I wanted to add some dimension. I added a piece of corrugated cardstock and something else as well to each project. To some of them I will add some dried plants while to others a piece of textile or lace.

I adhered both cards to the card base and then to complete them, I needed a “Merry Christmas” sentiment. As I had none that fit these particular cards, I went on to type it on my own on a computer and print it out. I used this opportunity to test various font types and sizes, until I found those that I liked the best. I have also framed the printed sentiments with a piece of black cardstock.

With these few finishing moves, both of my canvases and cards were complete. I was debating whether I should put a sentiment on my canvases or not, but at the end, I decided against it. This is just a matter of taste and personal preference. Anyway, here you can see how my finished projects look like.



If you pay attention, nature can be quite generous when it comes to art. It is an endless source of inspiration but also art materials. For instance, you can use a simple leaf as an embellishment (dry pressed leaves), as a stencil or like in my case, as a stamp. Also, this technique is rather simple and (speaking to you crafty moms and grandmothers) it can be something to try with your children. When I was preparing for this blog, I first tested this out with my kids. It was fun as first we went out, walked in the neighborhood, looking for pretty leaves, then at home we were doing leaf stamping. I can pride myself on finding a great variety of leaves and got some interesting results.
Also, I know it is a bit early to start thinking about Christmas, but hey I am one of those people who likes to be prepared well ahead of time. :)
Renata 💜

Instagram: @renata_artjournaling
Pinterest: @peleyrenata


.jpg)
.jpg)
.jpg)
.jpg)
.jpg)
.jpg)
.jpg)
.jpg)
.jpg)

.jpg)


.jpg)
.jpg)
.jpg)
.jpg)
.jpg)
.jpg)

.jpg)
.jpg)
.jpg)
.jpg)
.jpg)
.jpg)
.jpg)
.jpg)
.jpg)
.jpg)
.jpg)
.jpg)
.jpg)
.jpg)
.jpg)
.jpg)
.jpg)
.jpg)
.jpg)


