Wednesday, 11 August 2021

2021 Topic 9: Baubles & Bling with EKC {by Kay Carley}

  2021 Topic 9: Baubles & Bling


With a non-traditional colour scheme, using gorgeous pinks and purples that Kay is well known for, she's created some wonderful hanging bauble cards which, at first glance seem like CAS cards, but if you look carefully she's created subtle layers with such a gentle sparkle.
~ Keren.

Hi everyone, it's Kay with you today, and I'm here to share with you some simple Christmas card makes.

For this project I wanted to show you why I designed my bauble stamp set (EKC22) with plain baubles. This was to give you scope to have lots of different decorated baubles. You can simply stamp them onto patterned paper if you want really quick and easy decorated baubles or you can use stamps/stencils to add decoration to them. Another option is to doodle into them!

For this project I have used stamps that are contained on (EKC22) to decorate my baubles.

To begin I pulled out the stamp set and stencil that I wanted to use for this project - namely (EKC22) and (PS070and then made a decision as to what colours of Fresco Chalk Acrylic paints I wanted to use for the baubles. I also had in mind for my 'bling' element to use a twinkly embossing powder so I reached for my WOW! Twinkling Lights EP.


My first step was to begin creating a background onto panels of 340gsm Smoothy card stock. For this, I used stencil (PS070) with Fresco Chalk Acrylic (Snowflake). 

 
I had toyed with the idea of using (Metallic Glaze) for my background but in the end as I knew there would be lots of twinkle being added to the card later on I thought it best to go with subtle interest at this stage! 


To be able to stamp different elements into the baubles I needed to create some masks.

The masks were achieved by stamping each of the baubles into the middle of an A4 piece of paper. 
 
 
I used a craft knife to cut out the middle of each bauble. (I keep these masks [both the aperture and the solid bauble] so that they can be used time and time again.)

Next I painted a panel of 240gsm Smoothy card stock with Fresco Chalk Acrylic (Snowflakebefore stamping and painting the background of the baubles within a stamping platform.


As I was going to be cutting out the baubles and adding them onto my cards I wasn't careful with my painting. The photo below shows what they looked like before I re-stamped them.


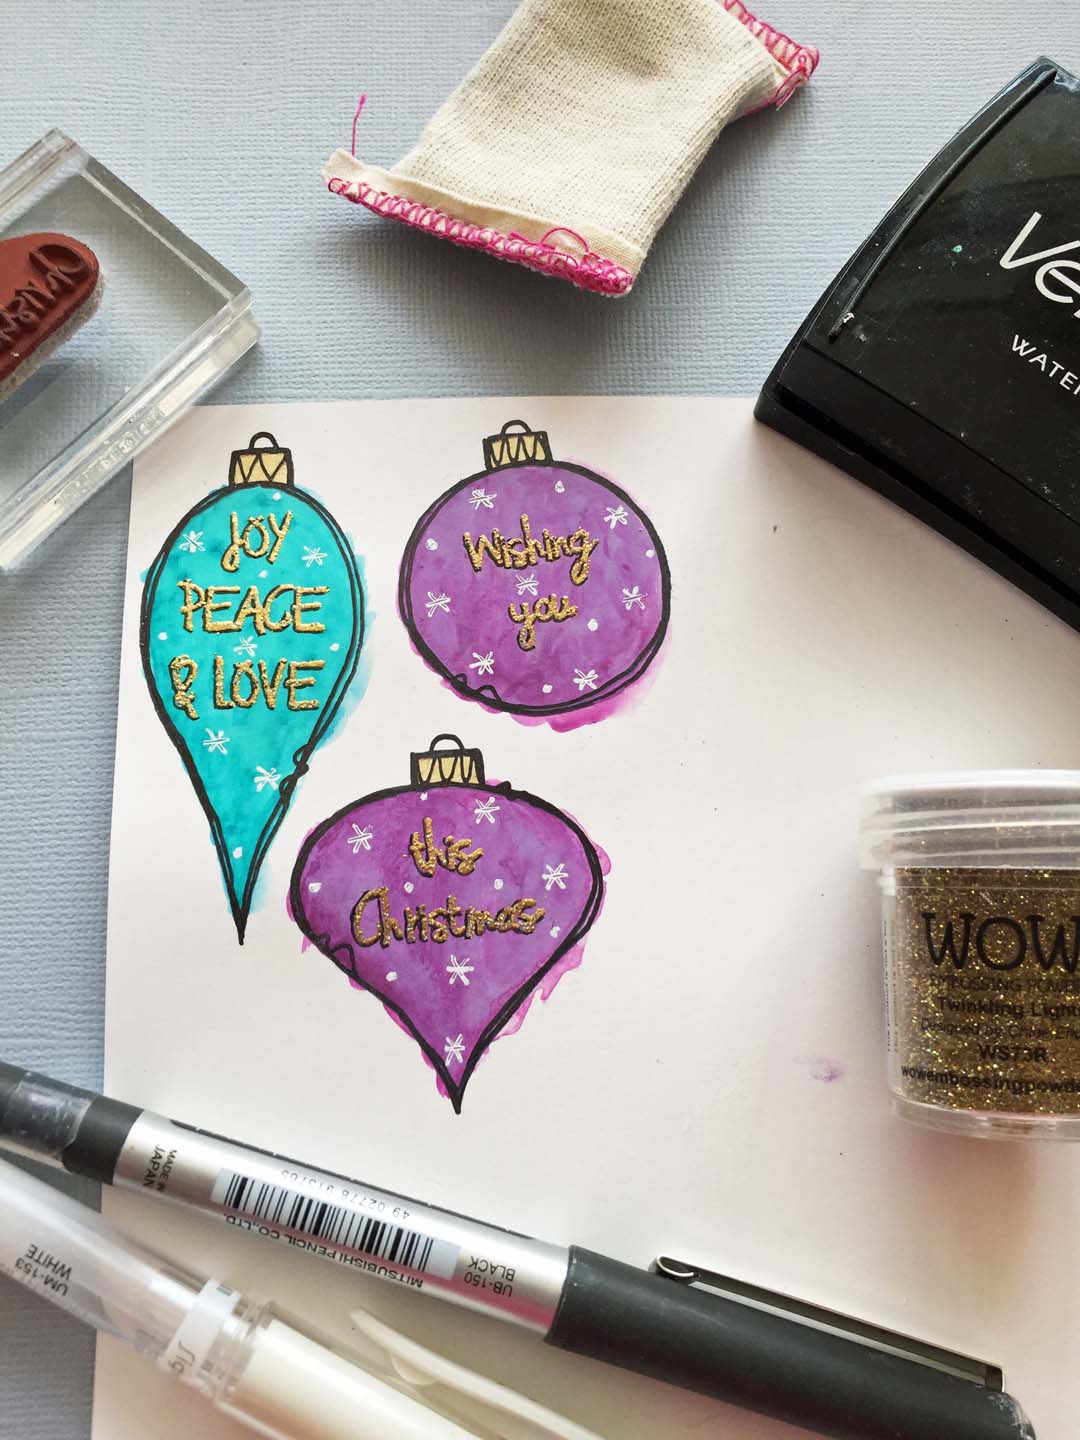
For these baubles I used (Caribbean Sea) and (Globe Thistle) for my base layers and then added a watered down mix of (South Pacific) for the turquoise bauble and (Purple Wine) for the purple bauble. The hanging element was painted with (Gold). Once the baubles were re-stamped I then added my decoration using the WOW! Twinkling Lights embossing powder along with some doodles using a white gel pen. (These particular baubles didn't require those paper masks but all my other baubles did!).


The next photo shows how the baubles were stamped and embossed with the small holly element contained on the stamp set along with some doodled white pen. The colours of Fresco Chalk Acrylics I used were (Globe Thistle), (Purple Wine), (Caribbean Sea), (South Pacific), (Bubble Gum), (Bougainvillea) and (Gold).


These baubles were decorated using the little background stamp contained on the stamp set instead of the holly.

Next I needed to stamp and emboss my different sized card panels.


As I was working with a glittery embossing powder I made sure to dust my panels first with an anti-static bag. Without dusting first I knew I would struggle to get nice clear twinkly imagery as my large holly stamp is quite intricate!


As you can see I just adapted my stamping and embossing to suit each of the different sizes of card panels. The panel sizes I used were DL, 6" x 6" and 7" x 5".
 

To finish I adhered my card panels to card blanks and curled the baubles a little by bending them over my fingers before adding them to the cards with 3D pads.


I used a gold glitter glue for the string to hang my baubles. To give me a guide to follow I first drew the 'string' very lightly with pencil and then traced over with the glitter glue.


Crystal glitter glue was used onto the holly leaves and dotted around randomly onto the card blanks to finish off.


As you can see, having baubles that you can decorate yourself gives you a lot of scope on creating a variety of Christmas cards. As I mentioned at the very start, one of the quickest and easiest things you can do is to stamp the baubles onto pre-printed patterned paper or onto any background pieces that you have created yourself and may have left over from other projects.  
I chose a modern colour scheme for my baubles but you can easily give them a more traditional feel by choosing a red and green colour scheme. Plus if you have a lot of cards to make you can omit the stamping and embossing of the background panels and go for a very clean and simple look. Or you may have a pine branch stamp in your collection that you could 'hang' the baubles from instead and of course you can stamp the baubles directly onto your card blank if you don't want them to look 'dimensional'. Lastly, being that the baubles are all separate stamps easily enables you to adapt your layout depending on the size of project/card you are creating. Lots of possibilities!

Love Kay x

Blog: Kays Crafty Corner
Facebook: Kay Carley
Facebook Group: Crafting with Kay Carley
Twitter: @carleycards
Instagram: kay.carley
Pinterest: Kay Carley

At this current time, all of my teaching is being done online. You can find details of all of my past and current online workshops over on my Crafting with Kay Carley Facebook Group.

Sunday, 8 August 2021

2021 Topic 9: Baubles & Bling with NEW EGL {by Keren Baker}

 2021 Topic 9: Baubles & Bling


Hi everyone, it's Keren Baker with you today, and I'm here to share with you creating a non-Christmas plus a seasonal project. I wanted to use some acetate bauble shapes and add some stamped images onto them. I was really happy getting to use Gwen Lafleur's new stamps and I am rather inspired by all her ticket images.

I wanted to do something non-Christmas- (onto that one later!) but the whole idea of using the stamps with a stencilled image seemed perfect. I decided to use acetate with Tracy Scott's PS159 stencil (because I never tire of acetate...ever!).


A little useful tip- find acetate with a removable thin film, so you can use a permanent pen to mark the shape onto the filmed side and when you've cut it out, removing the film takes the remnant of pen away.


I added alcohol ink to one side of the cut out bauble shapes and added some stamped tickets randomly on the reverse. I stamped with Stazon ink on the opposite side as otherwise it would have reacted with the alcohol ink and I didn't want to use Archival Ink straight on the alcohol as it'll ghost the image which I didn't want. I used EGL17 with these awesome tickets.


Now I grabbed as modern a book as I could find so the pages were whiter and auditioned them. I found the pages with less text looked better and let the beautiful ticket images shine.


I wanted to give the baubles 'bling' so added some Glossy Accents to the reverse of the stamped image and left 0.5cm around the edges to allow for seepage. Sprinkle some glitter on, flip it over and straight onto the book page. 


It's quite like the 'caught in crystal' technique, and after trying different amounts of Glossy Accents, using it in a scribbly fashion rather than aiming for full coverage meant less seepage.
Leave to dry completely, trim and then add decoration. Stamp out the leaves; it's amazing how just colouring any foliage red and green gives it a Christmas vibe.


It's not easy to see but I've used one of the images to stamp onto glitter cardstock. Using Stazon meant it dried but the rough texture obscures the image slightly. I trimmed some tiny 'v's along the bottom edge to make it look like a bauble top.


I could imagine these as tags too - you could write on the reverse.


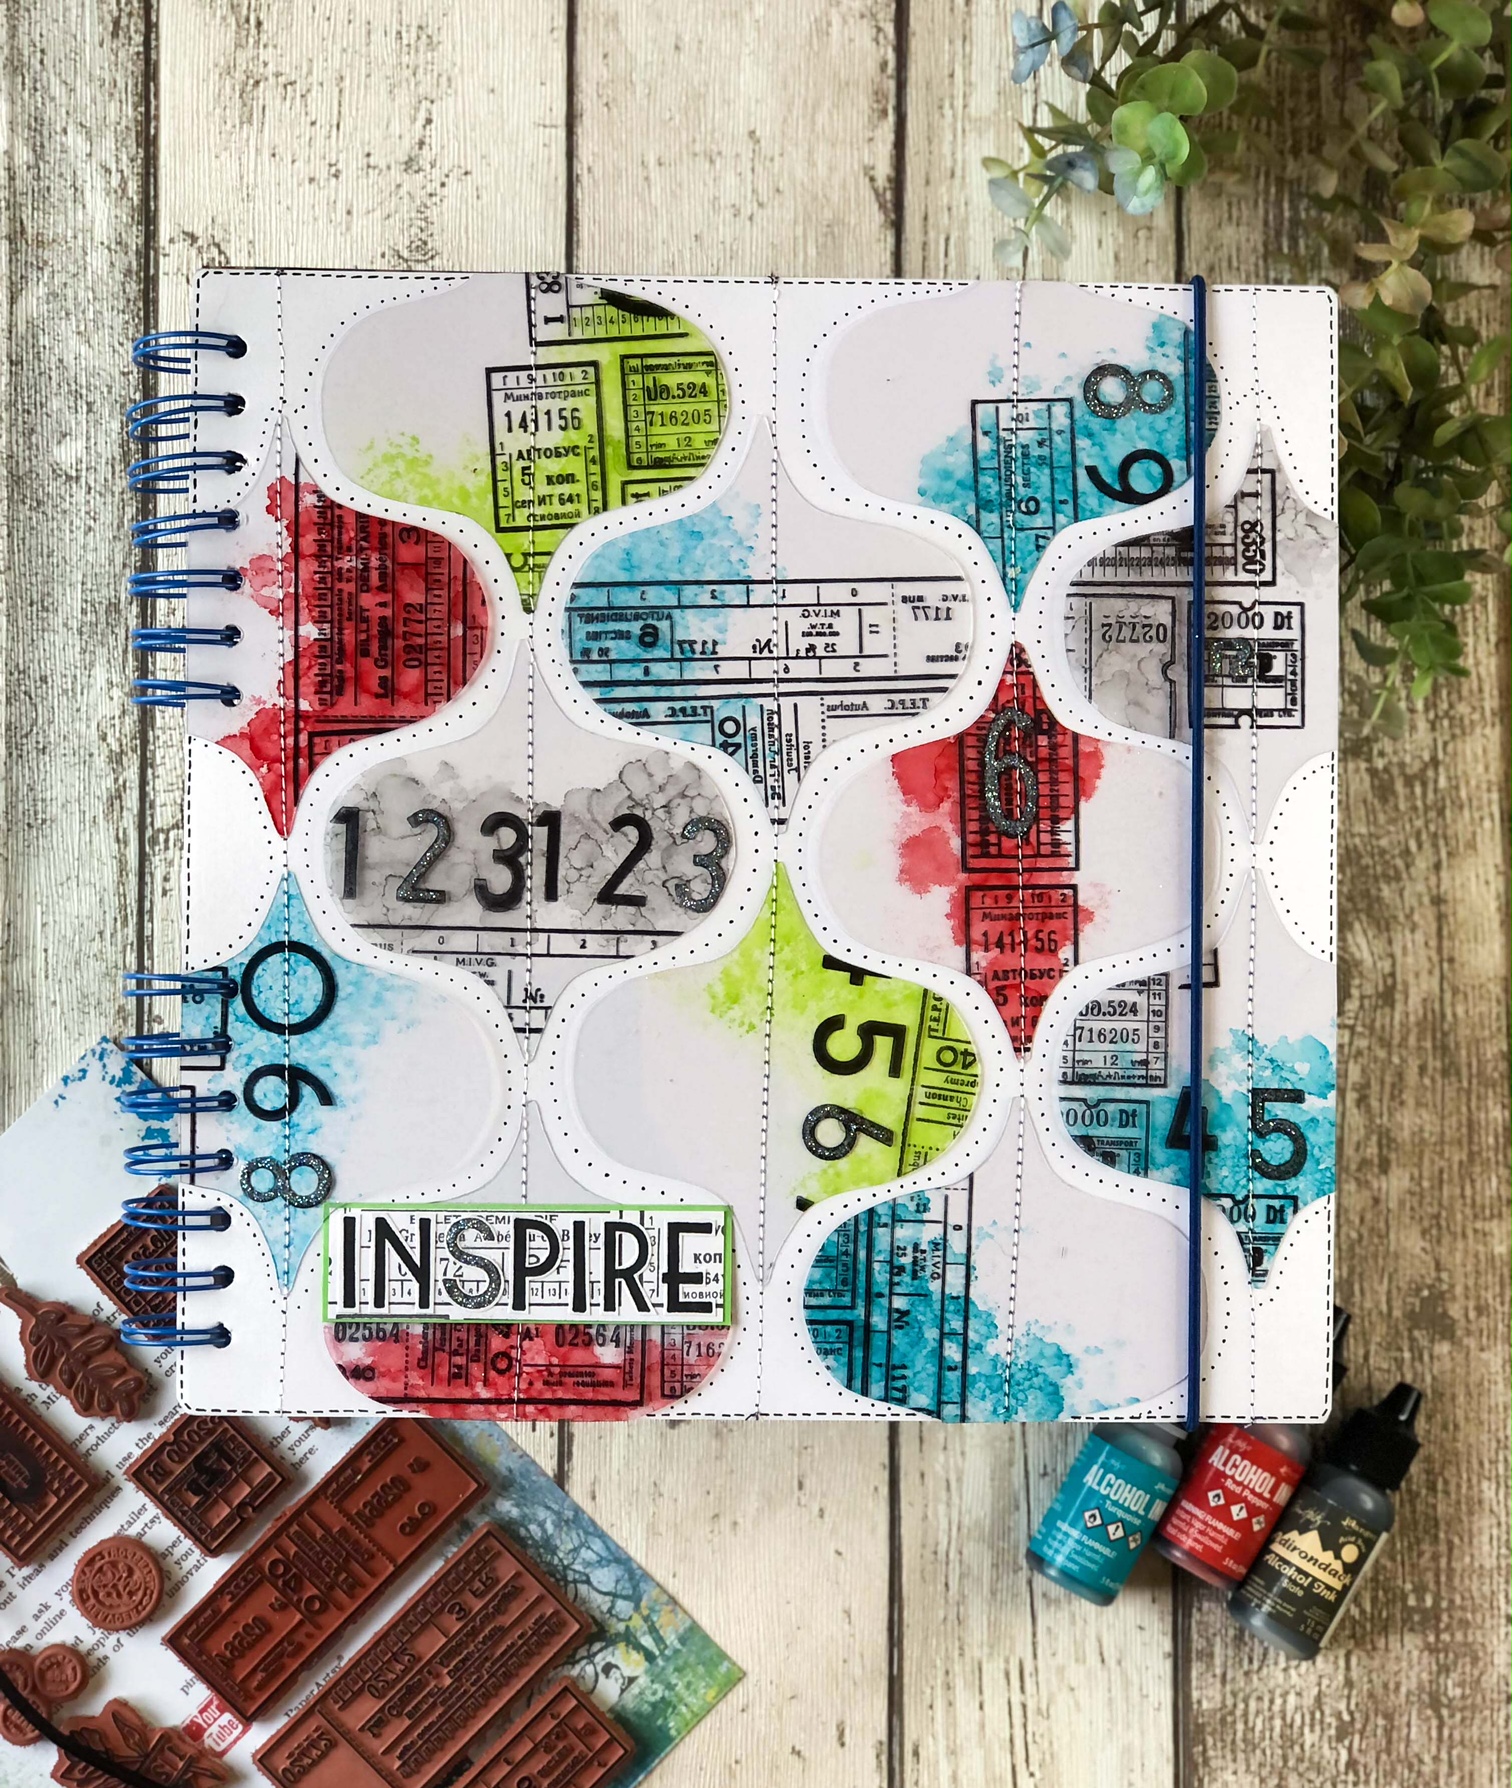
My second project was what I planned originally but when I used the larger bauble outlines on it looked too big for the journal cover. So onto the next one, using the smaller bauble outline on the stencil..


I followed the same process but didn't use the Glossy Accents. I laid the pattern out how I wanted it to look on the book.


I wanted to use some of the numbers and letters from EGL16. I really love the 20's feel they have to them whilst still retaining a modern bold look.


 I had an old rather ugly journal that needed a facelift. I decided that the only realistic way of attaching the acetate 'baubles' would be to sew them to another piece of cardstock. I trimmed the base card to size and after laying them out, added a tiny dot of glue to stabilise them before sewing. Sewing slippery surfaces is generally a recipe for disaster, even using a Teflon foot, so I used some baking paper to sew over using a longer length stitch that I could simply tear away afterwards.


To add a little glitter, I traced around the letters and numbers on the front. Having used black ink, the translucent glitter just looks sparkly black.


Glitter tends to get everywhere, sticking to the acetate, so you end up with extra sparkle! I now wanted to add a title, and some dots and dashes. For the title, I stamped the letters and trimmed them out adding them to a ticket stamped background.


There's nothing complex about the projects, just light and bright finishes. Gwen's almost vintage and bold images are wonderful to use and you can make them modern and clean or rich and even vintage.


One of my favourite challenges is trying to solve the problems that come when using tricky substrates, and how to combine different products but still let individual ones shine.
Creativity isn't always artistic, it's sometimes more to do with 'work arounds' and choosing new paths.
Gwen's new sets are super versatile and I can see them becoming go-to sets both for focal points and backgrounds too.

If you've never used acetate before, do try creating with it. I love the dual sided nature of the product - planning how to combine images and colours so they work together. Dig out your glitter or microbeads (that's my next project) to resurrect the 'caught in crystal' technique and see what you can come up with.

Thanks for being with me today,
Keren x

Blog:
Twitter:@craftstampink
Instagram: @craftstampink
Pinterest: @craftstampink