Showing posts with label FR4. Show all posts

Friday, 22 August 2025

Cards made with Hot Picks Products {by Katy Norgate}


 Hi everyone, Katy Norgate here with you; so nice to be back again.

This year on the blog, we have free rein to do a deep dive into a PaperArtsy product range of our choosing. For this post I have been exploring PaperArtsy's own Hot Picks designs. 

Today I'm looking forward to sharing with you the cards i've made and my process. Here is a closer look at the finished cards


Making cards is my go-to creative activity. Once on the production line I can create a batch of them, using the same style and products, but varying the colours. My last blog post used very neutral colours, so it was lovely to be back using some of Tracy Scott's pastel shades. While I didn't  experiment with colour charts this time, you can see some of the variations made by slight blending of colour on the page. 

I have enjoyed creating layers and dimension. 


The Hot Picks range has so many designs to choose from, it took me some time to decide which sets I was keen to play with, as i loved so many!. I finally opted for these floral designs above HP1505 and HP1602 I like the range of mark making stamps to complement the main featured flowers. 

I worked on PaperArtsy smoothy card stock (SCA4) since it copes so well with all types of wet media, and since I wasn't exactly sure what I might throw at it! I used the PaperArtsy grunge paste (GP190) for added texture. 

I have incorporated elements of these mini stamps MN28 and MN114 from the PaperArtsy collection, for additional mark making and textural elements.


I always prefer to use some stencils when making the background elements. I have used PS456 and PS457 from their release back in March this year, and are available from PaperArtsy Stockists, in addition to these minis from earlier collections PM024 and PM025

Here  are the colours I chose from the Tracy Scott range of Fresco Finish chalk acrylics Sunshine (FF223), Shutters (FF207), Aqua Duck Egg (FF199) and Flamingo (FF226) I used my trusty brayer (PABRAY1) to apply the paint. 

Add to this mix some bits and bobs of old medical gauze and cotton thread, inks and embossing powders, that is about everything I have used


Sticking to 2 of the 4 colours at a time, I brayered paint onto a craft mat then gently applied it to the smoothy cardstock, which I had first cut to size, for the card blanks i was using. Rolling back and forth until I has happy with the coverage. You can see this simple process in the photos below. I repeated this on several pieces until the paint was used up.


Not wanting to waste any leftover paint i applied paint through stencils PS456 and PS45 using a sponge. You can see below how these colours made a lovely orange too.


I had a go at using all 4 colours together with a much larger brayer, with mixed results. What do you think? I might use them to stamp some of the flower heads or butterflies on, rather than as a background.


Here is a selection of backgrounds with different  2 colour combos. I tried the flamingo and shutters together but it was not my favourite so didn't include them.


Next I stamped out the images with versafine ink, again onto smoothy card stock and heat embossed with black or white embossing powder. I also stamped and embossed the butterflies onto Dura-Lar matte film.


I added some embossing to some of the background pieces using the stencils. If you apply the embossing ink, using a sponge, through the stencil it works well.


So now to bring the elements together to finish my cards. Firstly I used some of the mark making stamps in the set PS1602 using archival black ink and analogous distress inks.


I used the same distress inks to colour some of the cut out images, and started to build the elements with the gauze and thread.


I added grunge paste through the smaller stencil PM025 onto some of the backgrounds.


Below I have stamped the floral image directly onto the background, and used the cut out embossed piece to superimpose over it, but slightly off set. 


More mark making with the addition of MN28 and MN114.


Here's another card in progress, using one of the stencilled backgrounds. I've painted the poppy using my watercolour paints. 


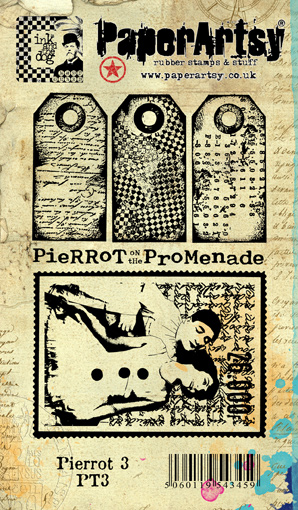
More stamped elements using an unmounted stamp from the PaperArtsy ink and dog range  Frames Plate 4 (FR4)


I distressed the edges of this background.


And here is another colour combo, maybe my favourite, Aqua duck egg  and sunshine, along with grunge paste elements and mark making with inks


There are so many possibilities with this collection of stamps. For this one I have stamped and heat embossed the poppy head onto a spare background, cut it out and then superimposed it onto another background with the same un-embossed stamped image.


So here you have several cards made using the same techniques described above, with these very versatile stamp sets, fresco finish paints and some texture elements. So many possibilities, it was a very absorbing and enjoyable crafting session. I hope you will give them a go yourself.


Facebook: Katy Norgate
Instagram: katy_norgate
Pinterest: Katy Norgate

Sunday, 18 September 2022

2022 Topic 13 : Fabric {by Etsuko Noguchi} with Ink & the Dog stamps


Hi everyone, it's Etsuko (My favorite things) with you today, and I'm here to share with you the Needle Book. I've created for the current topic: Fabric, using Ink & Dog by PaperArtsy Collections.


I've always wanted to give fabrics a rust-colored stain effect, And for the current topic this time was 'Fabric' so  I tried this effect with PaperArtsy Ink & Dog stamps with Rusting Powder, and decided to make the Needle Book to use when embroidering fabrics. I am very happy to be able to use my favorite Pierrot and Fairy stamps here and show them to you.


Let's get started. The first time I'm going to show you is the supplies. I used for this project and this time I finished with iron rust stain, stitch and stamping without using paint.


Next as you can see these supplies, to make the rust stain effect on the fabrics. I prepared PaperArsty Collections Ink & Dog (ID-PT2ID-WGS3ID-FR4,) PaperArtsy Rusting Powder, Vinegar, Versa Mark and linen and cotton fabrics.


PaperArtsy Rusting Powder is much finer than embossing powders, and as a metal of course it is not embossable, but you can use it with embossing ink. The idea with rusting powder is to help the metal powder grab to a surface, then slowly help the metal particles to rust by adding water (spritzing). The addition of an acid like vinegar or lemon can speed the process up. This seems to work best on natural fibres like fabric, wood. The powder is fine enough to reveal the delicate detail within stamped images, but please be careful not inhale in the particles when tapping off excess powder from the back. They tend not to be airborne easily as the particles are heavy, but it is common sense with any craft powder to take care.


Previously I have used rusty nails and hardware to make stains on papers and fabrics, but this is my first time using stamps, so I was little worried. I stamped with VersaMark (in the same way as embossing) and sprinkled powder over the image, then tapped off the excess powder and placed the fabric on a tray. I sprayed the vinegar 2 or 3 times on it (you want to keep it damp over a period of time to allow it to rust) to get good results, the other option is to spray it and leave it overnight. Versamark is quite a sticky ink, so the powder will 'grab' to the ink. 

After the above process is applied and left overnight, the powder is rinsed off the the fabric allowed to dry. On the left is the result of less time and less vinegar. The difference to traditional ink and 'embossing' is that with rust, the stamped lines become more blurry as the rust travels, and so things are likely to be less sharp than ink of course, but I like it. I used the sample on the right for the project book cover.
 

I masked around the image with Post-it notes to reduce bleeding of the vinegar. I used this fairy below on the back cover. I put her Pierrot hat on found from PaperArtsy collection Ink &Dog set (ID-PT2)


Since I didn't use paint, I made a pattern with Ink & Dog set (ID-FR4) and PaperArtsy Hot Pics set 1304 (HP1304) stamps with PaperArsty  Rusting Powder on fabrics, then ripped or slow-stitched them and I made a collage for each page.


Here is how I attached and made the accessories and the lace frame for the cover in the final stage.


Vintage spools from PaperArtsy Hot Pics set 1214 (HP1214) were stamped onto the Smoothy (Heavyweight) A4 white card by Ranger Archival Ink (coffee) and I used it to wind the thread around.


In the same way, I have used PaperArtsy Scrapcosy set 09 (ESC09) with Ranger Archival Ink (coffee) on the Smoothy (Heavyweight) A4 white card and I made 'Handmade by' tags. Such tags are very useful when gifting.


Now let's take a look how the fixtures were made to complete the book and finish the pages. I decorated around the cover image with several types of lace and made the book belt from the leftover fabric. The Pierrot's hat was stitched from (ID-PT2).


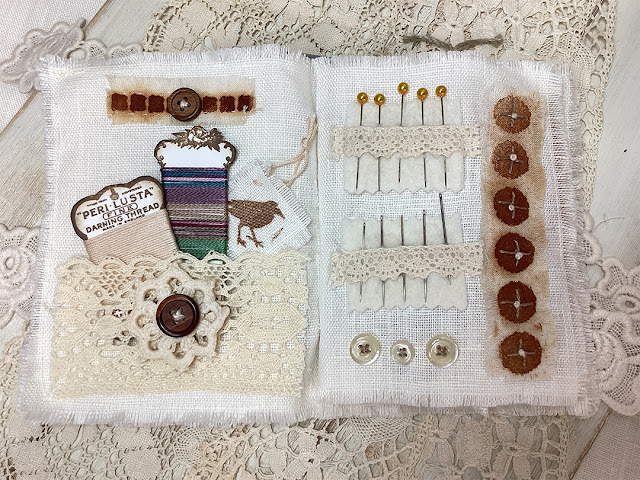
The first page was collaged with (ID-FR4) framed pattern stains, with the previously made spools of  thread in the pocket. It can store the pins and sewing needles are on the right page.


I have finished the needle book by placing the supplies on each page in this way.
I always wish the fun of composing this would never end! These 'Handmade by' tags were placed in the last page pocket.


The pretty fairy (ID-WGS3) is on the back cover. The Needle Book measures 5" x 4" and just is the right size to keep in a bag or sewing box.


My goal of this project 'Needle Book' was to keep it simple, making the most of the rust stain marks and the raw linen. I made that it would always be by my side when I start sewing or embroidering, that it would not get in the way, and I could enjoy it when I opened it. I used things that are all around us. Why not make your own? 
-For reference-  
There are still many ways to use Rusting Powder for a paper and fabric, such as using stencils, sprinkling powder around leaves or other thin shaped object as if they were masking, making rust water and soaking paper, cloth, etc. in it to dye. I think it's good to soak overnight in water with salt or vinegar to stop the colour. 
Rusting Powder is available at stores that carry PaperArtsy.

Thank you so much for visiting.
Etsuko xxx


Facebook: Etsuko Noguchi
Instagram: Pixienest
Pinterest: Etsuko N