Hi everyone Etsuko Pixienest here with you today.
For my first blog in 2025 I selected a set of past HP1506 butterflies from PaperArtsy collection of nearly 80 HotPicks to create a slightly vintage card. And when I got my first PaperArtsy stamp, I was eagerly waiting for it to arrive because I knew it would expand my world, and that feeling hasn't changed.
For this project I used the slightly newer Hot Picks stamps HP2401 and HP2402 to make small labels and tags for decoration and Seth Apter tissue PT06 for the card background. I was very impressed with the great effect this large patterned tissue produced. I first became aware of the tissue paper technique from a Leandra tutorial 10 years ago, which I have included a link to if you are interested. Leandra's tissue tutorial
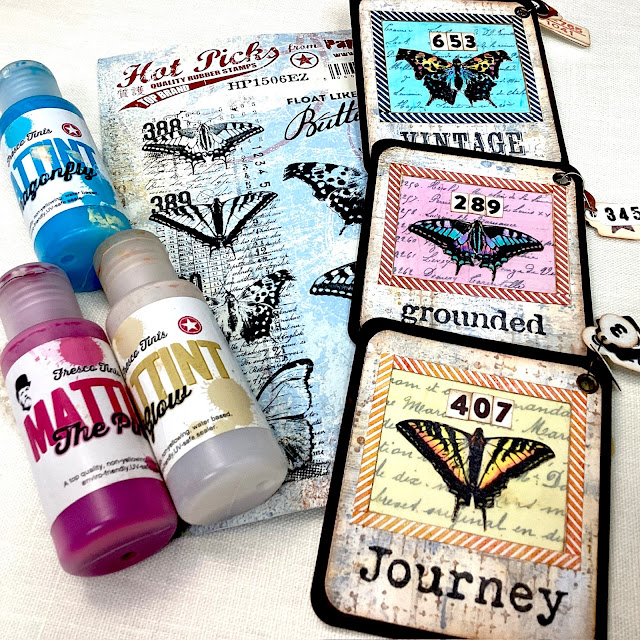
These are the main supplies used in this project. The paper and paints used for the base are presented in the next layer section. The stamps are mainly HP1506 and other HP2402, the Printed tissue papers are Hot Picks PT07 and Seth Apter PT06, and Mattints (The pink, Dragonfly and Glow ) were used for colouring. Mattint works very well with tissue paper and is used frequently.
Mattints were chosen for colouring on tissue paper because of their brilliant transparency and the fact that they can be applied without damaging the paper. And it worked smoothly. I love them!
Ranger Distress Oxide Spray-chipped sapphire and Distress Spray Stain-hickory smoke using a brayer applied randomly over the the Smoothy (heavyweight) A4 white stamping card , allow to dry, knock down with PaperArtsy Fresco Finish Chalk Acrylic - Snowflake and distress in places with Ranger Distress ink - vintage photo using a blending tool. The base background was created. You can also dissolve Infusion in warm water and put it in a spray bottle and use the same method to make a background for a vintage piece, when you have a time.
The paper was then cut into pieces according to the purpose for which the photo-slider were to be used. Round cutters were used for the four corners of the photo-sliderr.
This is the photo-slider for focal point butterfly. Rectangular windows were used for a die-cut.
HP1506 butterfly stamp stamped on A4 Card with Ranger Archival Ink-Jet Black and coloured with coloured pencils.
On the same paper, the script section of Hot Picks PT07 tissue paper was glued on with Mod Podge and when dry, Mattints The Pink, Dragonfly and Glow were applied to each section.
I wanted two decorations on the inside frame of the photo-slider, so I used HP1602 chevrons. Two round marks were also used for labels and tags.
Acetate glued to the holder windows and the butterfly sliders are ready.
Also dark brown outer frame and HP2402 texts added. The small tag decoration on the side of the slider, which is slightly visible, has been added to the photo below.
Cut out three cards from the first background paper, Tim Holtz clock face cardstock and Seth's printed tissue paper PT06 were each cut and collaged on top of the background.
The labels were made of kraft paper or white paper, coloured slightly with an ink pad and surrounded by Vintage Photo to give a aged.
This is the slider-side dangling, a small bronze eyelet has been added and clipped on.
The finished card was to be underlaid with brown paper as it was, but I wanted contrast to my work, so I made a whitish trim. PT01 printed tissue was applied to white paper and washed with Snowflake and used PS394 PA stencil with Grunge Paste on the paper.
The paper was cut into 5 mm wide strips and trimmed and stuck to the edges of the card.
White trim fitted and background finish. I liked the overall ageing colour finish.
Finally, a butterfly photoslider was attached to each card to complete the process.
I really enjoyed this project using PaperArtsy Hot picks as it allowed me to demonstrate the vintage style I love so much. I have recently been making and storing homemade labels and tabs to create clusters and clips for my junk journal, and I have incorporated that method into this project and collaged the labels. Please try making labels of different shapes and colours from the stamps you have on hand to add to your work and have fun!
Thank you so much for visiting by.
Have a wonderful 2025.
Etsuko xxx


No comments:
Post a Comment