Hi friends, it's (Floss) from floss_workshop.art with you for another 'With 3 Things' challenge post.
This feature on the PaperArtsy Blog is where 3 bloggers are sent 3 items in the post. Typically we will receive a stamp, a stencil and a couple of Fresco Paints. This year everyone is getting identical products in the post.
We have no clue what PaperArtsy HQ is going to send, the whole idea of this challenge is to do something crafty in our personal style with these 3 items. We are allowed to bring other PA products into the mix if we feel it is necessary...I didn't this time...
So let's take a look at what I received from PA HQ ...
- Hot Picks rubber stamp set HP1007
- a Darcy Marshall stencil PS103 and
- two acrylic fresco chalk finish paints: Gold Rush (one I haven't used before but now that I have used it, it may fast become my latest favourite colour fresco paint!) and Niagara Falls.
You know I'm a big fan of recycling card, books and papers in my art and so I deconstructed the packaging bag to decorate the inside of it so that I was able to make a gift bag. Here is one side
...and this is the other side...naturally there are two folded sides to allow it to be a box shape bag...you'll see the details of those as I explain my workings.
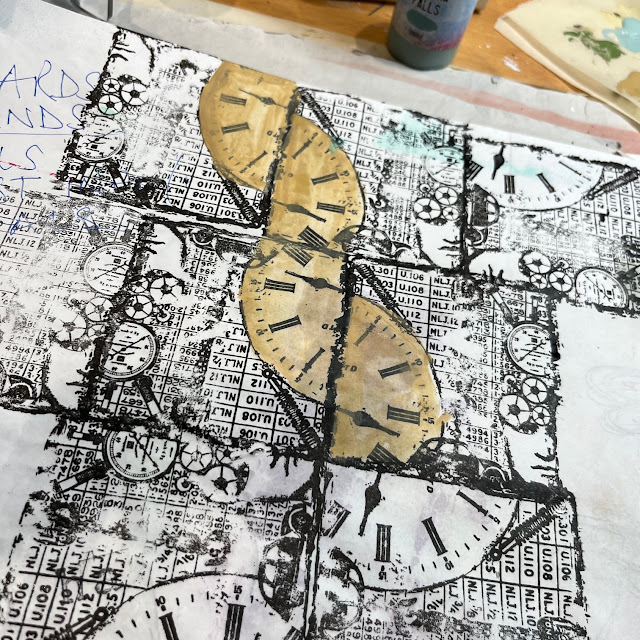
I started by playing on my paper sheet that 'protects' my work space...this paper invariably becomes part of my art as it's where I doodle ideas or play with colour when I'm thinking. So I started stamping the square part clock image and liked the way that if I used it in 'brick' fashion I could create a spiral.
I then tried rotating the same stamp 90* in a square...I liked both ideas and thought they'd look ok as feature designs on the front/back of the bag, so started looking a colourways.
I needed to incorporate the stencil design and so rolled out fresco chalk finish Gold Rush acrylic paint onto the gel plate and rolled Darcy Marshall's lovely tree design over that.
I took a couple of prints using copy paper and rice paper too.
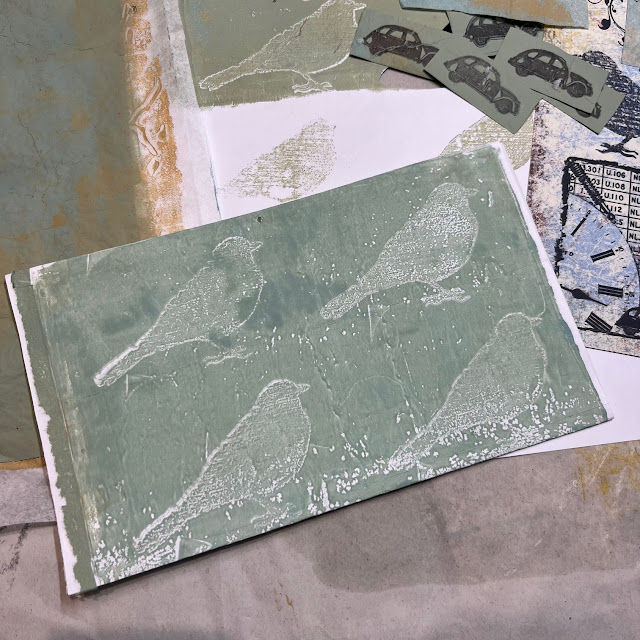
I then inked up the Hot Picks stamps and printed them onto my gel plate using Ranger Archival black ink pad. After I had waited for that to dry I sponged colour over the designs on the gel plate and let that dry too.

The beauty of printing the stamps onto the gel plate rather than onto a sheet of paper (or whatever you are working on directly) is that you can add colour behind the image. I added the Gold Rush over the bird legs so that it looked like the birds were standing or dancing on sand.
Naturally I mixed both Gold Rush and Niagara Falls together and created a beautiful creamy green colour. I made several plain sheets of colour so that I could collage the bag.
I made quite a few bird images as I thought these would look pretty cool down the sides of the bag.
I found that by folding each section before I glued anything down was a good way to check the design for each panel individually.
Rather than putting the large designs central in the front/back area of the bag, I thought it could be fun to have the little birds peeking their little faces round the corners...so I moved the big design over to accommodate that thought.
I originally was going to leave the birds with colour blocks behind them but I decided to fussy cut around the bird shape and then tear around the Gold Rush 'sand'.
I glued the seam after I had folded the bag following the original fold lines so that the bag could fold down flat after it was reconstructed.
It was at this point I decided it would be fun to have the birds opposite each other so that the tails would meet at the inside side area of the bag.
I used the stamping platform to position the birds directly opposite each other. The stamping platform allowed me to make sure the whole image of the bird was stamped leaving no gaps. I thought this would be the safest option as the birds were being stamped over the seam of the bag.
I also used the stamping platform to add the feature words.
I printed the block of text onto the plain sheets of Gold Rush and stamped the little cars on the gel plate and pulled the print using a half and half mix of Gold Rush and Niagara Falls onto rice paper. This created some fun labels to add to the bag. I toyed with the idea of using them as gift tags for the bag...
I used them on the large faces of t the bag instead...
...they fitted nicely onto the side too...
The rice paper was not only great for printing onto but it was a good substrate to cover the repurposed packaging bag to give it strength but not be too bulky.
This project has made me think of how I could create more of these but also how fun they would be on fabric...I hope this project has sparked some creative thinking for you too and that you've enjoyed what I have come up with using my surprise supplies...until next time...
take care,
Floss
x x x
YouTube: flossWORKSHOPart
Facebook: flossWORKSHOPart
Instagram: flossWORKSHOPart
Oh! I nearly forgot...I created the base for the inside of the bag too...It strengthens the base inside...


No comments:
Post a Comment