2020 Topic 7: Under The Sea
For
tonight's project, Lucy has dreamed up a really gorgeous project that
would be perfect for any of us to get our teeth into. Including a
sea-textured frame, she has thought of ways to include children in the
art plus utilising items you have in your house too. She has an
ingenious idea for bubblewrap. It would make such a great boredom buster
for any part of this 'stay-at-home' time.
~ Keren
~ Keren
Hi everyone, it's Lucy here with you today from Lucy's True Colours,
and I'd like to share with you a reverse canvas I have made using a
selection of fish stamps from the adorable Zinski range of PaperArtsy
Eclectica stamps. I do hope this finds you well, and coping with the
challenges facing us during this difficult period of our lives.
I planned this project with differing age groups in mind with the idea that it might work for mums and dads and their children who might be at home at the moment, and who might enjoy each doing different parts of the piece, or doing one each! I made lots of extra components which would work well for matching greetings cards, perhaps to keep in touch with friends and relatives through the post whilst we are self isolating, or to pop through our neighbours' doors to say Hello. Crafting is so therapeutic and is such an amazing activity for our well being, either alone or as a family, and I have tried to suggest some alternative products if you don't have, or can't get hold of, all the gear. Let's Swim not Sink!

I planned this project with differing age groups in mind with the idea that it might work for mums and dads and their children who might be at home at the moment, and who might enjoy each doing different parts of the piece, or doing one each! I made lots of extra components which would work well for matching greetings cards, perhaps to keep in touch with friends and relatives through the post whilst we are self isolating, or to pop through our neighbours' doors to say Hello. Crafting is so therapeutic and is such an amazing activity for our well being, either alone or as a family, and I have tried to suggest some alternative products if you don't have, or can't get hold of, all the gear. Let's Swim not Sink!

If
you don't have any canvases and, of course, it is difficult to get out
to the shops at the moment, have a look at whether you have any you
don't like around the house. It is easy to cover them with gesso and
reuse them!
To prepare the reverse of my canvas and to create an aperture, I gessoed it inside and then covered the stapled area with masking tape and gessoed this too. This was a tip I learned some years ago from a Finnabair workshop and it creates a really neat finish.
I covered these gessoed edges with Grungepaste using a palette knife, creating plenty of texture, and let it dry, which doesn't take long, and can be speeded up with a heat tool.
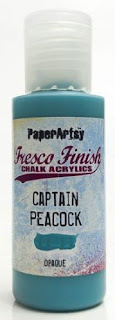
I roughly painted this surface with Fresco Finish Chalk paints in Inky Pool, Captain Peacock, Jade, Caribbean Sea, Smurf, Turquoise, Space Cadet, and South Pacific. Use any shades of blue you have; I would suggest a minimum of three. Frescos dry really quickly!
I used the darkest, which was Inky Pool, on the corners and inner and outer edges. I then dry brushed it onto the peaks of the dried Grunge Paste. I painted the inside (the back) of the canvas with South Pacific. Don't worry too much about this step as we are going to cover it up, you just want a dark blue backdrop behind our bubble wrap sea.
Cut
a square of bubble wrap the size of the canvas and an extra piece for
the 'lip' of the canvas (about half the size) and drip alcohol inks on
in blues and greens. I used Salt Boat Blue, Denim, Bottle, Pool, and
Stream. Then take your blending tool and felt, apply some blending
solution and dab all over until it is distributed. If you are trying
this at home with your family and you don't have any of the Tim Holtz
Alcohol Ink range, have an experiment with what you have to hand, maybe
food colourings or translucent blue paints, or blue glitter glues. If
you don't want to make a bubble wrap sea you could maybe use leftover
Easter Egg packaging such as coloured foil and cellophane.
For the fish, I created an alcohol ink background on glossy card stock. Again you could make a painted background or use patterned papers if you don't have alcohol inks. I used Butterscotch, Peach Bellini, Terracotta, Sunshine Yellow, and Sunset Orange. I decided to do the right hand side of the A4 piece in the paler, more yellow toned, colours so that I would have more variations when I stamped out my fish.
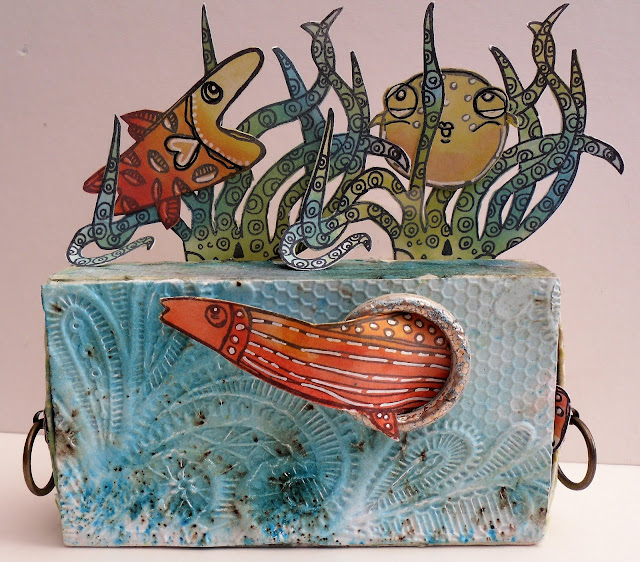
I stamped out a selection of fish from Eclectica ZA30 and ZA31 onto the prepared cardstock using Jet Black StazOn and then cut them out and added some wobbly eyes and some white gel pen highlights.

Here's a close up of the alcohol ink fish against the bubble wrap sea.
I prepared a piece of green alcohol inked cardstock in the same way using Oregano, Willow, Meadow, and Pesto alcohol inks in order to create the foliage for the sea floor. I stamped it with the fish tail and the octopus tentacles from Eclectica ZA31, using Olive Green StazOn ink. I made the pieces a bit bigger than needed, i.e. I left the eyes on the octopus so I had a piece I could tuck in. I then cut them out and inked the edges with green pen. I think octopus legs make convincing seaweed!

You can see the foliage or 'seaweed' in place in this photo.
I stamped a selection of the fish from Eclectica ZA 30 and ZA 31 onto the shiny side of some translucent shrink plastic using Jet Black StazOn.
I coloured the pieces on the reverse using Prismacolor pencils. I discovered that doing it this way I needed to keep the colours fairly strong which I wouldn't normally do with shrink plastic, where the colours intensify after shrinking, because you are going to be seeing them from the front which will be softer. I then shrank them with the heat tool and gave some of them a bit of shaping whilst still warm. If you don't have a heat tool, you can use your oven, following the instructions on the packet. On some of the fish I added some wobbly eyes.
For the fish, I created an alcohol ink background on glossy card stock. Again you could make a painted background or use patterned papers if you don't have alcohol inks. I used Butterscotch, Peach Bellini, Terracotta, Sunshine Yellow, and Sunset Orange. I decided to do the right hand side of the A4 piece in the paler, more yellow toned, colours so that I would have more variations when I stamped out my fish.
I stamped out a selection of fish from Eclectica ZA30 and ZA31 onto the prepared cardstock using Jet Black StazOn and then cut them out and added some wobbly eyes and some white gel pen highlights.

Here's a close up of the alcohol ink fish against the bubble wrap sea.
I prepared a piece of green alcohol inked cardstock in the same way using Oregano, Willow, Meadow, and Pesto alcohol inks in order to create the foliage for the sea floor. I stamped it with the fish tail and the octopus tentacles from Eclectica ZA31, using Olive Green StazOn ink. I made the pieces a bit bigger than needed, i.e. I left the eyes on the octopus so I had a piece I could tuck in. I then cut them out and inked the edges with green pen. I think octopus legs make convincing seaweed!

You can see the foliage or 'seaweed' in place in this photo.
I stamped a selection of the fish from Eclectica ZA 30 and ZA 31 onto the shiny side of some translucent shrink plastic using Jet Black StazOn.
I coloured the pieces on the reverse using Prismacolor pencils. I discovered that doing it this way I needed to keep the colours fairly strong which I wouldn't normally do with shrink plastic, where the colours intensify after shrinking, because you are going to be seeing them from the front which will be softer. I then shrank them with the heat tool and gave some of them a bit of shaping whilst still warm. If you don't have a heat tool, you can use your oven, following the instructions on the packet. On some of the fish I added some wobbly eyes.
On the sides I used the Blalub Blalub stamp and the bubbles from the fish's mouth from Eclectica ZA30.
Whilst
I was making this project I gathered together far more materials and
items than I needed and in the end, kept it quite simple! You could use
sea sponge, shells (real or clay moulds), and really go to town on
decorating the sea floor. I think it would be a lovely project to have a
favourite family holiday snap in the middle of the canvas 'frame' and
decorate around it with the fish. I hope I have given you some ideas of
what you can do with just two rubber stamp sets. Have fun and all the
best! xxx


.png)

