2016 Topic 19: Die Cuts
Hey Folks, it is Kim Dellow here playing along with the Die Cuts theme that is currently on the PaperArtsy blog.
I thought I would share with you an art journal page I've made using some of my own stamps, and, get this - I have some new stencils too, so one of those will be making an appearance on this page!
Here is the video of the whole page from start to finish:
Summary of the main steps using the die-cut shapes:
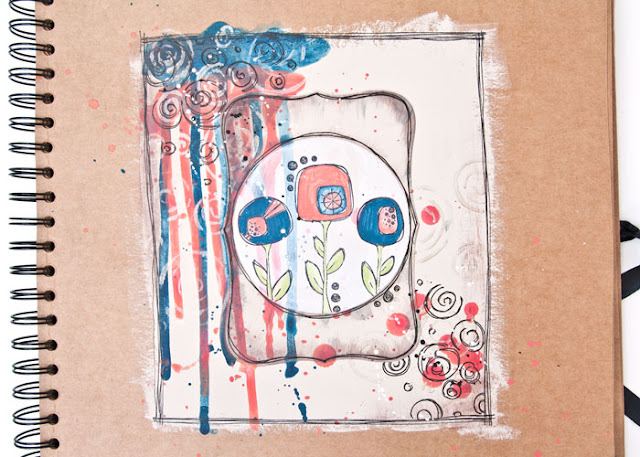
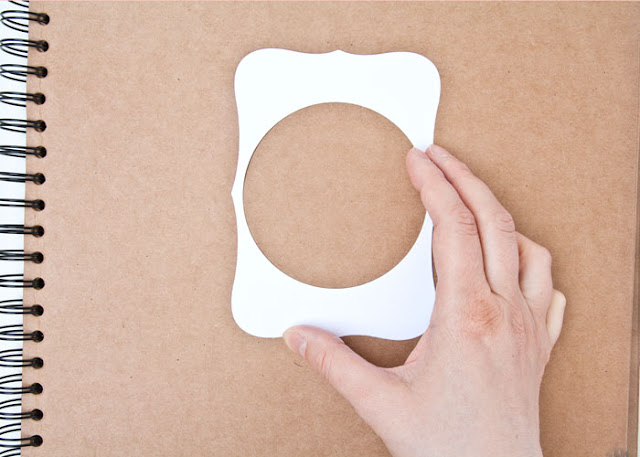
Step One: The journal page starts by making a die-cut cardstock frame using a large Spellbinders Labels 8 die and cutting an aperture in it with a circle die. I've glued the frame to the page with gel medium and covered it with Buff Fresco Finish Acrylic paint.
Step One: The journal page starts by making a die-cut cardstock frame using a large Spellbinders Labels 8 die and cutting an aperture in it with a circle die. I've glued the frame to the page with gel medium and covered it with Buff Fresco Finish Acrylic paint.
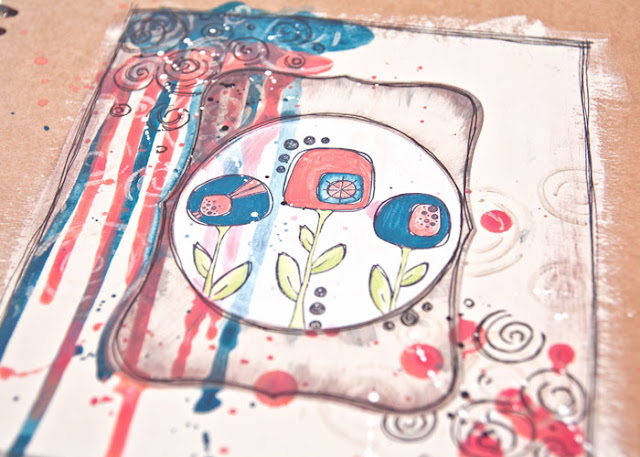
Step Two: Once the layer of Buff paint is dry I've added drips and splatters of the Baltic Blue and Coral paints to add both texture and colour. I've knocked back the centre of the die-cut frame with gesso then used the negative from a die-cut circle as a mask to stamp the flowers from my PaperArtsy Eclectica³ {Kim Dellow} EKD03 set in the middle of the aperture and coloured the flowers with paint.
 |
| EKD03 |
Step Three: Now, using my new circles stencil (PS034), I've added some details with the White Fire paint. I want the frame to stand out a little more so I go back in with the negative die-cut from the Labels 8 and the positive die-cut from the Circle and use them as masks to protect the surrounding area of the frame whilst I add some Chocolate Pudding paint around the frame edges and in the corners. I added some final detailing with some pens to finish the page.
I hope you enjoyed that journal page, I am particularly enjoying things that drip and splatter at the moment! If you want a full list of everything I have used you will find it over on my YouTube channel.
You can also find me in all of the usual place under my name, Kim Dellow, so feel free to come and leave me a comment!
Blog | Instagram | YouTube | Twitter | Facebook | Pinterest
You can also find me in all of the usual place under my name, Kim Dellow, so feel free to come and leave me a comment!
Blog | Instagram | YouTube | Twitter | Facebook | Pinterest
Thanks Kim, some great uses of die cuts there, frames, masks and layers, all working perfectly together. the shapes in your stamps echo the die cut shapes too, creating great harmony with fab splashes of colour. ~Darcy
We would love to see how you interpret this Die Cuts topic by linking what you make to our 2016 Challenge #19: Die Cuts, on this page HERE.
All of our bloggers love to see your twist on their ideas, particularly if you were inspired directly by their post.
All links go in the draw to win a £50 voucher to spend on products of your choice from the PaperArtsy online store. The Die Cuts link will close 17:00 (London Time) Sunday, Oct 16th 2016. The winner will be announced 2 hours later at 19:00.


12 comments:
Such great drippage, Kim! love this journal page... will watch the video in a bit as dinner is just ready...!
Lovely page Kim & n8ce build up of depth with the due cuts & the stencilling.
Hugs
Lesley Xx
Lovely page Kim & n8ce build up of depth with the due cuts & the stencilling.
Hugs
Lesley Xx
A wonderful page, love your new stamps and you have used them beautifully here - fabulous background too. x
Great journal page, Kim with very effective use of your own stamp designs! I love the depth given by the die-cutting. xx
Awesome journal cover Kim, lovely your images for focal point. The video tutorial is easy to understand. Thank you so much. xx
just come back after watching the video, which is really easy to follow and adds to the process. Thanks, Kim!
great page. the video really helps to explain the steps. thanks xx
Such a great project Kim! Such a good idea to put the pieces back in place to do the edges. I love your stamps!
Lucy x
Love those drips and splatters Kim! A fab page. Thanks for the video too xx
Fab project. Love that Kim. Lx
Fantastic journnal paage, Kim. I love the colours & the drippage & splats look fab.
Post a Comment