This feature on the PaperArtsy Blog is where 3 bloggers are sent 3 items in the post. We have no clue what PaperArtsy HQ is going to send us, there might be a slight variation (for example on this round we each were sent slightly different stamps) but generally 2 of the 3 things will be identical.
In my package I received PaperArtsy Eclectica stamp set (ESN32) and PaperArtsy stencil PS092, both by Sara Naumann, as well as PaperArtsy Fresco Finish Chalk Acrylic Paint in Candy Floss (FF70) and Electric Violet (FF201).
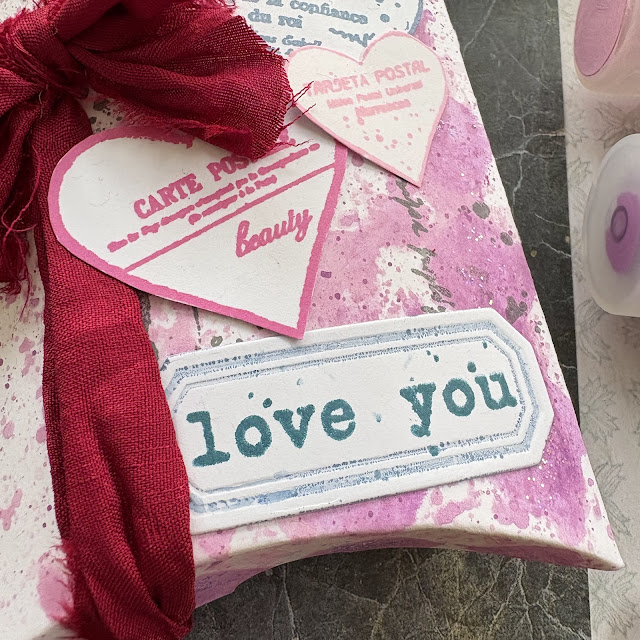
The three focal images in this set feature a heart and give plenty of options for layering, using them either as the intended design suggests, or using individual elements to create something a little different. I decided to do the later and take elements from the designs to create a gift box, let's take a closer look.
I’ve been meaning to make use of this Tim Holtz Pillow Box Die that I’ve had in my stash for the longest time. With the gift giving season upon us, nothing says ‘I love you’ quite like something handmade and the love theme of the stamps plays perfectly with that sentiment.
Using the dies, I cut front and back elements to form the pillow box and a label from the set with PaperArtsy Smoothy Heavyweight Cardstock (SCA4H).
I then put a blob of each of the PaperArtsy Fresco Finish Chalk Acrylic Paint colours on my craft mat and sprayed with water, before brayering it randomly onto the card. Watering the paint down gives a more subtle colour finish and helps the two colours to blend slightly on the card.
I then added some splatters using PaperArtsy Fresco Finish Acrylic in Electric Violet, the darker colour.
Next, the leftover paint was sponged through PaperArtsy stencil PS092 for some extra background texture.
Once dry I added some Stickles glitter over the top of the diamond pattern, to create some shimmer and opulence in the finished project.
Time to add some contrast stamping in grey, using the texture from the Carte Postale Heart stamp in PaperArtsy Eclectica stamp set ESN32.
And stamped the 'love you' sentiment from the bottom of the heart stamp onto the label.
With all the different elements prepared it was time to assemble the project. I started by securing the front and back sections of the pillow box die together using double sided tape.
To bring one final touch of opulence to the pillow gift, I added a red sari silk ribbon, tying it off in a bow.
I love how the finished gift box turned out. It would be perfect for either Christmas or Valentines gifts, for that special person in your life.
It’s a simple project to put together with easy elements to create. The contrast of the hearts against the background is really effective and reminds me of the love heart sweets you can buy in the UK.
I hope you enjoyed this practical papercraft project. Until next time, wishing you a happy creative week!
Victoria
Instagram: www.instagram.com/victoriawildingcreates
Facebook: www.facebook.com/victoriawildingcreates
Pinterest: www.pinterest.com/victoriawildingcreates


No comments:
Post a Comment