Hi everyone
Victoria here with you today.
Heading into winter and thinking about the nature theme for this quarter, naturally had me thinking about frosty and snowy winter walks. Some of my favourite memories are being wrapped up warm and being out in the landscape with my boys, so I wanted to create a memory box scene of winter florals.
The white topic might initially seem daunting, but some of my favourite ever projects use a neutral colour palette. Creating a white project is actually pretty simple when you know what to pair it with and you can’t go wrong with some other neutral colours, to help the white stand out.
Creating my floral memory box was really straight forward and I can’t wait to break down all the steps for you so that you can try it for yourself. Be warned though, you have to enjoy a bit of fussy cutting to make this one!
Kay Carley’s stamp sets EKC17 and EKC72 had the perfect winter florals for my project, with a nice selection of different shapes and sizes. I also picked out Fresco Finish Chalk Acrylics in Snowflake (FF15), Koala (FF141), and some Crackle Glaze (FF22) to create some extra background texture. Finally, I selected flat white and glitter white embossing powders from my stash.
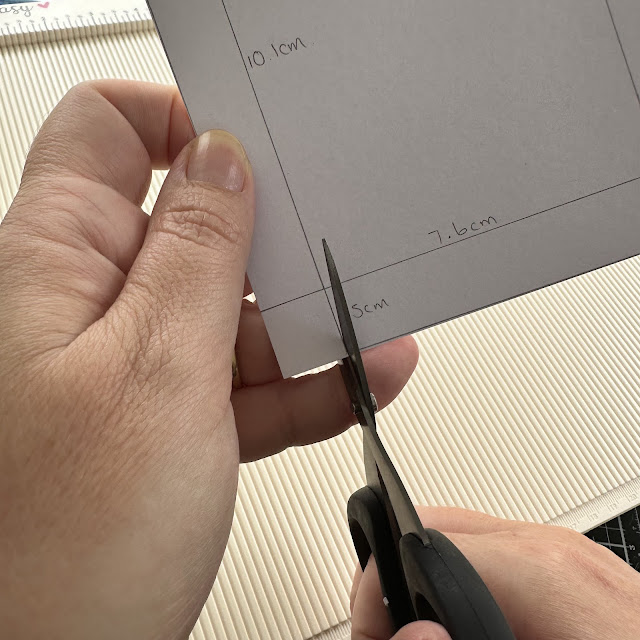
I started off by prep’ing the box. I wanted something small that could nestle against my other makes on top of the kalax unit in my cabin. I had a frame die cut from an Eileen Hull Sizzix set, in my stash so decided to use that up and create a back using the measurements shown above. You could easily just mark out and cut two of these in place of the die.
I cut away the corner pieces so that I could fold and glue the sides and bottom.
And scored along all the fold lines.
Next I applied some Fresco Finish Chalk Acrylic in Snowflake, using some cut ‘n’ dry foam, to the frame.
Being a flower fanatic, creating the floral elements is always my favourite part of a project! I wanted to keep things really simple, so selected some kraft card (for extra contrast) and stamped the various flowers, embossing them in flat white and glitter white embossing powders.
Then it was time to get fussy and cut them all out carefully, with a pair of small detail scissors. The white embossing looks fantastic against the kraft and will give some extra depth to the finished project, preventing the flowers from disappearing into the background.
Assembling the different elements was the final step of the project. I started by layering the flowers onto the background, gluing some flat, adding some where only parts were glued so that the stems could be teased out and then a final layer stuck down of foam pads. This created depth in the floral arrangement.
Then I stuck the front and back pieces of the box together, using double sided tape.
Before adding some florals to the front of the frame for extra detail.
Finally, I added the memory sentiment (leftover from a previous Scrapcosy ESC32 project) to the bottom middle of the box.
The finished effect is just what I was aiming for. Slightly distressed and with enough contrast to make the white pop. The glitter from the embossing powders looks magical in real life, unfortunately the camera doesn’t pick it up that well.
This floral box is going to look lovely amongst all my supplies in my cabin. Nothing beats being surrounded by previous makes for a serious dose of inspiration!
I hope you enjoyed learning about these white techniques and feel inspired to give it a go yourself. If you do, I’d love it if you shared and tagged me on socials.
Until next time, wishing you a happy, creative week.
Victoria x
Instagram: www.instagram.com/victoriawildingcreates
Facebook: www.facebook.com/victoriawildingcreates
Pinterest: www.pinterest.com/victoriawildingcreates


No comments:
Post a Comment