
Hi Everyone, Jo Myhill here again
"I’ve had a bunch of Scandinavian type Christmas decorations most of my pre and post married life, they were some of the first decorations John and I bought together. We rarely use them on the tree now as they are so small and they get easily lost in the branches. So I needed another way of displaying them and making them part of the family Christmas traditions".
I’ve always loved using these Wooden Houses in projects, the little nooks would are ideal to display the decorations.
I started by painting the whole house in slightly watered down Bora Bora. Watering down the paint means it goes on the wood much quicker and you don’t use quite as much paint as the wood sucks in the water rather than the paint.
Add quite a few layers to get a good colour but it doesn’t have to be a perfectly neat, opaque covering. NB its generally better to base coat with an opaque Fresco rather than a translucent (unless you want the wood grain to show through). In this pic my Bora Bora looks a bit more like sky Fresco than Bora Bora Fresco...

Keep the bottle a distance away from the wood so you get a light misting rather than big droplets. Let it sit on the wood for about 30 – 60 seconds and then blot with kitchen roll to absorb the excess paint. Keep spraying and blotting until you get a mottled weathered wood kind of effect that you like.

In another spray bottle mix water and Antarctic this time in a 25% paint to 75% water. Start spraying again, it looks a bit scary at first because it looks as though it’s covering everything you’ve just up but as it dries it fades beautifully and goes very pale because of the amount of water you’ve added to the mix .... Let this dry.
In another spray bottle mix London Bus and water, this time 50:50 and lightly spray. Add Chocolate Pudding to this bottle and spray again. If the colour gets too intense, blot with kitchen roll. Spraying paint is fantastic; it's a wonderful way to get colour into the nooks and crannies, and it builds up interesting layers of colours, which adds interest and depth to your project.


Add Snowflake and Stone to this Antarctic spray bottle and add water, roughly 25% paint to 75% water. This is your final layer to tone everything down and get that weathered wood look.
It seems a lot of spraying, but you want to build up lots of layers of faded mottled colour. Be warned though it can get messy (and addictive) so make sure there is nothing on your desk that you want to spray as well! A layer of paper towels underneath your project is ideal to suck away excess paint instantly. Set this aside to dry thoroughly.
Now take a sheet of card or paper and lightly spray with your spray bottles to get a browny-pinky-stone colour over the card.

You may need to use some Cut N Dry to move the paint around the card. Dry and then lightly sand with a sanding block.
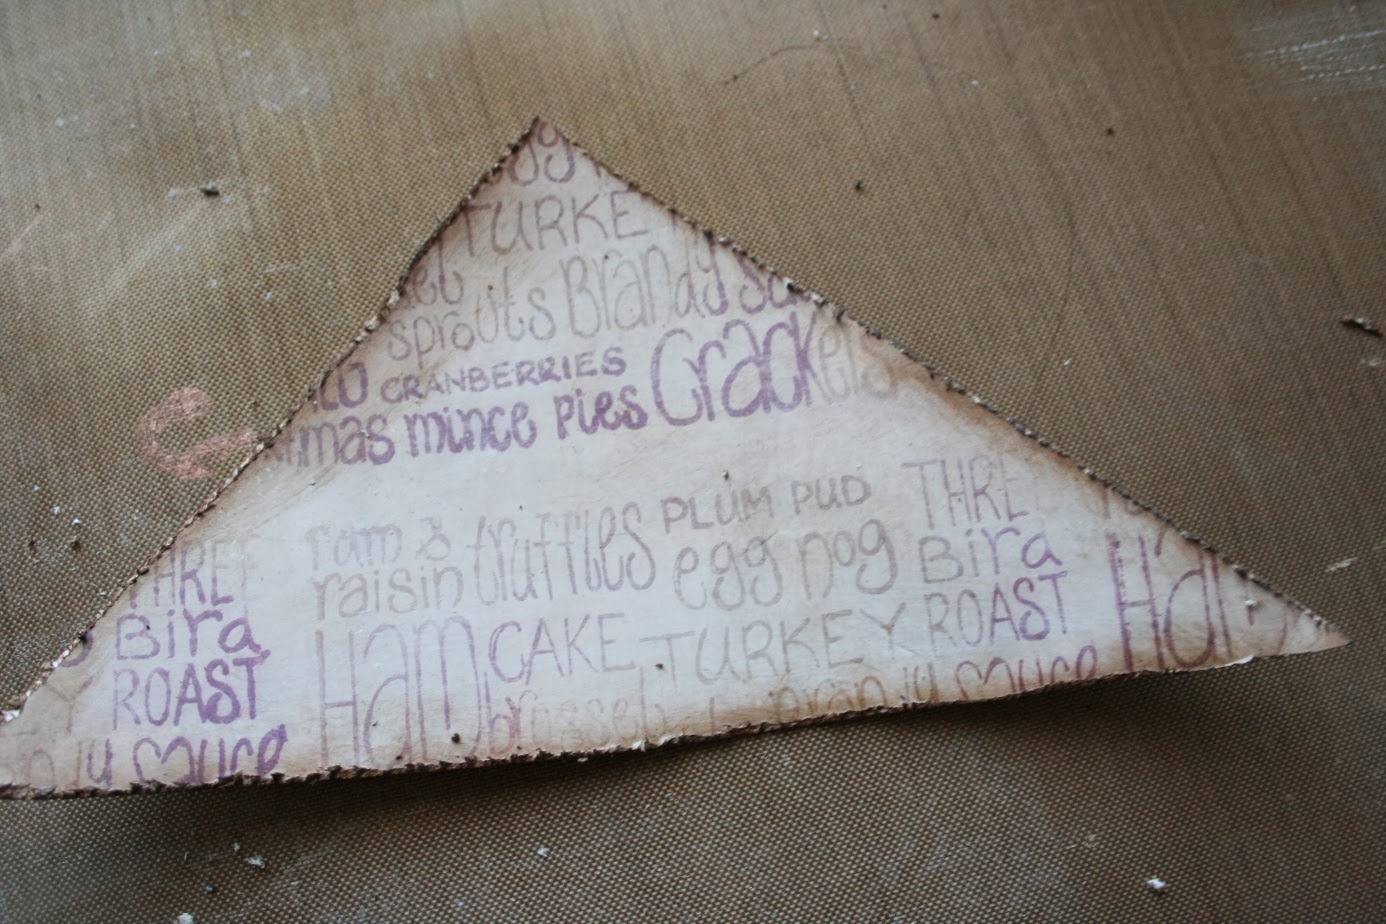
Using the text stamp from the Nut and Meg 8 plate, stamp all over the card with Plum and Sepia Archival Ink. I just add both inks to the stamp.
Using the text stamp from the Nut and Meg 8 plate, stamp all over the card with Plum and Sepia Archival Ink. I just add both inks to the stamp.

Once dry go over the whole card with Distress Ink in Brushed Corduroy and Burlap to give an aged stain look and flick some water on to give water stains. Leave this to dry.

Now using a brush add Treasure Gold, Copper to the edges of the house and in the recesses. Try and get into all the corners so that you’ve got some shimmery colour to act as a frame for the next stage.
On the roof of the house and the sides and back, brush on the Copper Treasure Gold in downward strokes to emphasise the grain of the wood.
Go around the edges of the house with Vintage Photo Distress Ink and finally some BrassTreasure Gold.
Distress each of the pieces of card with a Tonic Distress Tool and edge in Vintage Photo Distress Stain. Stick in the recesses.


Now for some more stamping. Use the holly stamp from Nut Meg 8 plate and stamp along the bottom edge of the house on the sides and back. I started in the middle of the back to get a central image and used Watering Can Archival Ink as it's grey and gives a softer faded line than the black Archival.
I then stamped the birdcage from Nut & Meg 6 on the back and sides, again in Watering Can Ink.
Nut & Meg 6

And finally the holly from Egg & Nog 1 was stamped on the back of the house in the centre. I ummed and aahed as to whether to put more holly strands down the back, decided not to as I thought it might be too much, but I’m still not sure.


I painted the holly and the birdcage in Tinned Peas and the robin in London Bus. Again the paint was watered down (Leandra’s painting videos on the PaperArtsy YouTube Channel are great to watch in terms of how to paint with Frescos) any excess paint/water was dabbed off with kitchen roll.

Finally I glued in the decorations with a hot glue gun and used drawing pins to hang the bells.

I am so pleased with how this has come out and it will be great to display every year at Christmas. I’m now thinking of another one that I could use to display really beautiful glass baubles that I dare not purchase or hang on the tree as I have two inquisitive cats who like to dab the baubles and knock them off!
Jo xx
Jo xx
Leandra Says: How fabulous, I can see why you picked the undertones of blue and red now! Not just a pretty face are ya! ;) Love that this project could be taken in any direction, these houses are so much fun!
Gillian Says: The whimsical stamps are perfect with these Christmas ornaments Jo, such a beautiful way to display those memories for years to come.
If you are inspired by Jo's ideas this week, please join along with the weekly challenge. You can link up your creativity here
and go in the 2 draws to win a prize, usually a stamp of your choice. We love
to see what you make, so jump in and get involved and perhaps try out something
new, like spraying paint!!


18 comments:
Oh, wow, Jo your house looks gorgeous, and I love those little decorations - I can see how they'd get lost on the tree! What a wonderful Christmas display that will make.
This is simply delightful. Your finished project is glorious
Some friends and I attended a recent workshop at Snazzys (in Swindon) and made an advent house using this same blank - astonishing to see how differently it turned out!
Kathyk
Brilliant, I have a couple of those sets of peoples somewhere. Great way of displaying them
Fantastic project Jo. Love the build up of layers and the spray effects. Good to see Treasure gold used as well. Perfect backdrop which shows off the little Christmas treasures. Never thought of using decs as a display instead of on a tree. Will have a look and see what I can do now. Thanks. X
well Jo another great project..love the colours you've used on the house and how the paints have puddled in the nooks and cranny's lol..thought you'd lost it in the second piccies cos that looks green lol!! brilliant project!!
That is a really lovely idea, off to gather together some wooden tree decorations. Thanks for the inspiration. Don't think I will get it done in total but may well make a start for this weeks challenge!!!
Oooh. I love the look of the house. The paint spraying is very effective! I also love teh slight shimmer from the Treasure Golds.
What a great place to house all your little Christmas decorations!
The build up of layers really adds a lovely effect. The final project looks stunning. What a great idea
Wow, it looks great. I have some similar ornaments passed down from my parents, this is a lovely way to admire them :) x
I have some of those decorations somewhere too and they were indeed lost on the tree, so I stopped using them. They look fabulous on this project with this colour combo and stamping. These houses are such a lovely idea and you have decorated yours with such flair and imagination. Julie Ann xx
Wonderful project :-)
Oh, it is delightful! Very clever (and beautiful) way to display your small special decorations.
What a fab way of displaying decorations. I was trying to think of Christmas house ideas the other day! We even used to have some of these decorations when I was young but not sure they still exist.
Emma x
Love this! What a clever idea :)
aw that's just fab Jo and so achieveable.
That is a perfect display piece for your lovely ornaments, they look great. I've got one of those houses, been promising myself for the last few years that I will use it for a Christmas project.....
This is just lovely Jo! I have some of those decorations but they actually came with a little wooden tree. Your gorgeous house is seriously making me think about abandoning the tree and displaying them this way, lol!
Hugs
Lesley Xx
Wow wow wow absolutely awesome, I love how you have matched the undertones with the little cute Christmas decorations, and so loving the technique. Kezzy :-) xxx
Post a Comment