


Hi everyone
It's Floss with you here today.
I'd like to share with you my successes and frustrations with gel printing and hope you can relate to what's been happening over the last few days here in my workshop!

I'm rarely someone who looks at a scene and wants to recreate it artistically but having recently been for a glorious walk at Beachy Head on the South Downs, in East Sussex where I live in the UK, and remembering how much I love the lighthouse there, I thought I would challenge myself to making a collagraph gel print.
A collagraph, for those of you who don't know, is where you use a textured plate that holds varying amounts of ink/paint to print different tones. I wanted to try embossed textures on card and use the gel plate to do this.

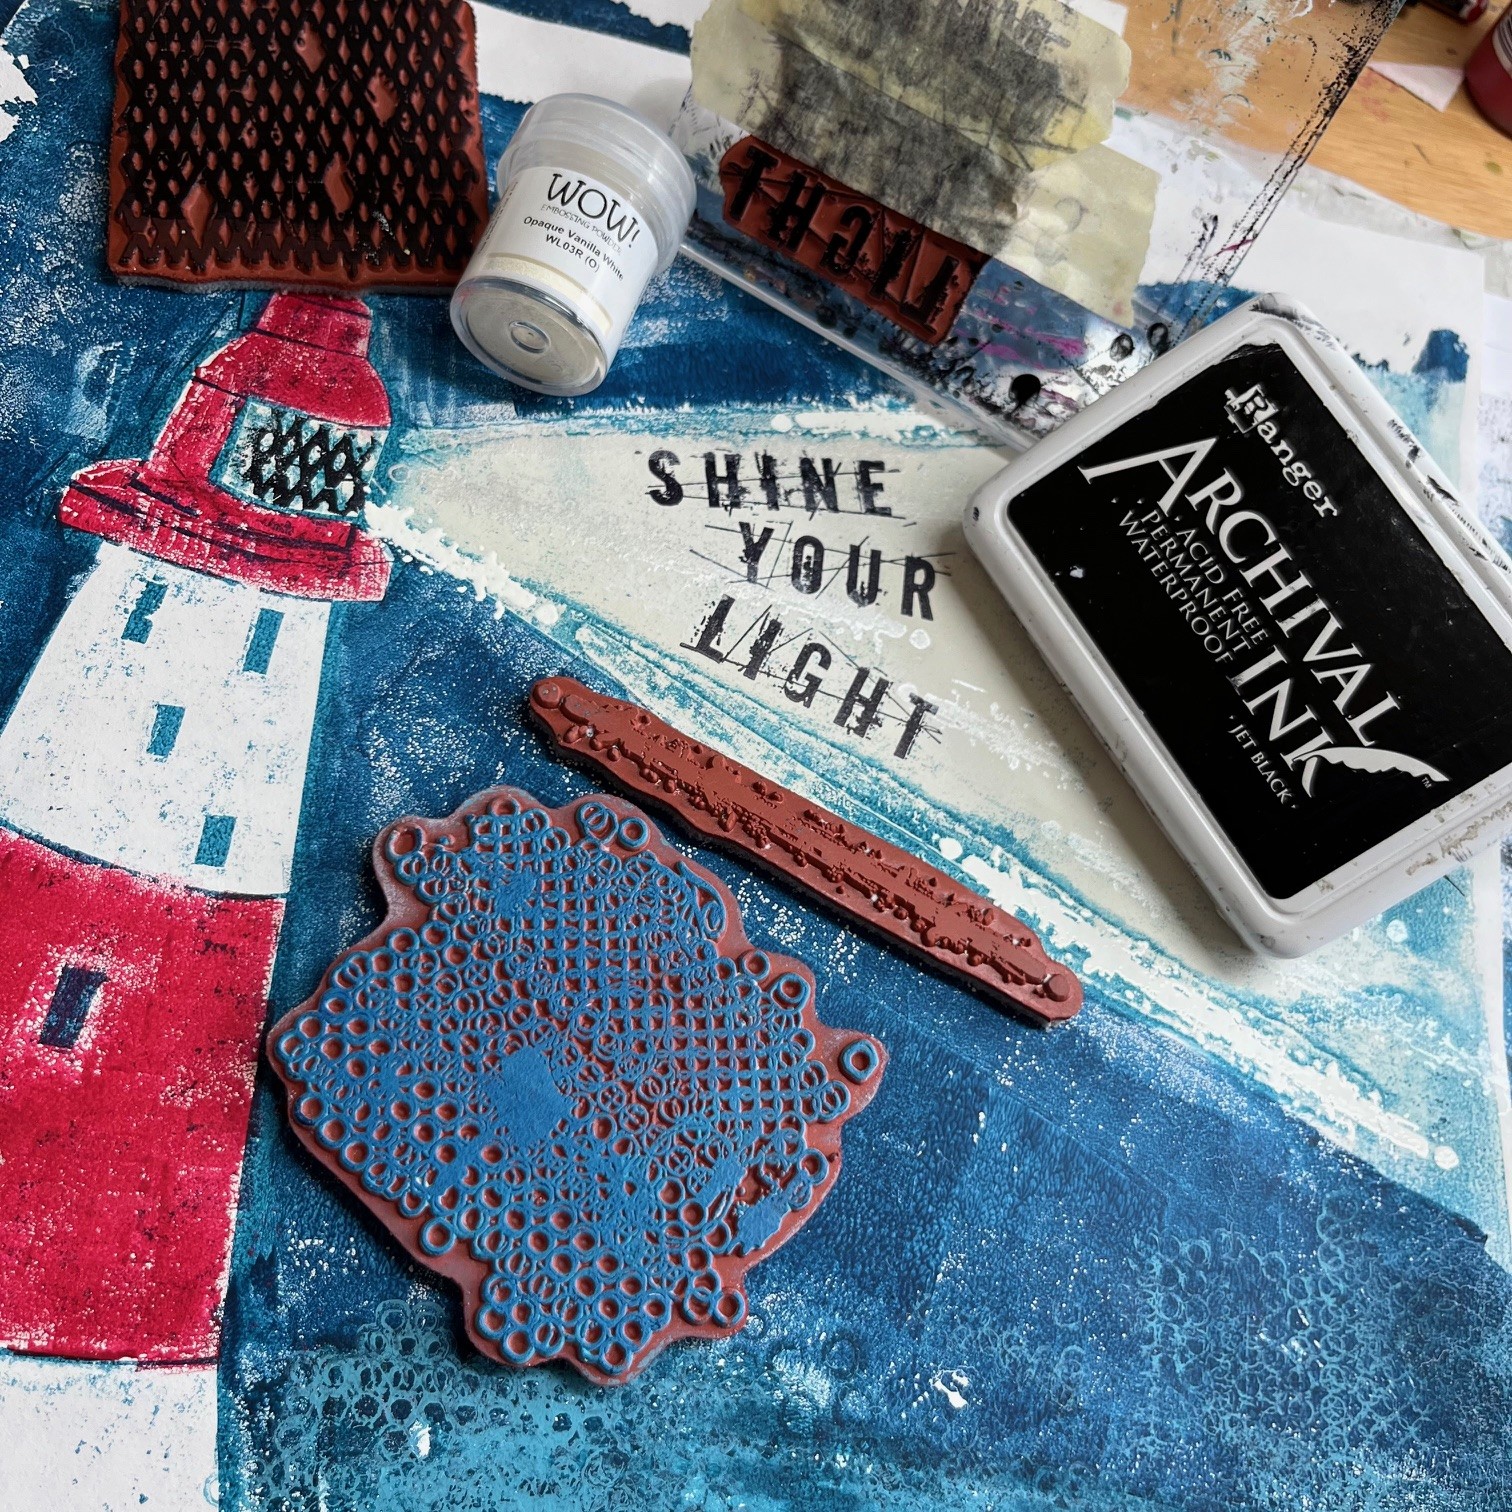
I made a basic sketch of the lighthouse from a photo and gathered a few supplies including a couple of Seth Apter's stamp sets: ESA15 and one of his newest ESA41 from PaperArtsy that I thought may come in useful.

I particularly liked the idea of using the scribble textured line for the light ray coming out of the lighthouse and the small circles for the sea details on ESA15, and the SHINE YOUR LIGHT wording as a feature in the light ray with the "blocks" above those words to be used as rocks at the base of the lighthouse on ESA41.


So the first thing I had to do was to transfer the image onto some card to cut out for the plate. I used and old school book cover. It is the same weight as a manilla document folder.

I wanted to use this first cardboard 'plate' as a test piece before I spent a huge amount of time with adding details in. I started by stamping and embossing the 'light rays' straight onto the folder thinking that the raised area wouldn't be too dissimilar to the lighthouse height.
To print, I rolled a thin layer of PaperArtsy Fresco Finish Inky Pool acrylic paint onto the gel plate and placed my lighthouse card image face down onto that. I lightly rubbed the surface so that only the paint in the space between the card and the embossing would be left on the gel plate. You can see the outline that it left here...

I used a make up sponge to add colour into the smaller areas: I used Heavy Cream for the light ray and Red Lipstick for the parts of the lighthouse body. I stamped some detail onto the gel plate and allowed that to dry.


I wanted to use the cardboard collagraph as the starting point. So often we use the gel plate for backgrounds and add to it so this really made me think about the possibilities of how detailed the cardboard plate should or shouldn't be. For example, I think adding embossed sea texture to the cardboard would be more useful than stamping on the gel plate.

Here you can see how some of my paint got stuck to the gel plate... this has got to be one of the most frustrating issues with gel printing!!! There is usually too much paint used in areas when this happens. Thinner layers work better. I also found that because I was working on my 12" x 14" gel plate, my layer of cloud 9 acrylic paint was drying in the summer heat before I could pull the print. Thankfully, using a couple of drops of PaperArtsy drying retarder in the paint slowed the drying process and made for a smoother print pull. This is definitely my best friend this week!

...what I did find by doing a couple of practice runs is that the cardboard plate had a better outcome each time because with each use, the paint that was pulled off the gel plate stayed on it and helped the next pull.

The first bit of detail I wanted to add was the wire mesh in the lighthouse. I needed to choose between the two crossed textures on ESA19. I cut the section out of the lighthouse face and held it over both embossed test pieces...I decided to go with the smaller mesh.

I then stamped a texture that simulated the iron stair and cut them out. You can see how I surround myself with colours and stamps (and a cuppa tea) to help the creative thinking happen!

After the first print did not give me as much detail as I hoped for in the light ray I decided to add masking tape to the surface and emboss on top of that. It helps to glue the tape first before using the embossing heat gun to stop the tape peeling off under the heat.

The detail was much more pleasing this time.

I also wanted to see if the mesh came out better printing it directly onto the gel plate before the collagraph layer...I masked the area of the gel plate off so that it was the correct shape. What you will also notice is that I drew the lighthouse shape on the other side of the gel plate so that when I rolled the paint onto the gel plate I could avoid getting any dark paint onto where the light ray and white lighthouse section were.


The next decision was how and where I was going to position the text onto the collagraph print. I wasn't keen on the way It was all lined up square in this particular design ...

So I decided to mask each word and print them separately. I started with the word YOUR so that I had a centred point to work from. I added some embossing to the light ray edges here too.
I wanted more detail around the base of the lighthouse so used Rangers Faded Jeans Archival Ink for the blocks at the base of the lighthouse and Ranger Archival Ink in Hickory Smoke for some rock detail.

I could not resist a little stitching on the final piece so added the step details. I now wonder if I should go back and stitch the card printing plate and see what result I would get from that.

And some free motion stitching on the railings that surround the wire mesh...that was tricky...remember to use a fine needle and an extra layer of paper/card on the reverse to stop your paper tearing if you do this.


I particularly like the energy and rawness of the print. The rough lines and subtle hidden textures allow your eyes to roam.

I actually especially like this monotone print that has more of the stamped embossed detail showing...I think this project has opened my eyes to more possibilities through play. If ever I'm stuck creatively I tend to reach for my gel plate.
Doing these collagraphs has taken time and patience waiting for the layers to dry but it has also given me the questioning mind of what if I? I hope you have a play with this technique and explore what textures you can add to your prints. Leaves, cotton thread, wallpaper and the likes also make fun textures...

I now have quite an array of various lighthouses.

I have made a Youtube video showing two more collagraph ideas...one cutting the background away and the other using chalk pastels over embossed PaperArtsy stamps...you can watch the whole process here in less than 15 mins...
Floss x

Facebook: https://www.facebook.com/floss.workshop.art
Instagram: https://www.instagram.com/floss_workshop.art/
website: https://www.flossworkshopart.com/home
Floss teaches mixed media sessions in person from her small workshop in East Sussex UK.
Details of classes can be found here: https://www.flossworkshopart.com/


No comments:
Post a Comment