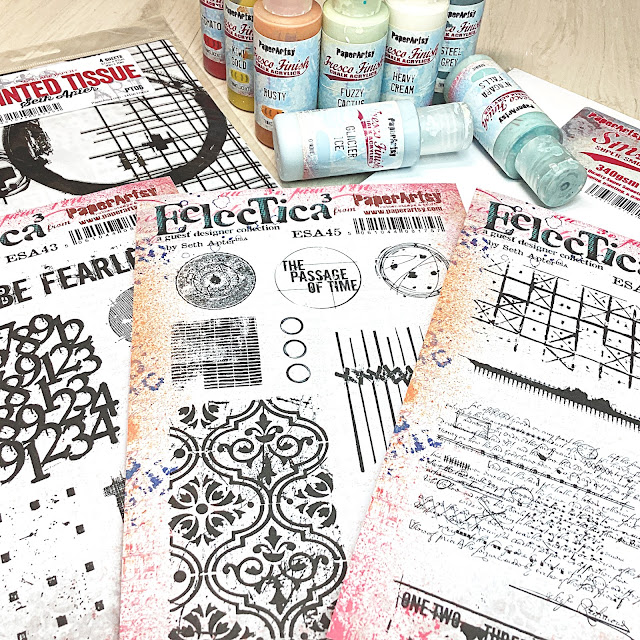
Before starting the project, I first prepared these Seth products. The stamps are the latest ones released earlier this year and the colors are Seth’s originals. I used most of the colors for gel printing by Seth's colours. It seems to me that Seth weaves stories by making stamps from things that inspire him on his walks and travels. I share that feeling and wanted to enjoy creating my works using these stamps. The paints I used here were PaperArtsy Fresco Finish Chalk Acrylics - Glacier Ice, Niagara Falls, Fuzzy Cactus, Heavy Cream, Steel Grey, Rusty, Kiwi Gold, Tomato and some more. Fabulous stamps were Seth Apter's stamp sets 43, 44 and 45 (ESA43, ESA44 and ESA45).
First I used gel plates to make the base of the album and the collage papers. The first painting I did, that Seth showed in a video, was to use opaque colors and then lightly dab transparent colors on top of them. I used black and white papers and printed them alternately until I had a paper of a color I liked.
In addition to the two-colored paper, I also prepared some washi papers, added paints with water and printed it using the same gel plates. I used these for thin tape and coloring points.
This time I decided to make a simple rectangular mini album in the √2 golden ratio, using a collage technique made from gel print papers I had made previously. The diagram above explains how to create the √2 golden ratio rectangle used here.
Draw the diagonal of the square, and use the diagonal as a radius to draw an arc that is tangent to the extension of the base of the square. Draw a rectangle that encloses the resulting figure. This is a √2 rectangle. Dividing it will create a smaller √2 rectangles (from book - Balance in Design). I tried to base the collage on this method, but I didn't use it for everything. When I overdid it a bit, or the colors didn't work out, I just relied on my usual eyeballing to fix it. Using this √2, the actual dimensions of the rectangular card are 3 inches high and 4 1/4 inches wide.
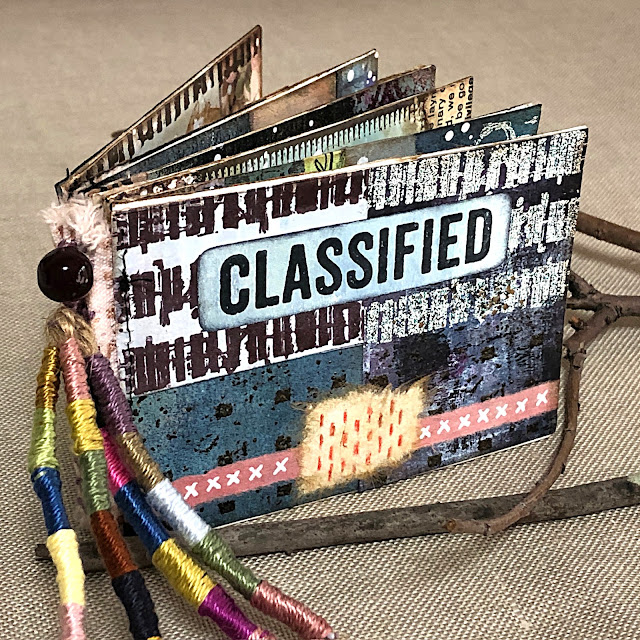
I created 12 rectangular cards, as described written above, 3 inches high and 4 1/4 inches wide using Smoothy (Heavyweight) A4 white stamping card and collaged the gel printing papers on them top. From the 12 collaged cards I chose this card as the cover of the album. I used 'CLASSIFILD' from ESA07 stamp set.
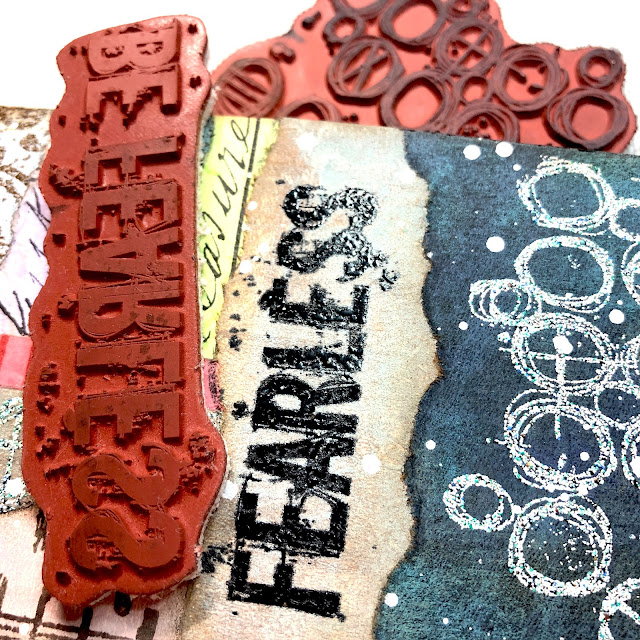
Now, let me give you a brief introduction to each page. The gel printing papers were used almost as is, and variations were added by stamping with ink or embossing powder. The technique and Seth's stamps used will be shown in the enlarged photos below.
On this page, I added some leftover pieces. The embroidered fabric, stamped paper, and textured wallpaper used for paint stamping. The metal 6 is made by embossing foil using a cutting die and then coloring it in a vintage style with alcohol ink to create numbers and letters, which I use whenever necessary.
The marks shown here are from stamps and Seth’s printed tissue paper, and I love the Damask pattern stamp on the right-hand page and I think it will come in very handy.
Here I printed the letter X onto fabric and stitched around it. Also I embossed it onto wax papers with embossing powder then I glued them over the collage.
The last page. The photo is a little dark and hard to see, but the grid on the left page is made of bronze powder. You can see it in the enlarged photo below. I used light pink gel print paper for this whole page.
For the spine, I chose a simple vintage-style card.
I mainly use Seth's new 3 set stamps here, but I chose this CLASSIFIED for the focal point because the words stand out. I used Seth Apter stamp set 07 and 44 (ESA07 and ESA44). Ranger Industries Archival Ink (ground espresso and jet black) with Distress embossing powder (Lost Shadow).
PaperArtsy's blank tissue is thin but strong enough that it doesn't wrinkle easily, making it a great product. It also goes great with stamps and Mattints, so I use it whenever I get the chance. Here I used the ESA35 stamp with white embossing powder on blank tissue paper. I took the photo with the light shining on it, so the tissue paper looks white, but you can't really tell from the outside. Satin Glaze seems to be good for adhesion.
From here on, I will introduce the products, which are made using the same techniques. I used stamps are ESA43 and ESA18. The former used Archival Ink jet black with Lost Shadow embossing powder and the latter used mixed whitish powder.
I decided to make a fabric hinge to hold the 12 cards in the album. To match the colors of the album, I diluted Bougainvillea with water and dyed some off-white fabric, then dried it and it turned out a great color.
I stamped the EM69 stamp all over the dry cloth using Destress Ink Vintage Photo.
I rip a piece of hinge fabric to the width of the card, attached it between two cards with double-sided tape, and then joined two other cards together using a sewing machine.
I wanted to dangle something from the back of the album, so I tried out a lot of different things but nothing seemed right. I thought a simple thing like a branch would be good, so I bundled together some hemp string to make a branch, then wrapped embroidery thread around it and made it like this.
Since I made the width of the hinge fabric a little wider, the cards didn't hang loosely together, so I connected them tightly with backstitching like this. This completed the project.
In most cases, when I make an album, I emphasize unity and create one or two master boards, then insert photos and stamp images to create a flow. However, this time I wanted to try a √2 composition, so I made a collage using printed paper. There were some pages that were disjointed, but I enjoyed the process. I would like to use this experience to create more creative works. If you would like to create abstract works using Seth's stamps, please share them with us on Facebook, PaperArtsy people, or Instagram. We look forward to seeing you.
Thank you so much visiting.
Etsuko xx


.png)

1 comment:
such detail in your post, and the book looks amazing.
Post a Comment