2021 Topic 2: A Pocketful of Journaling Resources ESN {by Jenny Marples}
~ Keren.
Hi everyone, it's Jenny Marples (Pushing The Right Buttons) here.
I'd like to share with you a little folio I've created to hold lots of
the bits and pieces you might need when working in a planner or journal.
As you might expect, that involves a few pockets!
When Sara Naumann talked about her new stamp and stencil releases in her recent FB live video in
the PaperArtsy People FB group I was inspired by her suggestion that
they could be used by planners and everyone who enjoys journaling.
Rather than just make a few journal pages (and bearing in mind the
current theme is pockets) it got me thinking about making pockets to
hold those bits of ephemera, tags, washi tapes and other things that
planners and journalers often use. Whilst making this folio I decided to
combine Sara's new releases with some of her older stamp sets since
they work so well together. Here's what the cover of the folio looks
like (front and back, secured by a sari silk ribbon);
I
used Eileen Hull's new 'Folio Journal' die as the basis for my folio,
splitting each of the folding sections with a knife and adding book
binding Architape with Hinge Spacer tools from Coolkatzcraft Ltd to introduce extra flexibility into each join.
The
entire hinged folio cover had cotton calico applied over the top. This
was then painted with a slightly dilute layer of Toad Hall paint which,
when dry, was sanded to add some age and softness to the finish.
On the inside of the cover I applied some gauze and painted the edges (the bits that would be visible) with Honey Dew.
Next it was time to start chopping up that masterboard and adding sections to the outside of the cover.
Turning
attention to the inside covers it was time to start constructing
various pockets to hold the bits and pieces needed by journalers. I used
more dies for this bit including the Walrus Whiskers Die Set, a Folio
Envelope Die Set and a Clever Strip Die to create the expanding sides to
some of the pockets.
Some
of the pockets were given an uneven coat of Toad Hall whilst the
envelope was painted in Cloud 9. Many of them had pieces of the
masterboard added on top. More of the masterboard was added to the
inside cover.
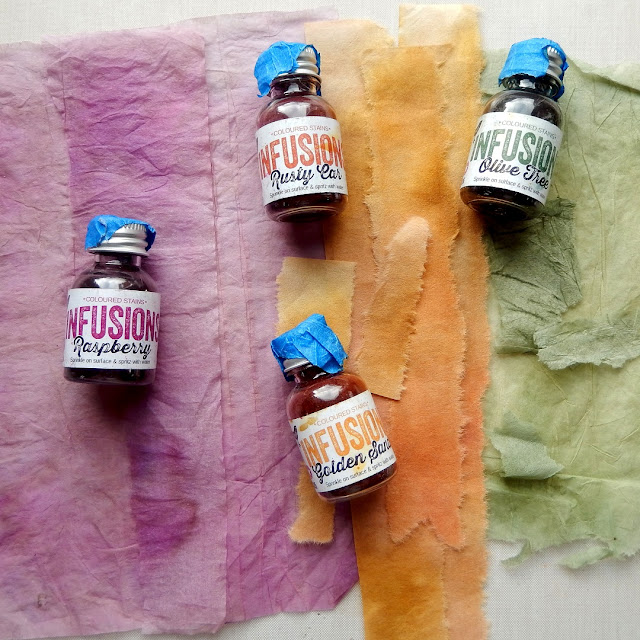
With
the basic folio constructed I needed to add a pop of extra colour; for
this I turned to Infusions, dying one ply layers of tissue with
Raspberry and Olive Tree, and some teabag paper with a mix of Rusty Car
and Golden Sands.
To
add to the decoration of each pockets and the front of the cover I
stamped images from the new ESN47 set together with some from sets
ESN36, ESN37 and ESN38 with Peat Moss Archival Ink before applying torn
strips of the tissue and teabag paper over the top.
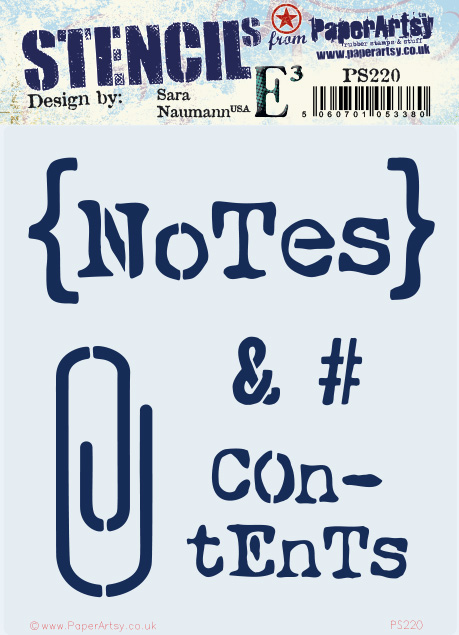
Almost
finished! I stamped various words and images from one of Sara's new
sets ESN49 onto the pockets and covers using black archival ink and with
Little Black Dress through one of her new stencils PS220.
Here
is more of the finished folio starting with the front inside cover
which, when folded back, reveals the first of the pockets containing a
couple of die cut stencils and the folio envelope for notes and scraps;
There
is an expanding pocket for ephemera on the first of the foldout
sections and on the inside of the spine a space to hold a pencil (or
pen) and a paintbrush.
The
folio is deep enough to hold a hand bound notebook decorated to
coordinate. It is secured in place by a band attached to the inside of
the cover.
On
one side of the final page are more pockets containing tags that can be
used as bookmarks and a washi tape holder whilst the other side has
been decorated and stencilled to coordinate.
Sara
Naumann's new stamps and stencils are perfect for making your own
bespoke journals, planners and folios as well as for using inside them
and they can now be found at your local PaperArtsy stockists.
Thanks so much for stopping by.
Jenny


LOVE it Jenny.. it's gorgeous...
ReplyDeleteWonderful.project Jenny
ReplyDeleteWow. I LOVE this so much. What a beautiful creation.
ReplyDeleteThis is stunning!!
ReplyDeleteGorgeous!
ReplyDeleteLove the soft brayered textures and great use of Sara's fabulous word stamps and stencils.
ReplyDeleteAlison x
Gorgeous project Jenny! You have such a way with a soft colour palette, beautiful ~ Stef
ReplyDeleteLove all the details x
ReplyDeleteWonderful creative process.....
ReplyDeleteWow !!! I am blown away by this Jenny, so many wonderful ways of getting the paint onto all those substrates and the wonderful ideas for pockets. Stunning !!!! Jennie x
ReplyDelete