Hi everyone, it's Liesbeth with you today, and I'm here to share with you my home-printed fabric using a selection of stamps designed by Scrapcosy!
I love to use fabric in many different ways! Not only for sewing, I also cover books with it and even make cards and other things with it! I'd love to show how to decorate your own unique piece of fabric. Enjoy the process of creating a large piece, it's so much fun, and use your fabric the way you choose!
Before I started I covered a big work surface with plastic because this technique is a delicious mess;-) (the plastic can be used multiple times).
A piece of white cotton fabric, not too thick, as big as possible! Mine was 90 x 60 cm. The best is to wash and iron it beforehand, so the ink, paint and glue will be well absorbed.
I always make the most decisions while creating...not before I start. So I think I'm gonna use this colours of Fresco Paint! PaperArtsy Chalk Acrylics: Terra Cotta, Slimed, Banana, Glass Blue and Smoked Paprika. It's important to use translucent paints as these five colours are.
I also searched for some matching colours of waterproof stamping ink. I used Tsukineko StazOn inks, but other coloured waterproof ink works well, like Archival!
These are the two PaperArtsy stamp sets I will use! Love them! I love the atmosphere and they're so detailed. With the stars and the beautiful borders they are perfect to use for this fabric!
Eclectica Scrapcosy 24 (ESC24) and Eclectica Scrapcosy 25 (ESC25)
Let's start stamping! I randomly stamped the entire fabric surface using the different stamps, starting with the branch (green), the moon (yellow) and a border (blue).
Here I made new decisions. I added red (wreath) and a darker blue (stars) and stamped the borders with brown. Sometimes I made a second print, the image is lighter then the first.
I continued stamping with some texts and another small border. Make sure you stamp the background stamps in all directions (not the texts).
I also used the stencils 266 PA Stencil - Large Size {by Scrapcosy} (PS266) and 264 PA Stencil - Large Size {by Scrapcosy} (PS264), they're matching with the stamps!
...and I did the same using Fresco Finish Banana and the stars.
And still..something was missing. So I stamped the good old PaperArtsy Hot Pick 1501 (HP1501) It's that wonderful large text, useful for everything! I stamped it, and just parts of it, here and there on the entire piece using black StazOn ink.
This is how the fabric looks now, it's time for some focal points!
Using black StazOn ink, I stamped the bigger stamps from both stamp sets several times onto white tissue paper.
I tore out the images (also added some images from the PaperArtsy printed tissue paper PT01) and cut out the moons. I spread the images over the fabric.
To glue the tissue scraps down I mixed half bookbinder's glue and half water; equal amounts. It needs to be thin! You can also mix every kind of white glue with water, or use Mod Podge. Glue everything on the fabric and be sure that every cm of the fabric is soaked by glue.
When everything was still very wet, I started to paint with watered down Banana paint. Just use your intuition and don't think too much ;-)
Continue this ,water color' painting with orange...
...and blue and some green. I lightly painted some of the images as well.
Using watered down Fresco Finish paint Gold, I splattered and painted and splashed beautiful spots and drops on the fabric. Now it's time to let it dry for a long time... I always give it a night to dry well.
If dry, it can be peeled off the plastic and your own unique beautiful piece of fabric is ready!
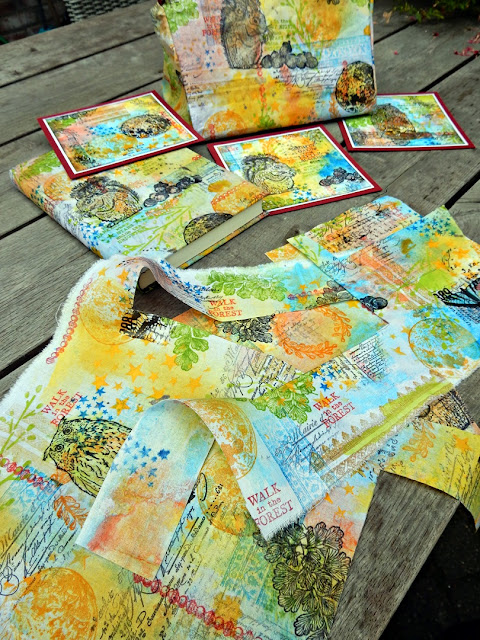
The finished piece of fabric, the only one of its kind! Now you can make with it whatever you want.
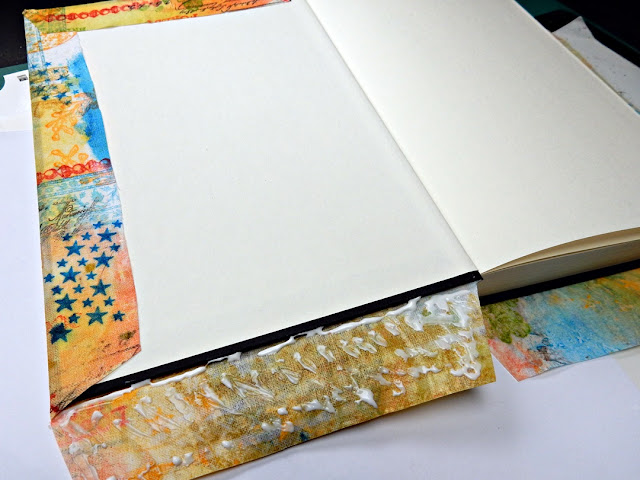
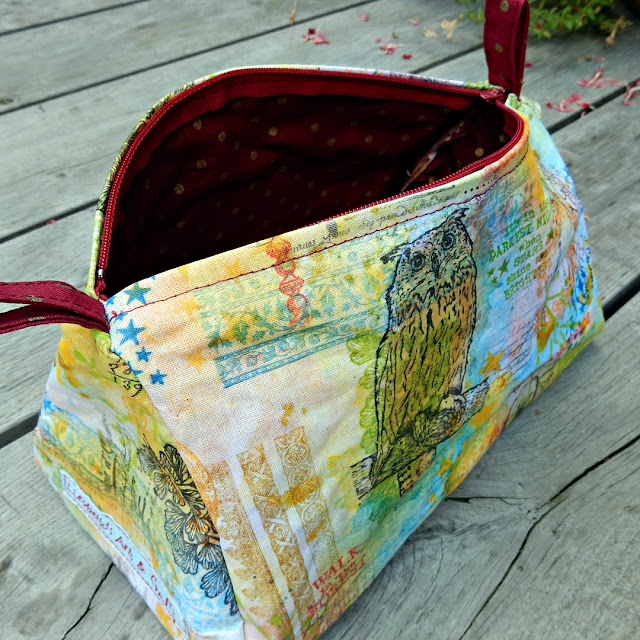
Out of this piece of fabric I made a pouch, 3 cards and a book cover! This is the book cover: I think a very nice and easy way without sewing. I used a ,dummy', an empty book. Cut out a nice piece of your decorated fabric (5 cm taller on each side than the book) Note there's a nice piece on the front.
Wrap it around the glued cover, press well. Start with the back, then the spine and finally the front.
Cut some fabric from the corners and spine, glue them and fold them to the inside as shown. At the spine I always cut off the fabric.
Finish off the insides with pieces of beautiful paper.
I love to use a white gel pen and a black fineliner for the finishing touch: on branches, acorns, around the stars, in the eyes etc.
The finished covered book, great to give as a present!
This nice technique is something I've done many times before, and every time the result is so different, so exciting. So I recommend you to give it a try yourself to. You will have so much fun during the process. I'm looking forward to see what you come up with and what you make out of your own fabric! To me it was another adventure! Hope to see you next time, have a wonderful day!
Liesbeth
Facebook: Liesbeth Fidder-de Vos
Instagram: liesbeth_fidder
On 8/9 October I will teach 4 workshops (4 different stamping techniques) in Tampere, Finland. Read everything about it HERE.


Looks spectaculair, what a great idea.
ReplyDeleteDefinitely going to try this, very impressive
ReplyDeleteHeel mooi geworden, Liesbeth!
ReplyDeleteSchitterend idee Liesbeth. Mooie kleuren.
ReplyDelete