2021 Topic 2: A Pocketful of Leaves and Lace {by Ellie Knol}
With
some outside of the box thinking, Ellie has given us another way to use
Tracy Scott's lace books, and you could do similar with die cut pieces
too. Her gel printed planner contains beautiful pockets that seem to
glow with the ethereal white images emerging from them.
~ Keren
Please note Ellie will share her books in a FB live in the PaperArtsy People FB group
FRIDAY Feb 19th
11am (PST), 1pm (CST), 2pm (EST), 7pm (UK), 8pm (FR, BE, DE, NL, ES, IT),
6am (AU,20th), 8am (NZ,20th)
Hi everyone, it's Ellie Knol with
you today, and I'd like to share with you the very pleasure I had in
creating two spiral binded books. I was planning to make one but had too
many pages for just one book; that's how the second one was born.
I
chose to do this project as I needed a new planner, hehe. That for one,
but the theme made me think of creating different types of pockets to
go into a planner type of note / journal-book. Combining that with the
beautiful stamps and lacebooklet made me decide to use the lace in the
book as well.
I know: I cut it up... I did not use it in the typical Tracy Scott style... shame on me, lol.
(You won't believe it, but this is what my husband actually felt about me using it this way. I told him: I have another to play with as I used only half of it.)
I know: I cut it up... I did not use it in the typical Tracy Scott style... shame on me, lol.
(You won't believe it, but this is what my husband actually felt about me using it this way. I told him: I have another to play with as I used only half of it.)
Of course that provided me with a cleanup page as well! The lace is from TSLB03.
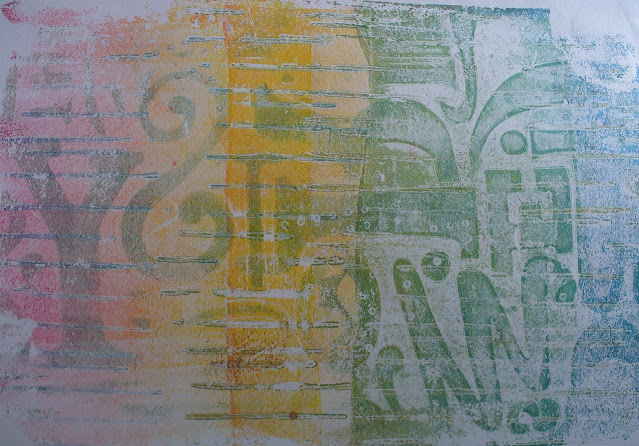
Monoprinting is a favorite technique of mine. Gel-printing in layers or monoprinting- what's the difference? The word says it: mono means ONE, so monoprinting is when you do not layer two prints on one page.
I
stamped with StaZon ink onto the plate. Before pulling the dried paint
with a white paint, you stamp onto the gel-plate with the solvent ink.
Leave the ink to dry before brayering on the white paint, or you'll make
a mess.
When playing with paints, we also need a stencil, don't we? I LOVE this new stencil PS209 from Tracy.
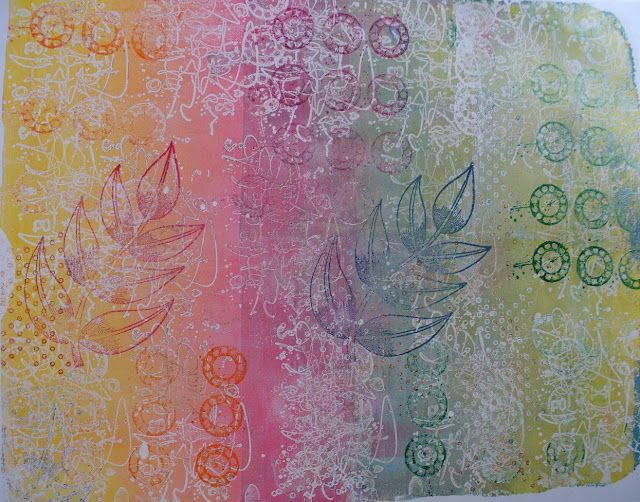
Stamping into the wet paint on the gel plate is so much fun. The paint I remove from the gel plate gets stamped onto a second gel plate. The circles are from stamp set TS041
As you may have noticed, I only used transparent and semi-opaque Fresco Finish Paints: Cherry Red, Smoked Paprika,Tangerine Twist, Zesty Zing, Mustard Pickle, Southern Skies and Glass Blue. They are good for transparent prints and the colors blend easily and thinly.
I will show a few of the pockets I created. This is one I created from a torn piece of monoprint. It's been adhered to the white cardstock on all three edges.
This pocket is like a mini-envelope bound horizontally, also made with a gelprint
Creating
pockets with vellum provides for see-through pockets. The torn edges
make it look playful. Notice that you have two pockets this way on both sides of the page!
The pocket on this page is also like a mini-envelope, but bound vertically using a strip of Smoothy Heavyweight cardstock.
Heat embossing in white with beautiful leaf stamps from stamp set TS040, in this case onto a vintage photo pocket. This is a new favorite stamp set of mine, that's for sure!
I used up all the monoprints I've made in this session! The covers of the book were created by pulling the prints onto Smoothy Heavyweight cardstock on
both sides After drying I laminated them which makes them even
sturdier. An elastic band forms the closure of both the books.
You may have noticed that I stamped the word NOTE and some script to the covers. That's Ink & The Dog Words Plate 3 in action!
Within the book there are two more dividers, also laminated. They keep the white papers (for writing on) separated in various sections within the book. The pages with pockets are placed at the beginning of every new section (sort of).
Within the book there are two more dividers, also laminated. They keep the white papers (for writing on) separated in various sections within the book. The pages with pockets are placed at the beginning of every new section (sort of).

The final detail; not sure whether it's finished as yet, but had a nice play with it. I LOVE (heart) Lace Book 3..
I
have to confess... creating this kept me busy for quite some days. Not
that I mind, but it sure is a work-in-progress still. Using a book like
this has to grow on a person, as journals do. As you may know I have a
passion for making books, the binding, but also the way it will be used.
Creating this was an experience I learned a lot from. For instance...do
not try to use watercolor on vellum; heat embossing, yes, but water,
no!!
Please be inspired, and play with your product!
Let me know your thoughts on this project please. What might you do different ?
Let me know your thoughts on this project please. What might you do different ?
Ellie Knol
Blogs: http://elliecreahoekje.blogspot.nl/
and http://ellieatcs.blogspot.nl/
Owner of : https://www.facebook.com/groups/DutchArtJournal/
Facebook: https://www.facebook.com/profile.php?id=100008479362838
Pinterest: https://nl.pinterest.com/ellieknol/
Instagram: https://www.instagram.com/ellie.knol/
Please note Ellie will share her books in a FB live in the PaperArtsy People FB group
FRIDAY Feb 19th
11am (PST), 1pm (CST), 2pm (EST), 7pm (UK), 8pm (FR, BE, DE, NL, ES, IT),
6am (AU,20th), 8am (NZ,20th)


Fabulous project Elli. Really looking forward to seeing your live.
ReplyDeleteVey cool love how the lace booklet printing turned out!!! Looking forward to your live!
ReplyDeleteawesome project Ellie, I wish I could watch but have to go to work :(
ReplyDeletePráchtig Ellie! Ik moet ook echt weer es met de gelli...������
ReplyDeleteThanks for sharing your beautiful books Ellie, I will be sure to watch the facebook live tonight. Thanks ~ Stef
ReplyDeleteWow verskiklik mooi! Skielik die begeerte dat tannie my leer hoe om dit te doen😃
ReplyDeleteYou can still watch it Christine, and thanks to you all!
ReplyDelete