
2020 Topic 4: Mighty Mica

Introduction:
The composition of this canvas has so many delicate details to be appreciated - tone on tone stamping, using white or light paints to knock back a darker paint colour, using a stamping platform to great effect, coloured pencils, and of course, mica! Corrie shares each step so well, I'm sure by the end you will see how all those steps make a difference!
~ Leandra
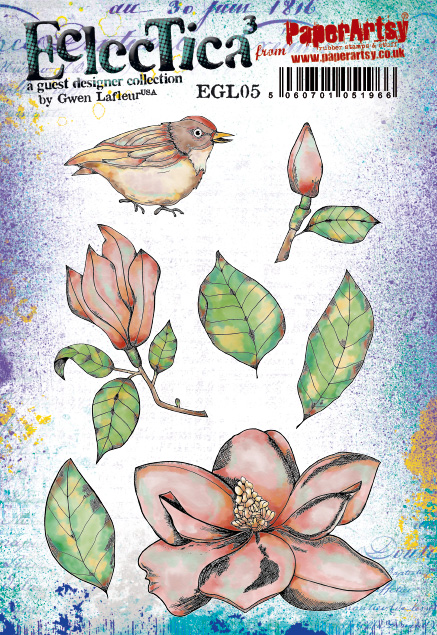
Hi everyone, it's Corrie with you today, and I'd like to share with you a 20 x 20 cm canvas that I made with the beautiful new stamps by Gwen Lafleur.
I
was so excited when I received this gorgeous stamp set {EGL05} which is
one of my favourites from the new release. I had never worked with
mica, apart from with mica powder, so I went in search of some sheets it
as I really wanted to try it. Unfortunately I could only find one pack
and it was dark brown; not what I wanted so it was back to the drawing
board to come up with another idea. When I found some mica flakes in the
back of the cupboard that I had never used, I decided to use those
instead.

This
is what I came up with. It is a 20 x 20 cm (about 8" x 8") canvas. It
was fun to make and putting the pieces of mica on the flowers was a
labour of love. Here's how it came together:


I decided to keep the background really simple because I wanted those beautiful images to be the stars of the show. I painted the canvas with some Fresco Finish Chalk Acrylic in the colour {Nougat} and then added some stencilling with mask {PM008} By Emma Godfrey using the {Blue Bayou} Fresco Finish Chalk Acrylic.


I
really enjoy colouring with Copic Markers but for this project I
thought I would do something different. I stamped the whole set onto
some {Smoothy Card} and left all the stamps in the stamping tool so I could re-stamp them later in the exact same spots.

I used PaperArtsy Fresco Finish Chalk Acrylics to paint all the stamped images. Looks a mess like that but wait and see ! I used these colours : {Snowflake}, {Nougat}, {Gold Rush}, {Tinned Peas} and {Blue Bayou}. I used these same colours throughout the project.


Remember
I left all the stamps in the stamping tool. Here's why: all the stamp
lines were gone because I painted over them, I just had to put it back
into the stamping tool and re-stamp. I used Archival Ink in {Jet Black}
to stamp before and after painting.

I
then added a little bit of shading on all the images using coloured
pencils. This worked a treat ! I then cut all the images out and went
around the cut lines with a black marker to make it look like I cute
them out perfectly!


Next
I sat down with a cup of tea and added mica flakes, one by one to the
flowers and the buds, so all the blue paint is covered in mica. It is
such a shame that you can't really capture the shimmer/glitter in a
photograph very well. Believe me though, it is very pretty and sparkly !
Next I turned my attention to the canvas.


I decided to keep the background really simple because I wanted those beautiful images to be the stars of the show. I painted the canvas with some Fresco Finish Chalk Acrylic in the colour {Nougat} and then added some stencilling with mask {PM008} By Emma Godfrey using the {Blue Bayou} Fresco Finish Chalk Acrylic.


Because I wanted the images to shine I knocked the stencilling back with more Fresco Finish Chalk Acrylic, using the {Nougat} again and also the {Gold Rush}.
I mainly used my fingers to do this. I also decided to add some
dictionary words because I thought it would go well with my canvas. They
are the words: Flora, Natural and Fauna. After this I added the images
together with a part of a word chip by Tim Holtz which I coloured with a
Copic Marker to get it rid of the stark white.


As
I said I really love this stamp set by Gwen Lafleur and I really
enjoyed using it. I can see lots of other uses for it, including
birthday cards, art journal pages (my next project) and even tags and
ATC's. I really like how my canvas turned out and wonder how it would
have looked in different colours and with maybe just a background made
with mica powders or mica sprays. I hope I gave you some ideas to have a
go yourself.
Thank you very much for being here today and I hope you'll visit me at my other locations too :
Instagram : https://www.instagram.com/corrie.herriman/
YouTube : http://www.youtube.com/c/CorrieHerriman
Such a wonderful canvas, Corrie. Love the neutral tones and the balance of the overall design . As for the mica - worth the patient addition of each of the mica flakes aided by a good brew! Judging on how it looks from a photo I can bet it looks amazing IRL .
ReplyDeleteTFS
X
This is wonderful Corrie. Fabulous project
ReplyDeleteThis is stunning! love the blue tones.
ReplyDeleteStunning Corrie!! Love this soft colourway too!!
ReplyDeleteOMG absolutely stunning
ReplyDeleteThat is so beautiful, Corrie! X
ReplyDeleteI love your project - its beautiful!!! What did you use to affix the mica flakes?
ReplyDeleteThis is beautiful! I'm loving the mica flakes on the flower petals, and what a great way to use the stamp positioner to restamp after you painted! I'll definitely be using that idea :)
ReplyDelete