Pages

Wednesday, 30 October 2019

2019 #17 A Vintage Christmas: Snowman with EKC {by Chris Dark}

2019 Topic 17: A Vintage Christmas


Chris has created such a gorgeous vintage effect with Kay's stencil and stamps and ended up with a softly pencilled and painted snowman with such an unexpected but wonderfully Christmassy colour scheme.Her gift bags and tags are really special.

Hi everyone, it's Chris Dark with you today sharing my take on A Vintage Christmas. There are so many ways to interpret this topic and everyone's idea of it will be different but holly, snowmen, snowflakes and Christmas tree ornaments are definitely to be featured in mine so I chose to work with gorgeous recently released Christmas stamps and stencils by Kay Carley. All the stockists for the stamps and stencils I used can be found in this post.  It's nice to do a pretty project like this now and again with lots of sparkle and a gorgeous palette of colours that I feel reflects vintage from Tracey Scott's new Fresco Finish Chalk Acrylic Paint release. Stockists for the paints can be found at the end of this post.

I always relish the prospect of working with stencils and Kay's snowman stencil PS161 is a joy. You can build him up so easily as all the parts of the stencil fit together for layering; look at the blog post linked above where Kay shows how the stencils can be used.  It's easy to create a different effect each time but  I've surrounded mine with holly from the PS162 stencil and the EKC32 stamp set. A gel plate helped me make the backgrounds, it works so well with the stencils for more layering of colour and the impression of texture.


I enjoy decorating gift bags and making tags for my Christmas gifts and everyone seems to appreciate them which is nice so I feel it's worth the effort. This one will be for my mum; it can be easily pegged onto the top edge of the bag.


There's a gel print in the background using some of the paints listed above. The Frescos  create a really nice base for stencilling and also for colouring with pencils. The mono print gives an even coating of paint on the card with a little tooth for the pencils to grab.


Die cut some holly, a silver skeleton leaf, silver mini clothes peg, and a silver glitter matting layer all help to add the vintage sparkle.


The gift bag follows on from the tag above in style with a stencilled and stamped mono print and then stencilling over the top. The die cut this time is cut from another mono print where real leaves were used on the gel plate.


The recipients name could be written in the heart instead of using a gift tag.


By using different parts of gel print you can achieve a nice variance in the colours but they all co-ordinate and the new Fresco colours are so pretty together. 


A bit of glitter card is another favourite thing of mine to use at Christmas and some wrinkled seam binding too.


Christmas makes are always my favourites although they are also the hardest makes to fit in at such a busy time of year so I'm glad I've made a start. My colour scheme is set with some of the beautiful new colours in Fresco range and the beautiful stamps and stencils from Kay help to get quick results. I've die cut lots of silver glitter holly for the rest of my tags and bags and I hope you'll join us in the topic! 


Thanks for joining me today and I hope you have some creative time this week.
Chris x

Instgram: @chrisd999
Find my classes at The Craft Barn


Monday, 28 October 2019

2019 #17 A Vintage Christmas: Christmas Wrapping with ESN {by Jenny Marples}

2019 Topic 17: A Vintage Christmas


Yes! It's finally that time of the year where we can mention the 'Christmas' word!! We have a lovely new topic for the next 2 weeks where our bloggers are exploring Vintage Christmas ideas with stamps of their choice. Today Jenny is using Sara Naumann's stamps to decorate this lovely box and create some beautiful accompanying items too.

Hi everyone, it's Jenny Marples (Pushing The Right Buttonswith you today, and I'd like to share with you some vintage style Christmas wrapping ideas using Sara Naumann's fantastic new stamp designs ESN38 and ESN39.

There's nothing quite like making bespoke and personalised Christmas wrapping for those special gifts and it's so easy to do. I've created a gift box, wrapping paper and matching tags to show you how it can be done.


Let's get started; begin by cutting four lid sides and two box tops from thick black card or chipboard using Eileen Hull's Sizzix Scoreboards XL Die 'Treasure Box'. Paint the outside of each piece with French Roast Fresco Finish paint. You'll see below that I left some bits at the edge bare.


Next brush Cloud 9 Fresco Finish paint across the lids and sides horizontally, again leaving some parts unpainted at the edges.


Assemble the box by sticking together the side pieces and adding the tops with strong glue or tape. Then use rough sandpaper to remove some of the paint, paying particular attention to the edges.


Add permanent brown ink to the edges of the box. I also like to run a thin line of dries-clear glue along the edges to strengthen it.


With the box complete it's now time to start work on the decoration. Use a brayer to apply Tinned Peas, Granny Smith and Guacamole Fresco Finish paints to a piece of A4 Super Smoothy Card. 


Stamp over with the star design from stamp set ESN39 using London Bus Fresco Finish paint until the card is covered.


Cut strips from the edge of the painted card, edge with a little permanent brown ink and attach to the top and bottom of the box to replicate the look of tied ribbon. You'll see from the photo below that I also added slightly wider pieces of black card to the inside of one side of the box to create a lip that ensures the top and bottom will fit securely when slotted together.


Cut tag shapes from kraft card and cut slightly smaller ones from the painted card (I was able to cut 6 in total). Edge each one with permanent brown ink before sticking them together.


Cover a small piece of card by brayering Tinned Peas, London Bus and Guacamole Fresco Finish paint over it in layers.


Cut a piece of this card and add it over the tag before stamping one of the designs from stamp set ESN39 over the top with permanent black ink. Use an embossing ink pen to draw over the leaf and berry image then cover in gold embossing powder and heat set. To finish tie a bow of white ribbon or seam binding. Repeat this step for the remaining 5 tags using the designs from stamp sets ESN39 and ESN38. 


You can combine some of the images and sentiments and use parts of each of the designs to create different looks for each tag.


To decorate the top of the box cut smaller tags from the remaining card and stamp/emboss as you have done for the larger tags. Attach with a white ribbon or seam binding bow.


With the box and tags complete it's simple to create the coordinating wrapping paper. Take some matching brown paper and stamp over with one of the designs from stamp set ESN39 using Cloud 9 Fresco Finish paint.


Here are some photos showing the completed box and wrapping paper;


Here are the completed tags; you can see how I've mixed up the stamps used to create different designs on each.


Finally, if you pop the wrapping paper and tags inside the box you can even give them as a gift in their own right.


I hope this has given you some ideas for creating your own vintage style Christmas wrapping with Sara Naumann's beautiful stamp sets.

Thanks for joining me here today,
Jenny

Sunday, 27 October 2019

2019 #17 Topic Introduction: A Vintage Christmas

2019 Topic 17: A Vintage Christmas


Well hello everyone, Keren here with a really beautiful and nostalgic topic; Vintage Christmas. I apologise in advance for those scrooges amongst us, but most of us are beginning to think about the season and I have a festive feast of images that will make you smile, grimace and hopefully inspire to get your Christmas crafting on!
If I suggest 'vintage', we could conjure up so many different eras that might speak to our age, stage of life or the styles that we adore. My picks romp through old, really old and across different countries too!
One of the vintage queens of PaperArtsy has to be Scrapcosy. She's well known for her love of vintage and the way that she's inspired by many vintage images. So, it only seemed right to add in this Christmas panel using her 2017 Christmas stamp release


My idea of vintage probably heads straight to Victoriana or the 1960's. This is a typical Victorian styled winter town. It makes me think of Charles Dickens and 'A Christmas Carol' and I love the way that the warm colours are filtered through the windows. It gives such a cosy feel. 


Stylised periods like the 60's and 70's produced some fabulous designs. Notice the shadows from the hanging baubles and the gorgeous colour scheme.


Vintage can be vintage inspired, so I thought I'd include some actual artistic examples. These fabulous covered boxes use some great images and would make lovely gifts or decor.


 Food is an important part of any cultural celebration. These next two pictures show the best and quite possibly the worst of vintage food!


I'm always up for exciting new recipes, but this 'Tuna Tree' sounds a step too far! Do love the little 'elf' on a shelf who has made a massive comeback as the star of 'Elf On The Shelf'. I'll leave the tree and keep the elf!


Vintage rarely makes me think of bright colours, but this amazing example is so beautiful and look at the intricate details like the Tiffany style lamp and all the tiny tree decorations.


This kitsch Christmas card is wonderful; the snow looks like glitter falling. The clever colouring makes the mushroom look as if it's glowing!
  

I couldn't resist adding this vintage photo. He's so cute and I love the brown string tied parcels which always looks so classy.


I remember being mesmerised by a wooden version of this Rotary Candle Carousel. Seeing the warmth of the flames and the heat spinning the decorative part. These cute creatures certainly know how to party!


It's easy to think that we have the monopoly on cool colour schemes, but this 1960's table shows that 'vintage' can give some wonderful colour inspiration too!


This little pair are celebrating the age old tradition of kissing under the mistletoe. I didn't know that originally you were only allowed one kiss per hanging berry and only that! Love how they're wearing the berries from head to toe. 


 The 1950's certainly provided fabulous artwork. This card from the time has wonderful grey whites and vintage-y muted tones!


Here's another example from the same era, with the typical Christmas scene of a snowy church.


Moving back to the vintage inspired, I love this set of stockings that started out as a cheap pair then had a little bit of vintage glamour added.


Vintage Christmas photos across the world look different from country to country. This photo is showing the Nordic tradition of St Lucia. 


 We're yo-yo'ing back and forth from different time periods now. I thought this was a great example of design and love how the arch looks like a Christmas tree. This has given me a great idea for a Christmas greeting of my own.

Whilst looking for designs to inspire us, this sepia image caught my eye- not only for the cute girls and the vintage sled but more for they way that the image is entirely brown and white with just little elements of the scene picked out in soft colours.


Before Father Christmas became 'Coca-Cola'ised', there were different coloured 'Santas' from different parts of the world. This is a really striking image in white.


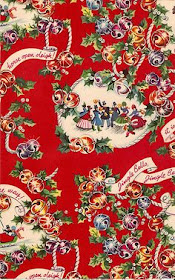
 I thought this vintage wrapping paper design was fresh and vibrant. I'd love to wrap my parcels in it too!


 To round off the topic, I decided that some images of actual projects/papers might be useful. It's always good to see modern interpretation of vintage! This lovely collaged paper using vintage images to create a fresh look. The image reminds me of Scrapcosy with a little Sara Naumann thrown in for good measure!


Artistically grouping objects can make a real statement. This quirky group of vintage objects will bring joy to anyone viewing the scene!


This lovely December journal uses a subdued colour scheme but what makes it interesting is the use of texture; hessian, threads, ribbon and lace.

If stitching is more your thing, how about these fabulous vintage stocking patterns?


This is probably my favourite project- such a clever use of vintage spools and they'd look awesome around your home at Christmas.


Vintage images look fabulous used on projects and there are lots available free on the internet. These cute ornaments really draw your eye.


What's fascinating about this topic is that 'vintage' can be subtle, bright, cute, quirky- in fact, nearly anything! There's plenty of possibilities for everyone to join in with this theme.

You're going to love the projects we have coming up for this topic. We are not doing the linked challenge  for 2019, so if you want to create along with us and this topic, please share on our social feeds so we can see what you get up to. The best places are Instagram @paperartsy or post in PaperArtsy People Group on Facebook. Make sure you tag us in your contributions, we love to see what you get up to in your creative world!