


Hi everyone, it's Jenny Marples (Pushing The Right Buttons) with you today, and I'm here to share with you a new handmade book using a selection of stamps designed by Kay Carley.

I had lots of fun sploshing around with various painty techniques inside this book, pulling out older ephemera stamp sets, PaperArtsy Printed Tissue, die cuts and scraps to build up the layers. All of that provided a backdrop for Kay Carley's latest gorgeous floral stamp releases which are the real stars of the show here.

Let's dive inside and get started!

Facing a blank page is often the hardest part of the process so grab those paints and start sploshing around to break that block. Creating neutral coloured backgrounds will give you the option to play with other colours in the later stages of the process and make them stand out.


The 'Browns' set of Fresco Finish Chalk Acrylic Paints includes many of my most used shades and they layer together beautifully. Start by sploshing on a little 'Chocolate Pudding' straight from the bottle onto the page and spread quickly with a spatula in random directions. When dry, repeat this process with 'Toffee', then 'Caramel', then 'Sand' and finally 'Nougat', using less paint each time so the lower layers remain partially visible.

Having repeated this process on each set of pages you will be in a position to add your choice of patterns and images. I'll be showing you the bits and pieces I used but urge you to dig through your existing stash and scraps. Ephemera can be found in old books, maps, music sheets, magazines and more but if you don't have access to these look through your PaperArtsy stamp sets for anything with script and numbers on to make your own.

For this page I added images from the Ink & The Dog 'Words 3' stamp set and some of the new Printed Tissue: Frames underneath the Mini Mask PM016, all continuing to use the neutral brown colour palette.


Now for another splosh (or in this case more of a splat). If you are feeling adventurous dilute 'Guacamole' Fresco Finish Chalk Acrylic Paint and splosh a large brush full onto the spot where you are planning to stamp your flowers. However, if like me you want a little more control squeeze a drop of the same paint onto an acrylic block and smoosh it onto your page. You'll see below I've used the same technique on a tag for another page.


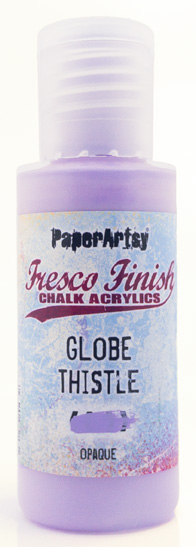
Stamp your Kay Carley florals over the splodge - I used the border from the Kay Carley EKC65 stamp set - and paint in the details with contrasting colours. In this case I went for a range of mauve shades including Fresco Finish Chalk Acrylic Paints in 'Moonlight', 'Globe Thistle' and 'Pansy' with some added 'Granny Smith'. Using some form of stamping platform is really helpful if you want to paint and re-stamp the image.


Continue on with each page, starting with the layers of stamping and ephemera (including scraps of fabric and lace) before adding that 'Guacamole' smoosh to highlight your feature flowers or words. Add another accent by dropping some dark green ink (or black overpainted with dilute 'Hyde Park' Fresco Finish Chalk Acrylic Paint) at the end of words or phrases. To make them spread out a little try using a straw to blow on the liquid before it dries.


To make the book more interactive you may want to make some coordinating tags, index cards, trims, etc (again, digging through your dies and see what you already have to play with for this). I used a technique previously shown HERE, dipping and drying a piece of card through three layers of heavily diluted Fresco Finish Chalk Acrylic Paint. Start with a full coverage layer of 'Globe Thistle' before dipping your dried card into droplets of 'Moonlight' and finally into droplets of 'Pansy' to get that splashed look.


For some final sploshy action you can use a favourite marbling technique beautifully demonstrated HERE on the PaperArtsy Blog by Corrie Herriman. Rather than use re-inkers I went with drops of semi-opaque and metallic shades which work well as they have a little more 'open' time. The 'Gold', 'Pewter', 'White Fire' and 'Toffee' Fresco Finish Chalk Acrylic Paints combine really well, particularly if you go for repeated applications to build up the background colour.


Finally in this technique portion of the post I'll show how an option for creating the moulded floral decoration on the front of the book using the Kay Carley EKC64 stamp set. Start by stamping the floral image onto a scrap of card and cut around it leaving a border.

Cover the card in embossing ink and heat set a layer of embossing powder. Reapply embossing ink and powder 4/5 times more to build up a thick layer on the card. Cover your stamp in more ink and when the last layer of powder is still molten press the stamp into it. After a few seconds release the stamp and reveal a deep impression.

Paint your embossed floral with 'Guacamole' Fresco Finish Chalk Acrylic Paint and then add the other details with your mauve shades before re-stamping the image with permanent ink. As an alternative you could try this technique on moulding clay, making sure the clay had fully dried before painting and re-stamping the image.

Once all your pages are complete you can bind your book together and add this moulded floral piece to the front cover.

To finish I'll take you through each page of the book, pointing out the other stamps and stencils used along the way. As mentioned before I highly recommend you dig through your existing collection to play with some of those that you may not have used in a while.
The front cover makes use of the marbled paper and dip dried card for tags and the word is on the Kay Carley EKC65 stamp set mentioned earlier.

Here's the tag shown earlier, decorated with torn sections from the Printed Tissue: Frames.

This spread was completed with a small tea-stained envelope containing more tags.


The little dragonflies that were added to the stamped border on this page can be found on the Kay Carley PS080 stencil.


Flip the envelope over to reveal another dragonfly, this time from the Kay Carley PS127 stencil (which was used a lot throughout the book). I doodled around the stencilled image in a style which replicated Kay's look. The forecast in the background comes from the Ink & The Dog 'Words 3' stamp set used earlier.

On this page I applied a gel plate printed piece of tissue and scribbled randomly on it before adding the stencilled leaves from the dragonfly stencil. On top are the flower heads from the Kay Carley EKC64 stamp set.


The alphabet in the background comes from the Ink & The Dog 'Words 5' stamp set, another great source of ephemera and there's more from the Printed Tissue: Frames.

You'll see a glimpse of the same alphabet on this page too. Repeating elements throughout a book can help with the flow.

An embossed postcard in the background of this otherwise simple page adds texture and interest to compliment the flower from the Kay Carley EKC65 stamp set.


The sentiment on this page comes from the same stamp set whilst the little postcard image at the bottom (another repeated throughout the book) is part of the Ink & The Dog 'Words 4' stamp set.

I had already picked out the words to highlight from an old garden encyclopaedia and realised that one of the images from the Printed Tissue: Frames worked perfectly with them. You'll have seen the ration book image in the Ink & The Dog 'Words 5' stamp set mentioned earlier.


It's subtle, but you may just spot the numbers from the PaperArtsy PS021 stencil in the background. Use them with Grunge Paste for more of that added texture.

You'll see the repetition of Printed Tissue, stamped florals and interactive elements again here. Translucent layers are good if you don't want these elements to compete with each other for attention.

Think about just using a small portion from the floral border stamp over printed words. And of course Kay Carley's older stamp sets will play well with the new ones.

By knocking back the Printed Tissue, book page scrap and stamping in the background with heavily dilute 'Nougat' Fresco Finish Chalk Acrylic Paint and adding that green splat behind the flower still takes centre stage here.


I tried something different here to combine with the painted doorway; those dragonflies can be created by tracing around the dragonflies from the Kay Carley PS127 stencil with a white pen and machine stitching over the lines. Fill in the images with dilute paint, allowing the colour to flow through the wings and react with the paper underneath. The flowers in front of the doorway come from the Kay Carley EKC40 stamp set with the words and smaller flowers visible on the previous pages.


A large ephemera stamp from the Hot Picks HP1501 stamp set has been used in the background of this next page (along with the alphabet again). I have gone back to this set countless times over the years.

Adding the flower to some vellum here allows the lace doily beneath to remain partially visible.

Remember to stamp on your fabric scraps as well as on the page to turn a plain pocket into part of the overall design.


The column from the Tracy Scott PS279 stencil provides a good structural 'support' for the larger floral image in front.


Throughout the book you'll have seen a scattering of dragonflies, stamped on fabric and vellum, taken from the Kay Carley EKC06 stamp set. On this last page they combine well with the delicate vines from the Kay Carley EKC64 stamp set and a block of gel plate printed tissue.


Sploshing around with your Fresco Finish Chalk Acrylic Paints is a great way to create your backgrounds, help highlight your focal points and add that finishing touch to a page. And combining these new Kay Carley stamp sets with the older ones in your collection can breathe new life into them. It can take just a few play sessions to create a set of pages and make your own mixed media art book.
Jenny

Facebook: https://www.facebook.com/jenny.marples.73
Pinterest: https://www.pinterest.co.uk/jennymarples73/


3 comments:
what beautiful pages Jenny!
Absolutely fabulous work. ❤️❤️❤️
Amazing…..
Post a Comment