Hi everyone Lauren here.
Tonight I'd like to share a post about colouring with alcohol markers and using alcohol solution to add texture and interest to your images and backgrounds.
I often feel that colouring in is slightly under-rated. Aside from the obvious relaxing qualities, adding colour to an image is what gives it life. It's the magic that gives a piece an identity. You can take the same image and give it a completely different purpose or feel just by treating it differently, which means your stamps work extra hard for you too. A good example is the sheep I made from a flower with a JOFY stamp recently. All it took was a change of colour and a few details to transform it:-
Of course, there are lots of ways to add colour to your stamped images, but for me, alcohol markers are the perfect colouring tool. They blend seamlessly and give a really clean, professional finish to your work without covering up the stamping lines. They are always the first thing I reach for when I'm playing around with images to see what I can do with them and they work beautifully alongside a lot of other mediums such as paint and pencils. Adding texture with Alcohol Blender is a great way to add interest to your colouring quickly and easily.
...to help me show you what I mean. Quite frankly, I can't get enough of them at the moment and they are just lovely to colour so any excuse is a good one. These techniques will work with alcohol markers or alcohol inks from a bottle.
Tonight I'd like to share a post about colouring with alcohol markers and using alcohol solution to add texture and interest to your images and backgrounds.
I often feel that colouring in is slightly under-rated. Aside from the obvious relaxing qualities, adding colour to an image is what gives it life. It's the magic that gives a piece an identity. You can take the same image and give it a completely different purpose or feel just by treating it differently, which means your stamps work extra hard for you too. A good example is the sheep I made from a flower with a JOFY stamp recently. All it took was a change of colour and a few details to transform it:-
Of course, there are lots of ways to add colour to your stamped images, but for me, alcohol markers are the perfect colouring tool. They blend seamlessly and give a really clean, professional finish to your work without covering up the stamping lines. They are always the first thing I reach for when I'm playing around with images to see what I can do with them and they work beautifully alongside a lot of other mediums such as paint and pencils. Adding texture with Alcohol Blender is a great way to add interest to your colouring quickly and easily.
plus ZA03
Step One: Adding Colour If
you were thinking these guys were only good for Halloween then think
again. A slight wardrobe change and a seasonal background turns our
monster into a snowball and all it took was a bit of doodling and some
super quick one layer colouring.
Step Two: Bespoke Clothing Well
I couldn't leave him all naked in the snow now could I.... Using his
mouth as a starting point, I doodled a scarf and coloured it with red
and green Copic Markers. Using some Surgical Spirit as my blending
solution (you can also use nail varnish remover for this). I poured a
little alcohol blender onto a flannel, fluffed up the fibres a bit and
pressed it briefly over the colour to add texture and make it look more
like fabric. This is also a good technique if you want to create the
look of fur.
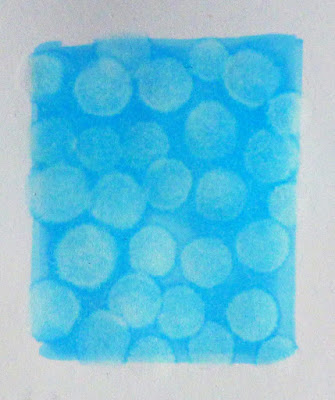
Step Three: Alcohol BG For the background I used a piece of glossy card swiped through some blue alcohol ink (I used Ranger's Denim shade mixed with a drop of blending solution). I love the smokey effect you get.
Step Four: Blending Fluid Reduction To create the snowflakes I applied some blending solution on a cotton
wool bud to one of Emma Godfrey's lovely snowflake stamps from EEG19 and
stamped randomly over the piece of card. You need to move quite quickly
as the alcohol will evaporate if you hang about. Your stamp also needs
to be clean to do this or you will transfer ink onto your background.
You can use your alcohol blender to clean your stamp before you start.
Step Five: Layering All
I needed to do then was layer my image onto my background. I stamped it
once straight onto the background with Memento ink in Tuxedo Black.
Then I cut out and layered my coloured sections onto that image. I
added some torn paper to the bottom for snow, with a smattering of
glitter glue for a bit of sparkle, before matting the whole lot onto a
piece of black card. (Alcohol pens do tend to bleed through card but as I
always layer my images before putting them onto a card blank, it's not
usually a problem. I always put my cardstock onto a glass mat when I
colour it in to ensure that all the ink stays on the piece of card I'm
working on rather than bleeding into whatever is underneath. This should
ensure that your pens last longer too.)
Rather than trim the card blank down, I repeat stamped one of Emma Godfrey's Christmas Sentiments from EEG12 ....
...(let it snow) down the side of the card. Perfect!
Step One: Mark Making It's
a nice idea to keep a texture library and try out different mark making
tools. Try more solution and less solution to see what the differences
are.
Even something as basic as a cotton bud dipped into alcohol blending solution will give you a variety of useful and interesting effects.
...(let it snow) down the side of the card. Perfect!
Even something as basic as a cotton bud dipped into alcohol blending solution will give you a variety of useful and interesting effects.
Step Four: Embellishments I love these two cuties from ZinskiArt Set 03 and Zini 04. They are such fun! Yes I DID cut out the snowflakes!
I hope that gives you a sense of what can be achieved. There are, of course, lots of different effects you can create using this simple technique and part of the fun is finding out what works best with your markers to add interest to your colouring projects.
I really, really love your Mr leggy snowball, and that texture with the flannel and blending solution is a brilliant idea. It's surprising that you get such a crisp image when stamping with it too!! Thanks so much Lauren! ~Leandra
All
of our bloggers love to see your twist on their ideas, particularly if
you were inspired directly by their post; so please spare a moment to
comment or make your own creative item. They all love to see your
feedback and what you can do more than you realise!
We would love
to see how you interpret this Alcohol Ink and Pens topic by linking
what you make to our 2016 Challenge #22: Alcohol Ink and Pens on this
page HERE. The Alcohol Ink and Pens link will close 17:00 (London Time)
Sunday, Nov 27th 2016. The winner will be announced 2 hours later at
19:00.
All links go in the draw to win a £50 voucher to spend on products of your choice from the PaperArtsy online store.


15 comments:
Awesome ideas lauren!!!
oh what fabulous fun! I love that monster in his scarf, how gorgeous!
FABBYLISCIOUS missus, I love your sheep/flower treatment and your step by step with the alcohol techniques just rock!
Seasons Greetings and may your monsters always be clothed!
Kathyk
Gorgeous.... I love what you've done with those stamps!
Gorgeous.... I love what you've done with those stamps!
Love all these, fabulous as always
Love
Amanda x
Wonderful projects!!!
Really fun projects with gorgeous colours, beautifully blended! I just love that monster in his cuddly scarf! xx
Some fabulous ideas Lauren. Your characters make me smile too. Xx
Ha ha love the monster in his scarf,soooo much fun ;)
Hugs
Donna xx
Some brilliant ideas and tips here lauren and great results!
Lucy x
Beautifully coloured images, amazingly creative and inspiring tutorial...you are one clever cookie Lauren! Ruth xxx
This is such a great post Lauren. I love these monsters and you've given me so many ideas now for Christmas cards. I love your mash up!
Fab post Lauren and I love the cards. Mr Snowball is great fun and I love all the texture you have going on in these projects. Can't believe you cut those fiddly snowflakes out though!
Hugs
Lesley Xx
Great tutorial, Lauren, and fantastic effects with the blended alcohol marker colouring - fab tips and brilliant results!
Alison x
Post a Comment